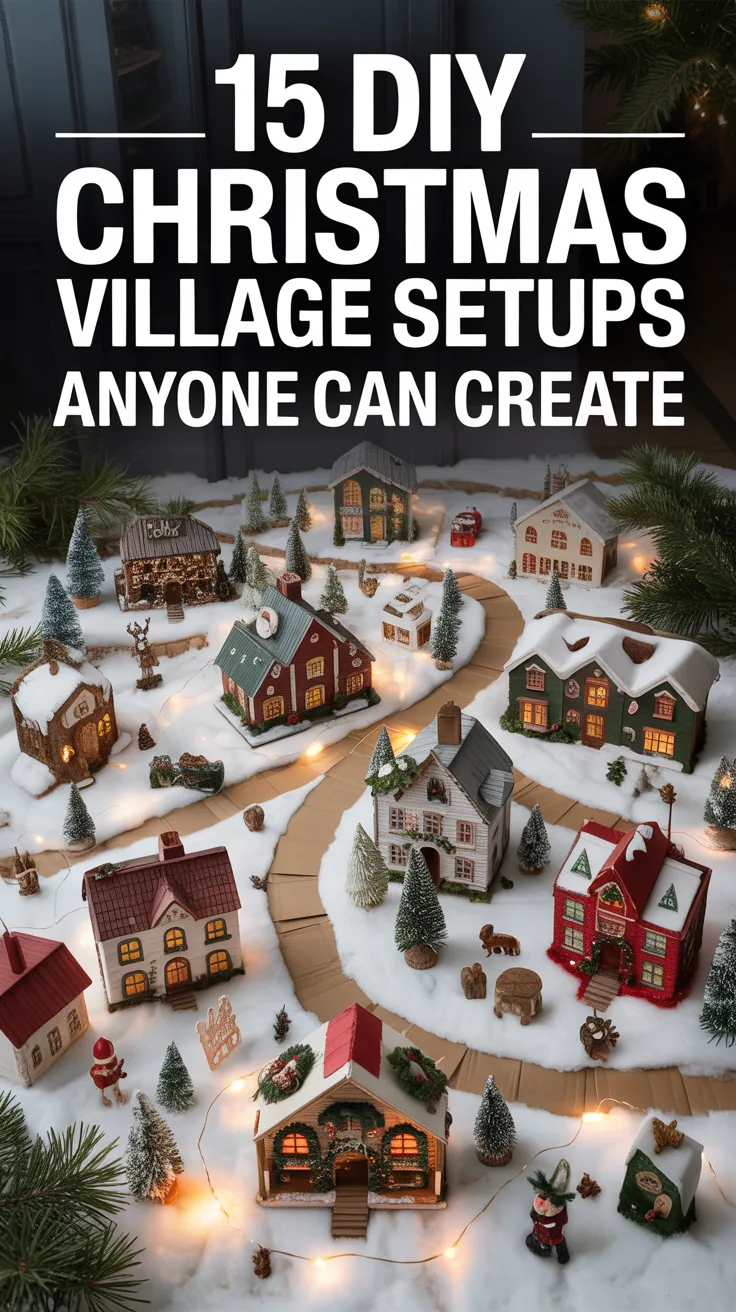
Introduction to DIY Christmas Villages
There’s something magical about a miniature Christmas village twinkling beneath the tree or displayed on a mantel. I’ve been creating DIY Christmas village displays for over a decade now, and I’m still amazed at how these tiny worlds can transform a home’s holiday atmosphere. The best part? You don’t need to spend hundreds on expensive collectibles or have professional crafting skills to create something truly special.

My first attempt at creating a village was honestly a bit of a disaster—I tried using hot glue on everything (including delicate paper buildings) and ended up with a melted mess! But that’s the beauty of DIY projects; we learn as we go. Today, I’m sharing everything I’ve discovered about creating enchanting Christmas village setups that will delight your family and guests throughout the holiday season.
Choosing a Theme for Your Christmas Village
Before gathering materials or placing a single building, I’ve found that selecting a cohesive theme makes all the difference. When I didn’t plan ahead one year, I ended up with a bizarre mix of Victorian houses next to space-age buildings—not exactly the look I was going for!
Consider what style speaks to your holiday heart:
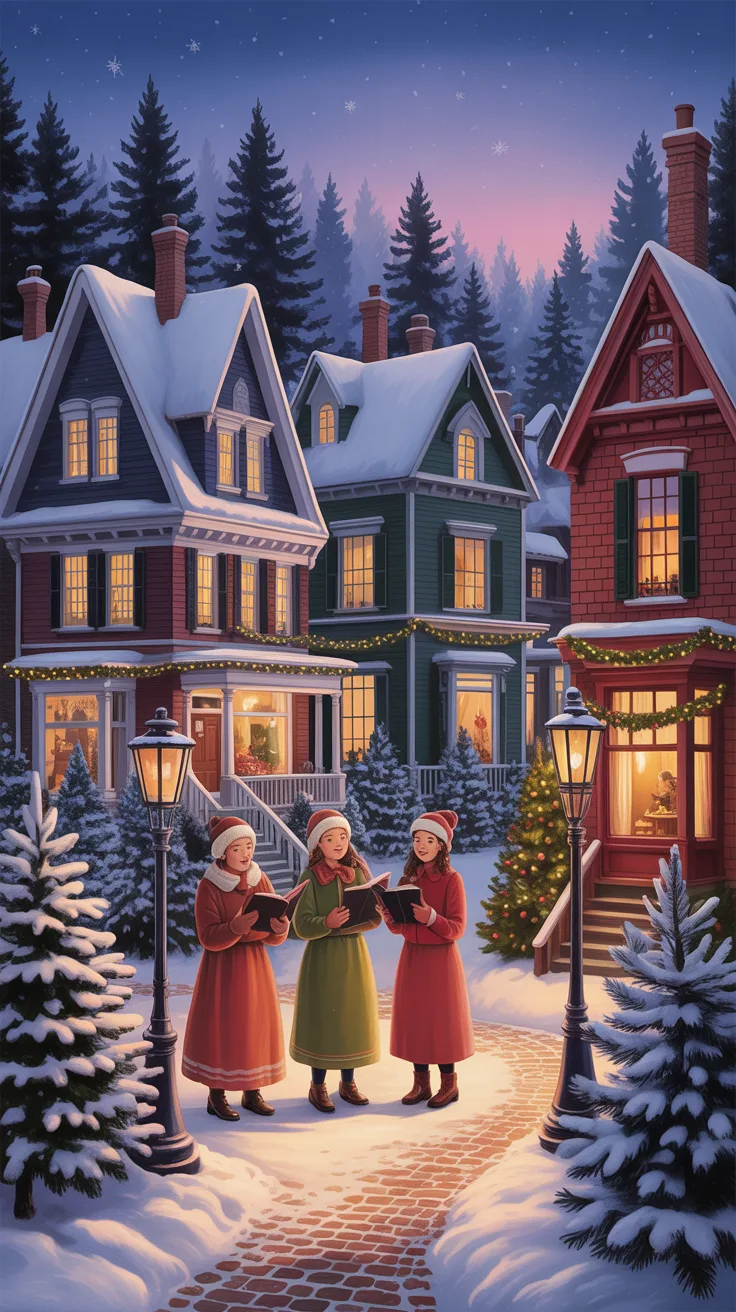
- Traditional Victorian: Think Dickens’ A Christmas Carol with cobblestone streets, gas lamps, and carolers
- Rustic Country: Farmhouses, barns, pine trees, and perhaps a frozen pond
- North Pole Workshop: Santa’s workshop, elf houses, and reindeer stables
- Alpine Village: Snow-capped chalets, ski lodges, and mountainous backdrops
- Coastal Christmas: Lighthouses, beach cottages, and boats decorated with lights

View on AmazonAs an Amazon Associate, I earn from qualifying purchases.

View on AmazonAs an Amazon Associate, I earn from qualifying purchases.
Pro Tip: If you’re just starting out, choose a theme that allows you to incorporate items you already own. I had several pine trees from an old train set that became the perfect forest for my alpine village.
Essential Materials and Tools
You don’t need to break the bank to create a stunning Christmas village. After years of trial and error, I’ve narrowed down the must-haves:
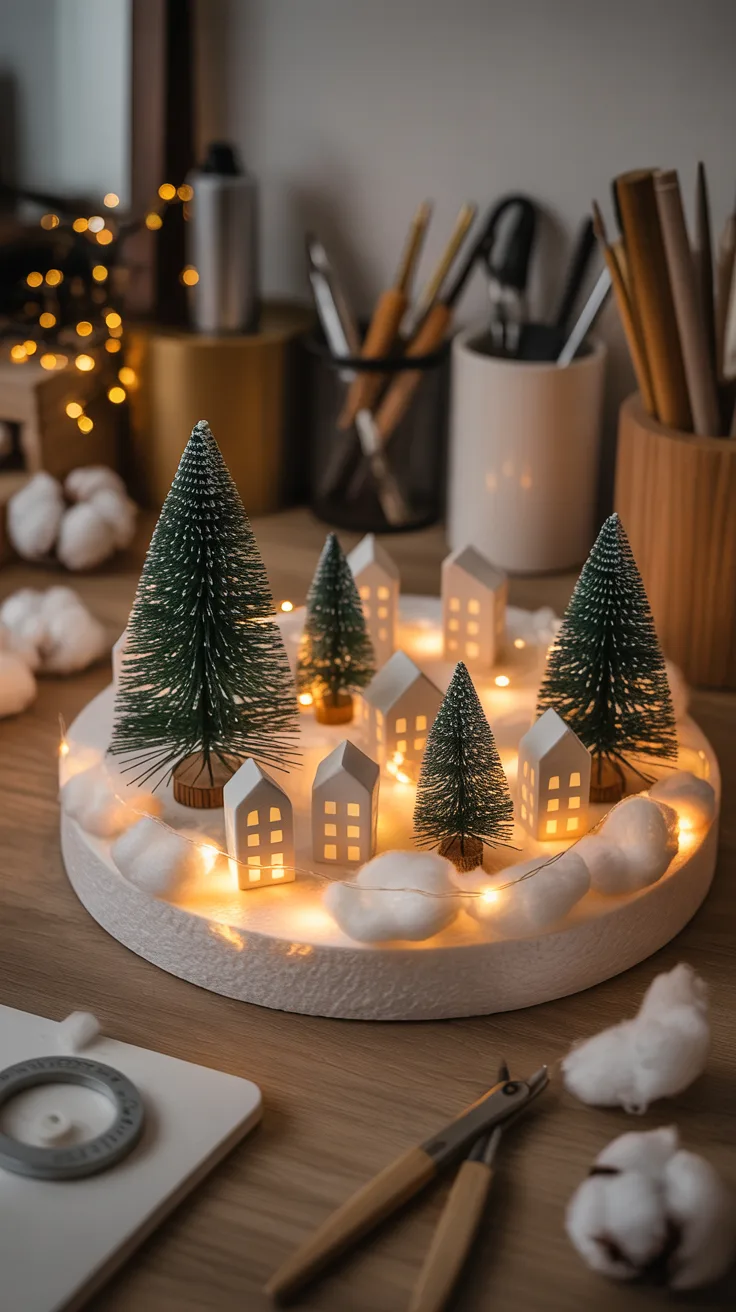
- Base materials: Foam board, plywood, or sturdy cardboard
- Buildings and figures: Store-bought, handmade, or upcycled
- Landscape elements: Cotton batting or poly-fill for snow, small mirrors for ponds/ice
- Greenery: Mini trees, bottle brush trees, preserved moss
- Lighting: Battery-operated string lights, LED tea lights
- Adhesives: White glue, hot glue gun, double-sided tape
- Tools: Scissors, craft knife, ruler, paintbrushes
- Decorative accents: Miniature wreaths, fences, benches, lampposts
I once tried to save money by using regular table salt as snow—big mistake! It attracted moisture and eventually ruined my cardboard base. Sometimes spending a little more on quality materials (like proper snow blanket material) saves headaches later.

View on AmazonAs an Amazon Associate, I earn from qualifying purchases.

View on AmazonAs an Amazon Associate, I earn from qualifying purchases.
Step-by-Step Guide to Building Your Village
Creating a DIY Christmas village is like telling a story—each element contributes to the narrative. Here’s my tried-and-true process:
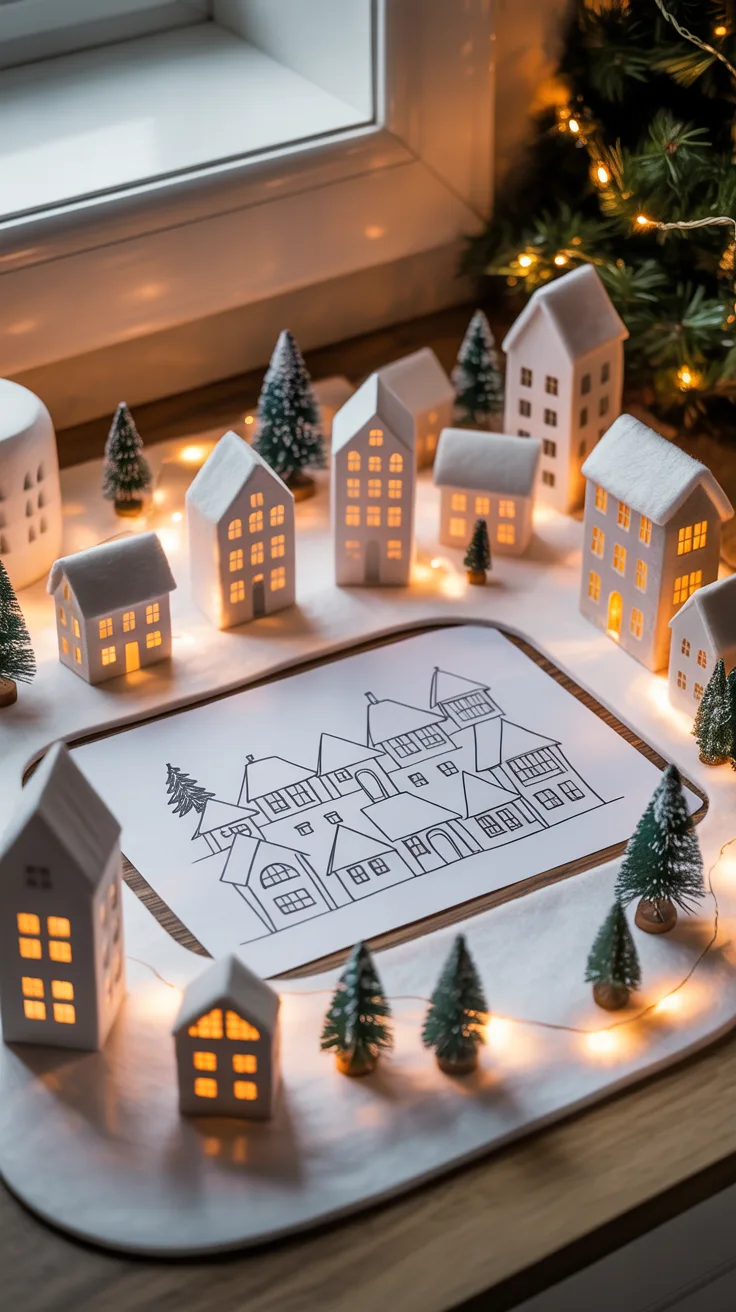
- Plan your layout: Sketch your design on paper first, considering traffic flow around your display and focal points
- Prepare the base: Cover your base material with white felt or batting for snow. For a more textured look, apply white paint mixed with baking soda before adding snow material
- Create elevation: Use stacked foam or small boxes covered with snow material to create hills and varying heights
- Position key buildings: Place your largest or most important structures first, creating focal points
- Add pathways: Create roads or paths using brown felt, painted cardboard, or even black ribbon
- Install lighting: Thread lights through from underneath where possible, or hide wires under snow
- Add landscape features: Position trees, ponds, bridges, and other landscape elements
- Place figures and details: Add people, animals, vehicles, and small accessories
- Final touches: Dust with iridescent glitter for sparkle or add a light spray of artificial snow

View on AmazonAs an Amazon Associate, I earn from qualifying purchases.

View on AmazonAs an Amazon Associate, I earn from qualifying purchases.
Pro Tip: Take photos as you build! If something gets knocked over (which happened to me when my cat decided to “visit” my village), you’ll have reference images to restore your creation.
Creative Ideas for Village Layouts
After years of experimentation, I’ve discovered some layouts that consistently create visual impact:
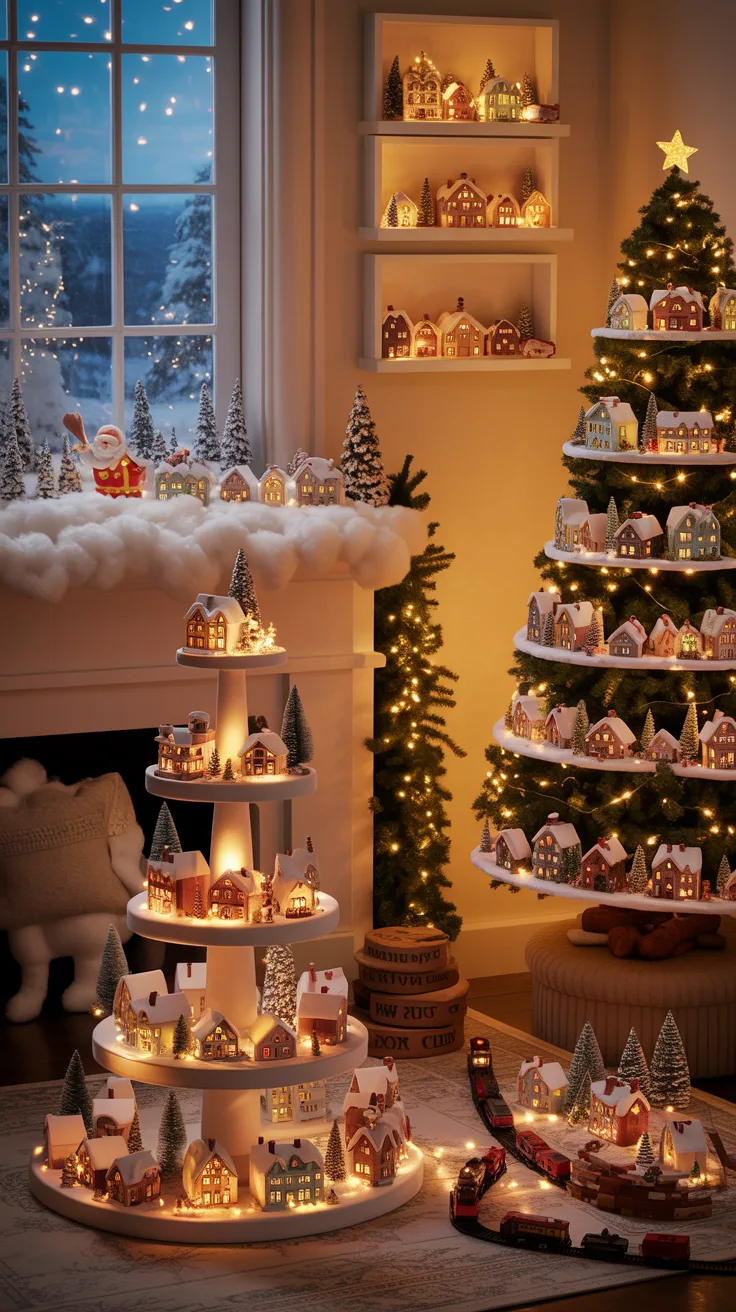
- Tiered display: Use cake stands, sturdy boxes, or wooden crates to create multiple levels
- Window village: Line a bay window with cotton batting and create a village that catches natural light
- Mantel narrative: Tell a story from one end to the other (like Santa’s journey from workshop to delivery)
- Tree surround: Create a village that encircles your Christmas tree, as if the tree is a giant mountain
- Bookshelf village: Transform shelving into a vertical village with each shelf representing a different neighborhood
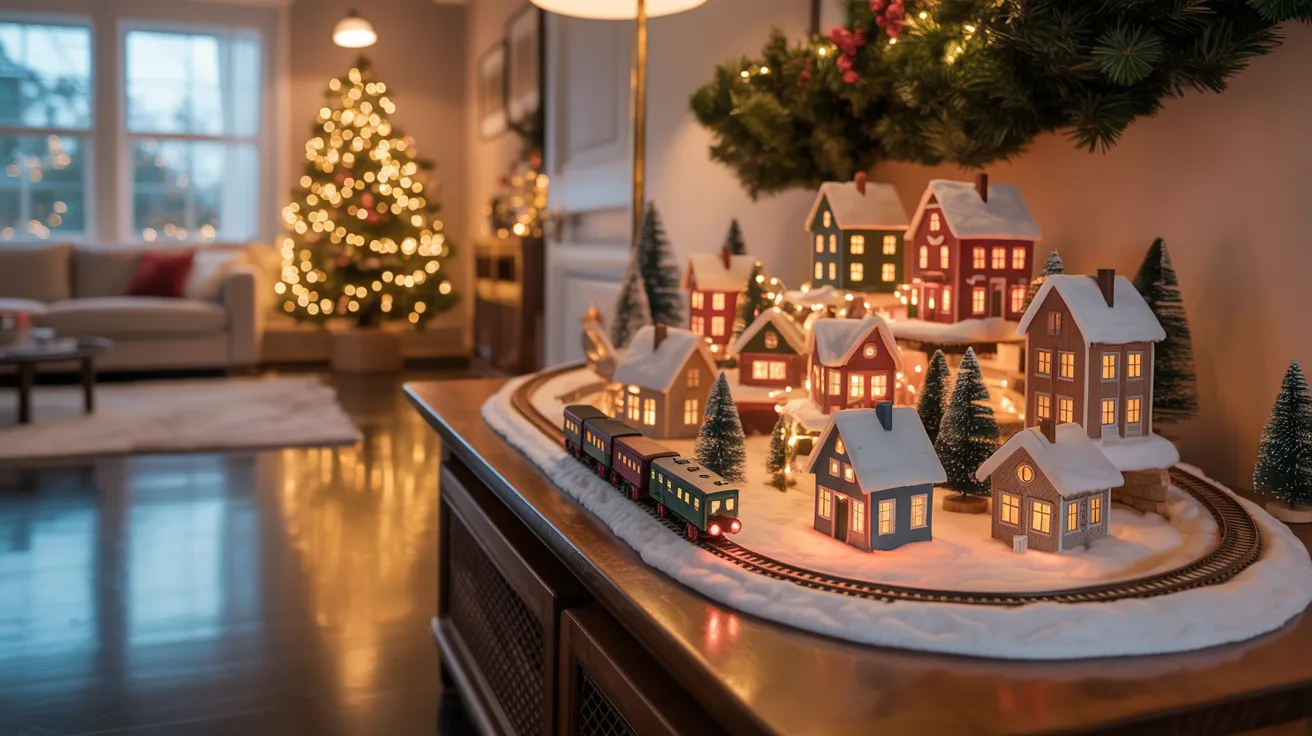
- Train integration: Incorporate a small train set that travels through your village
- Shadow box scenes: Create multiple small villages in shadow boxes or crates for a unique wall display
My personal favorite was the year I created a village that told the story of “The Night Before Christmas” from beginning to end across my dining room sideboard. Visitors spent ages following the narrative from one scene to the next!
Lighting and Special Effects
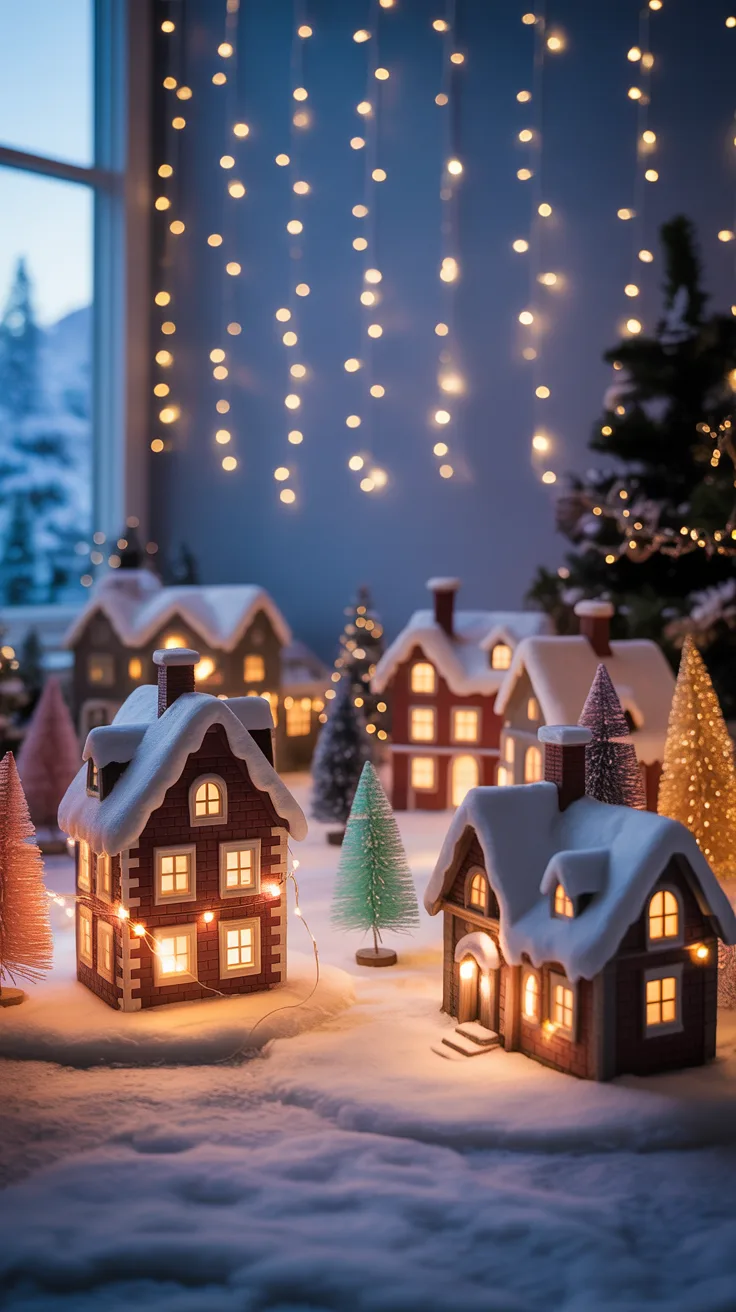
Lighting transforms a cute craft project into a magical Christmas village setup. I learned this the hard way when my first village looked flat and lifeless until I added strategic lighting.
For basic lighting, battery-operated LED string lights work wonderfully. Thread them through buildings with pre-cut holes or create your own openings carefully. For a more advanced approach, consider:
Fiber optic trees that change colors create a magical effect when scattered throughout your village. I place tea lights under translucent materials like thin fabric or wax paper to create the illusion of glowing ice or fire. Sound elements can add another dimension—I found a tiny speaker that plays faint Christmas carols, making it seem like they’re coming from the tiny church!
One year I experimented with a “falling snow” effect by hanging white fairy lights vertically behind my village against a dark blue backdrop. The twinkling lights created the perfect illusion of gently falling snowflakes.

View on AmazonAs an Amazon Associate, I earn from qualifying purchases.

View on AmazonAs an Amazon Associate, I earn from qualifying purchases.
Pro Tip: Always check battery-operated lights frequently, and never leave plug-in lights unattended. I use timers to automatically turn village lights on at dusk and off at bedtime.
Pro Tips for a Stunning Display
After years of creating villages, I’ve collected some insider secrets that make a huge difference:
Scale is everything—mixing vastly different sizes of buildings or figures breaks the illusion. I learned this when I placed a giant Santa figure next to tiny houses, making him look like a holiday Godzilla! Now I carefully check proportions before purchasing new pieces.
Create depth by positioning smaller buildings toward the back and larger ones in front. Use forced perspective techniques like gradually smaller trees as you move toward the background.
Don’t overcrowd your village. I used to think more was better until a friend pointed out that my village looked like a miniature hoarder situation! Now I leave breathing room between elements, which actually makes each piece stand out more.
Add movement where possible—a rotating windmill, a swinging pendulum in a clock tower, or a small train can bring your village to life. Just be careful not to create a chaotic scene with too many moving parts.

Maintaining Your Christmas Village
Protect your creation throughout the season and for years to come with proper maintenance. I dust my village weekly using a clean, soft makeup brush or a can of compressed air for hard-to-reach spots.
Keep pets and small children at a safe distance—I learned this lesson when my toddler nephew decided the village needed a “dinosaur attack.” Consider placing your display behind a decorative fence or on a high surface.
For storage, I photograph my layout from multiple angles before disassembling. I wrap each building individually in acid-free tissue paper and store them in divided storage containers with labels. For homemade pieces, a light coat of clear sealer helps protect them year after year.
If you notice buildings starting to fade from sun exposure, rotate their positions each year so they age evenly. Some of my pieces are over 15 years old but still look wonderful because of careful maintenance.
Conclusion: Enjoying Your Festive Creation
The true joy of a DIY Christmas village comes from the memories it creates. I love watching visitors discover tiny details I’ve hidden throughout the display, like a miniature cat in a window or a tiny snowball fight in progress.
Consider establishing a tradition of adding one new element each year—whether handmade or purchased. My village has grown alongside my family, with pieces commemorating special years and milestones.
Most importantly, don’t stress about perfection. The slightly lopsided house I made with my niece is far more precious to me than any store-bought piece. These villages are about capturing the spirit of the season—community, warmth, light in the darkness, and the simple joy of creating something magical.
So gather your materials, let your imagination run wild, and create a Christmas village that tells your unique holiday story. Years from now, you’ll treasure not just the display but the memories of creating it.
Frequently Asked Questions
What are some affordable materials for a DIY Christmas village?
Dollar stores are treasure troves for affordable village materials! I’ve found miniature trees, figurines, and even small houses there. Cardboard boxes can be transformed into buildings with some paint and creativity. Salt dough can be molded into landscape features and painted. Paper templates found online can be printed and assembled for buildings. Even natural materials like pinecones, twigs, and pebbles make excellent landscape elements at zero cost.
How can I store my Christmas village safely after the holidays?
I’ve found that egg cartons work perfectly for storing small figurines and accessories. For buildings, wrap each piece individually in acid-free tissue paper (never newspaper, as the ink can transfer), then place in plastic storage containers with dividers. Label everything meticulously with photos if possible. Store in a climate-controlled area—not an attic or basement where temperature fluctuations can damage pieces. Keep all village components together, including your base materials and lights, so nothing gets lost before next season.
What are some common mistakes to avoid when setting up a Christmas village?
The biggest mistake I’ve made (repeatedly!) is trying to include every single piece I own in one display. This creates a cluttered, unrealistic scene. Other common errors include inconsistent scaling (mixing vastly different sized pieces), poor lighting (either too dim to appreciate details or harsh lighting that creates