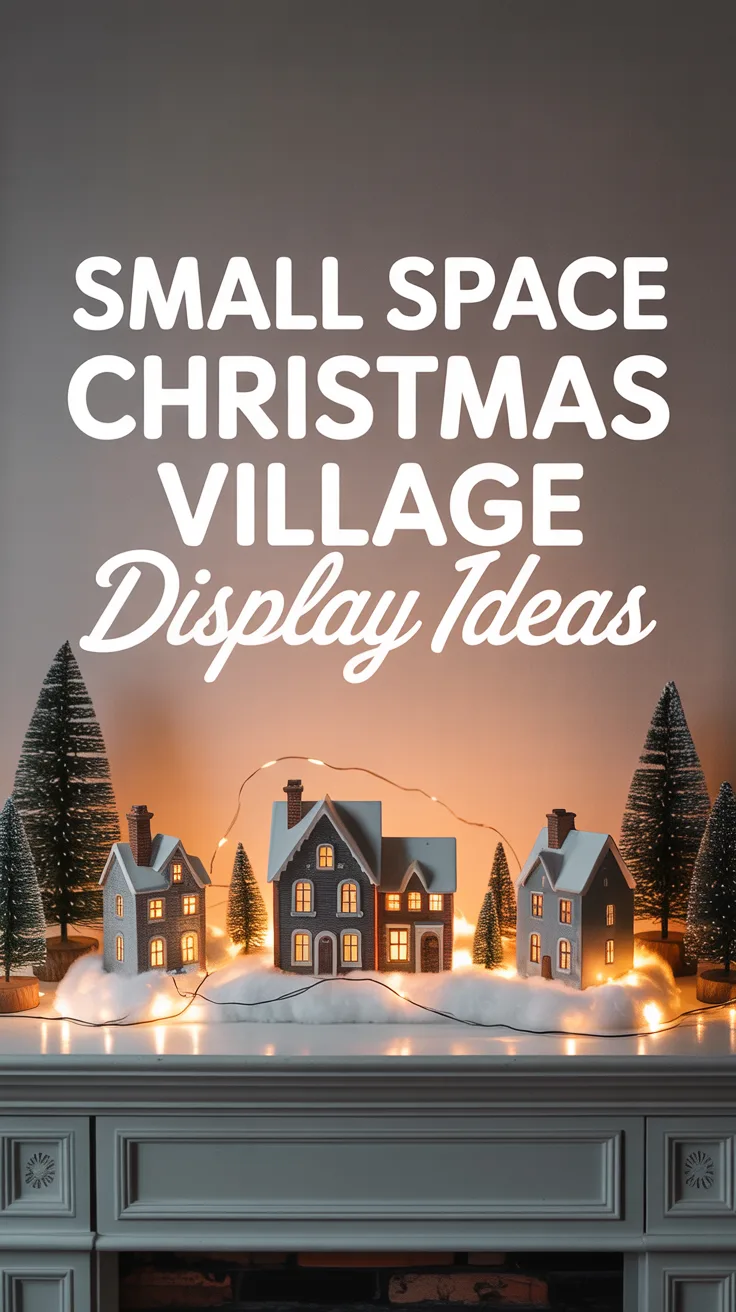

Introduction
There’s something magical about a miniature Christmas village that captures the holiday spirit in the most charming way. I’ve been collecting pieces for my Christmas village display for over a decade, and I’ve lived in everything from tiny apartments to larger homes. The challenge? Finding creative ways to showcase my growing collection when space is at a premium. If you’re like me and love these festive miniature scenes but worry about where to put them, I’m excited to share some practical solutions I’ve discovered through years of trial (and yes, a few errors) for creating stunning small space Christmas village displays.
Choosing the Right Spot

The first hurdle I faced was finding the perfect location for my village. In small spaces, every inch counts! I’ve found that unexpected areas often make the most magical displays.
Window sills were my go-to when I lived in my first apartment. The natural light created beautiful shadows during the day, while the village lights twinkled beautifully at night. Mantels, if you’re lucky enough to have one, offer a natural stage for your display. I’ve also used bookshelves (after temporarily relocating some books), console tables, and even the top of a piano.
One year, I tried using my coffee table and quickly learned that was a mistake with curious cats and visiting toddlers! Which brings me to an important consideration – choose locations that are visible but protected from high-traffic areas, pets, and small children.
Pro Tip: Before setting up, I always measure my intended space and sketch a rough layout. This prevents the disappointment of realizing halfway through that not everything will fit!
Space-Saving Display Ideas
When working with limited real estate, creativity becomes your best friend. Here are some of my favorite space-efficient approaches to Christmas village displays:
- Create a village “slice” rather than a full town – focus on a main street or one neighborhood scene
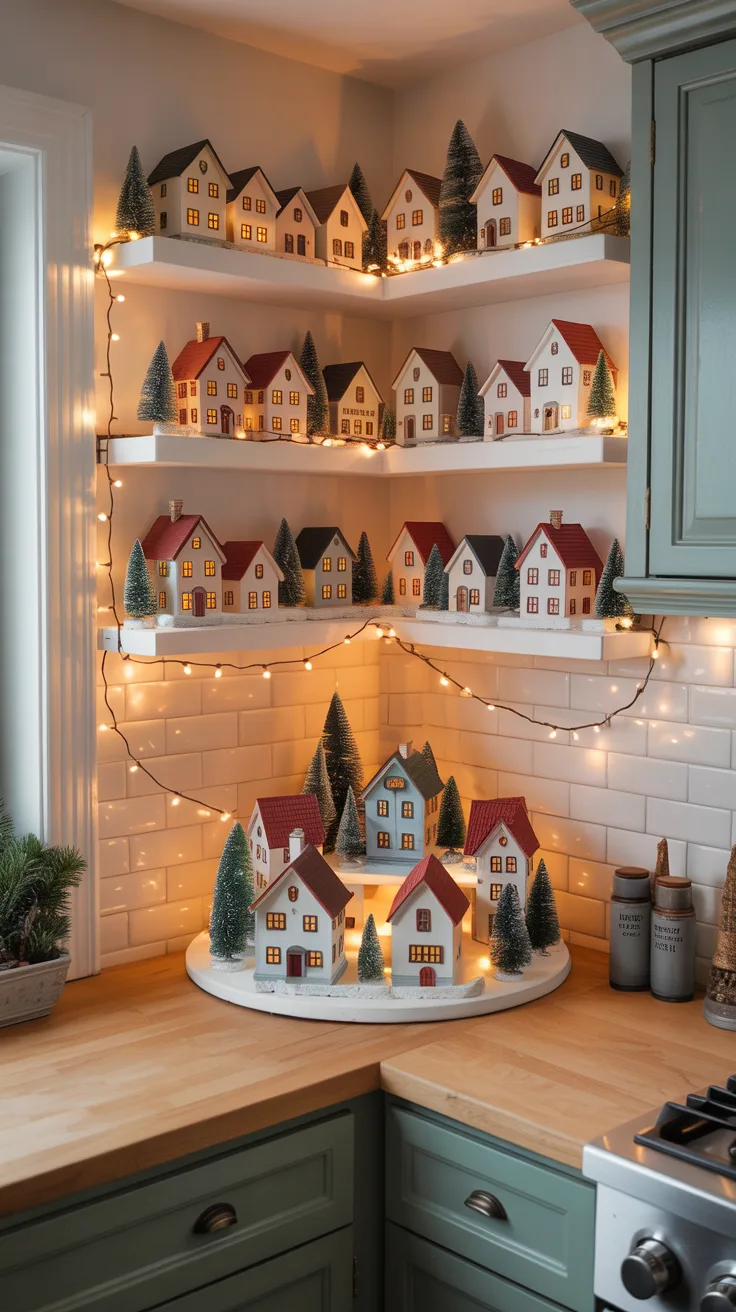
- Use wall-mounted shelves specifically for your seasonal display
- Incorporate a corner display that maximizes typically underutilized space
- Set up a village vignette inside a large lantern or cloche
- Arrange pieces on a decorative tray that can be moved if needed
- Utilize the top of a sideboard or buffet in your dining area
I once created what I called a “village in the round” on my kitchen island using a lazy Susan. Guests could spin it gently to see all sides of the display – it was a huge hit and took up minimal space!
Vertical Displays
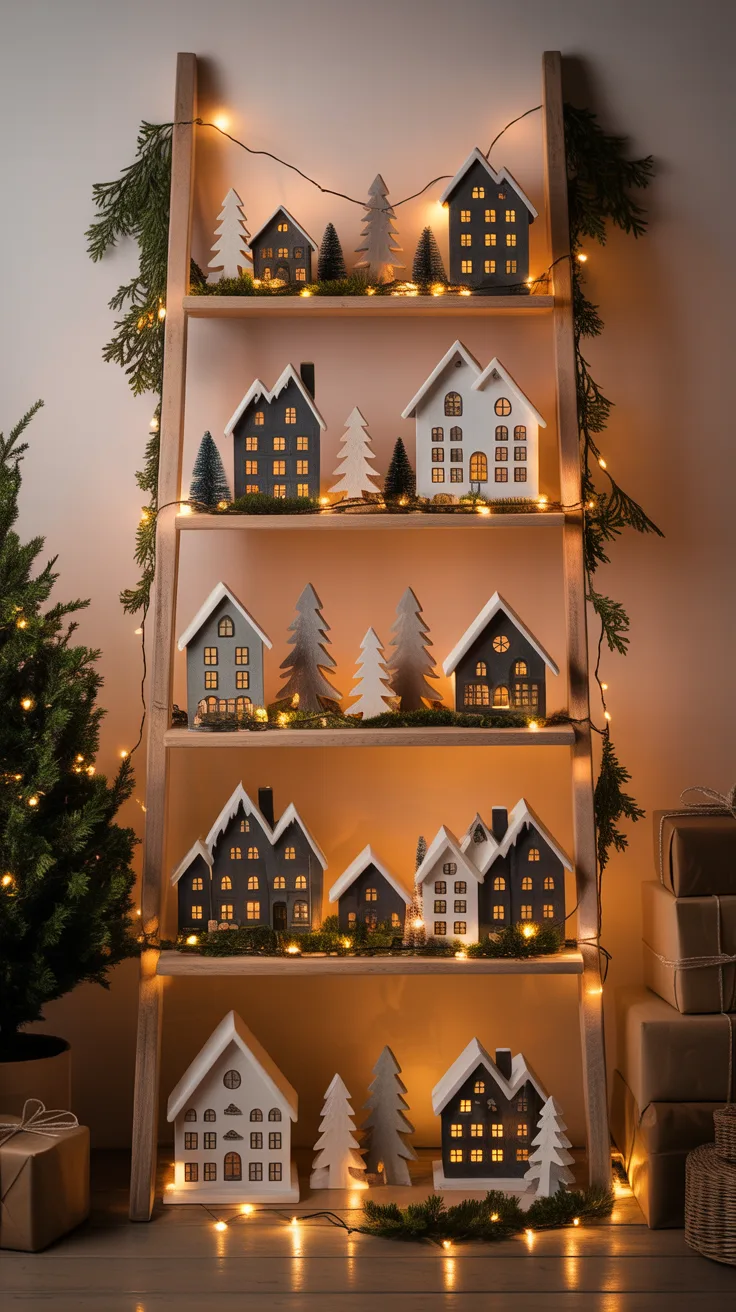
Going up instead of out was a game-changer for my small space Christmas village. Vertical displays not only save valuable surface area but also create visual interest and dimension.
I’ve repurposed an old wooden ladder as tiered shelving, draping it with mini lights and greenery between the village pieces. Floating shelves installed temporarily for the season work beautifully too. One of my more successful projects was converting a tall bookcase into a “village apartment building” with different scenes on each shelf.
For an easy vertical display, I stack sturdy gift boxes of different sizes, cover them with white fabric or batting for a snowy effect, and arrange village pieces on each level. The varying heights create a mountain village effect that’s charming and compact.
Pro Tip: When creating vertical displays, place your most detailed or favorite pieces at eye level where they’ll get the most attention.
Multi-Level Arrangements
Even within a single surface, creating multiple levels adds depth and makes your village look more expansive than it actually is. Here are approaches I’ve used successfully:
- Foam core boards cut into “platforms” and covered with snow blankets
- Sturdy cardboard boxes in various heights arranged like a topographical map
- Cake stands and dessert pedestals for elevating special buildings
- Books wrapped in white paper to create stable, different-height platforms
- Small wooden crates turned upside down and arranged in a stair-step pattern
My first attempt at a multi-level display was a disaster – I used flimsy boxes that collapsed midway through the season! I’ve learned that stability is crucial, especially if your village pieces are heavy or if the display might get bumped.
Essential Accessories for Small Displays
When space is limited, every element should earn its place in your display. These are the accessories I’ve found most valuable for small-scale villages:
- Miniature trees in varied heights – create depth and a sense of forest without taking much space
- Battery-operated micro LED light strings – add twinkle without bulky cords
- Snow blankets or quilt batting – create a unified base that hides platforms
- Small mirrors – positioned as “frozen ponds” that also reflect light
- Miniature figures – add life and scale without requiring much room
- Cotton ball “smoke” – placed in chimneys for a cozy effect
I’ve learned to be selective about accessories. In my enthusiasm one year, I added so many trees and figures that the buildings were lost in the forest! Now I follow a “less is more” approach for small displays.
Pro Tip: Mirrors not only create the illusion of water features but also visually double your display size when positioned strategically at the back of your arrangement.
Lighting Tips for a Cozy Atmosphere
Lighting transforms a nice village display into a magical one. In small spaces, the right lighting approach is especially important. I prefer warm white lights for a cozy glow rather than multicolored ones that can make a small display look busy.
Battery-operated lights have been a revelation for my displays. No more hunting for outlets or dealing with cords! I tuck the battery packs underneath snow blankets or behind buildings. For buildings without built-in lighting, I place small LED tea lights inside.
One technique I love is creating a soft backlight behind the entire display. This creates silhouettes and adds depth. I’ve also experimented with placing a string of lights underneath the snow blanket for a subtle glow that appears to come from the ground.
Timing is another consideration – I’ve invested in simple timers for my village lights so they automatically come on at dusk and turn off at bedtime. This saves battery life and creates a consistent ambiance.
Pro Tip: Keep a supply of fresh batteries on hand throughout the season. Nothing dims holiday spirit faster than a half-lit village!
Common Mistakes to Avoid
Through years of creating Christmas village displays in small spaces, I’ve made plenty of mistakes. Learn from my experience and avoid these common pitfalls:
- Overcrowding – Cramming too many pieces makes the display look cluttered rather than charming
- Inconsistent scale – Mixing vastly different-sized pieces can break the illusion
- Poor lighting planning – Visible cords or uneven lighting detracts from the magic
- Unstable foundations – Wobbly or uneven surfaces lead to toppling buildings
- No focal point – Every display needs a central element that draws the eye
- Forgetting about viewing angles – Consider where people will actually see your display from
My most memorable mistake was creating an elaborate display on my apartment’s radiator cover, not considering that once the heat came on, the snow would “melt” (quite literally as the batting warmed up) and pieces would shift! Now I always check practical considerations like heat sources, drafts, and stability.
Frequently Asked Questions
How can I make my Christmas village look bigger?
Use mirrors as backdrops to create depth, incorporate varying heights with platforms, and be selective about which pieces you display. Sometimes a carefully curated smaller display actually looks more impressive than a crowded one. Lighting that creates shadows and dimension also helps create the illusion of a larger space.
What are some budget-friendly ways to enhance my display?
Many of my favorite display elements are repurposed items from around the house. Books, boxes, and containers can become platforms when covered with batting. Cotton balls make perfect smoke and snow drifts. Branches from your yard can become bare winter trees when spray-painted white. Dollar stores often have miniature accessories and battery lights at affordable prices.
How do I store my Christmas village after the holidays?
Storage is always a challenge in small spaces! I wrap each piece individually in tissue paper, then place them in plastic storage containers with dividers. For particularly delicate pieces, I save the original packaging. I also take photos of my display before disassembling it, which helps me remember the arrangement I liked for next year.
Can I use real plants in my Christmas village?
Absolutely! Small succulents can become “trees” in your display, while moss makes excellent ground cover. Just be careful about watering near electrical components, and remember that live plants need light. I’ve used small rosemary plants trimmed into tree shapes that not only look festive but add a wonderful holiday scent.
What are some lighting options for small displays?
Battery-operated micro LED strings are my go-to for small displays. Look for warm white lights with thin, flexible wires that can be easily hidden. Battery tea lights work well inside buildings that don’t have built-in lighting. For a professional touch, consider LED strip lighting along the back of your display for ambient illumination.
