
Introduction to DIY Pressed Flower Coasters
There’s something magical about preserving nature’s beauty in functional home decor. DIY pressed flower coasters are the perfect blend of practicality and artistic expression that can transform your coffee table while showcasing the delicate beauty of flowers. I’ve been making these charming coasters for years, and they’ve become my go-to handmade gift for housewarming parties and holidays. Whether you’re an experienced crafter or just starting your DIY journey, these pressed flower coaster projects offer something for everyone. Ready to bring a touch of natural elegance to your home? Let’s dive into these 10 stunning pressed flower coaster projects you can create with materials you might already have on hand!
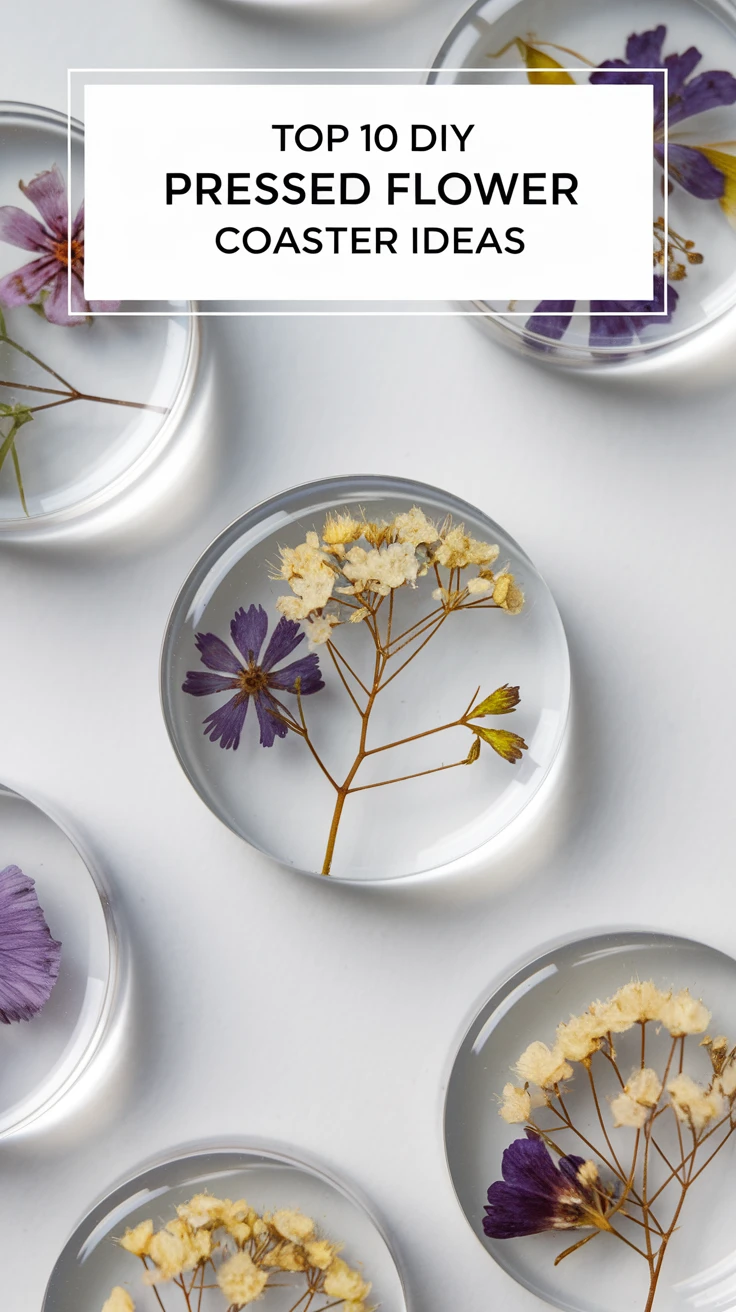
1. Classic Resin Pressed Flower Coasters
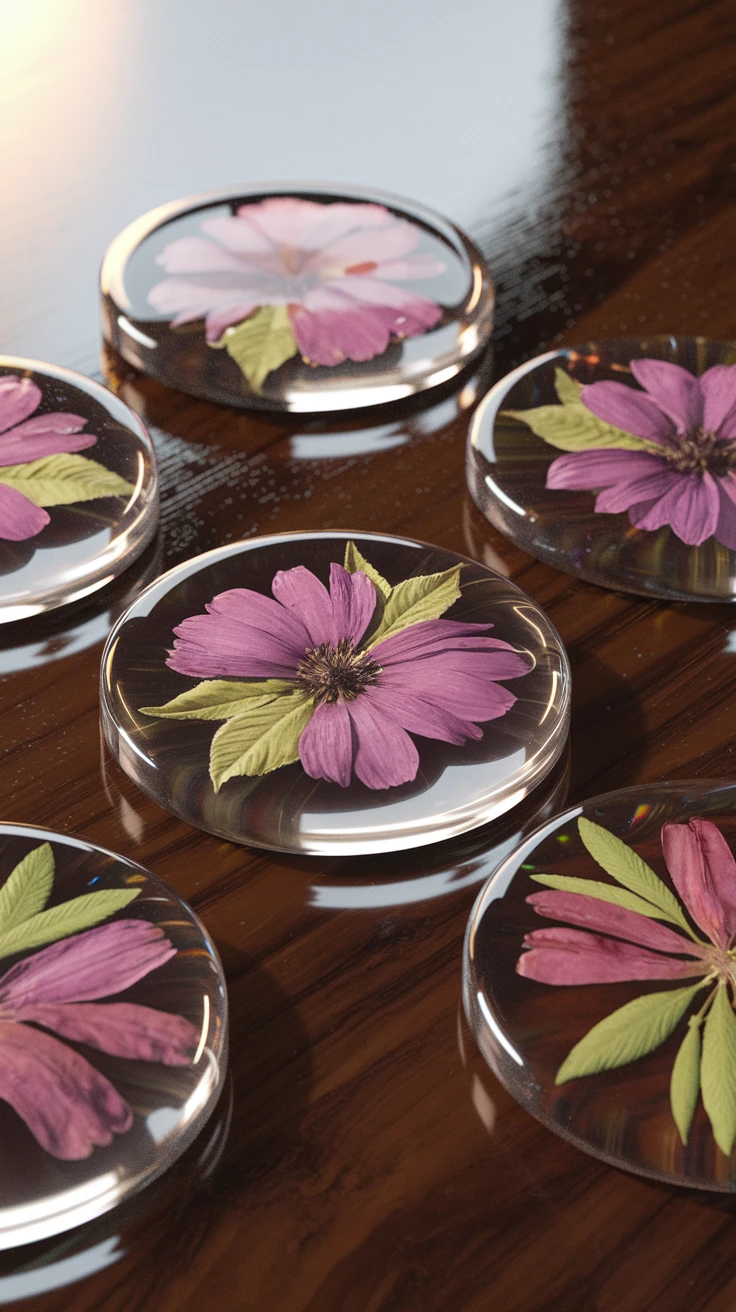
Resin coasters are perhaps the most popular method for creating pressed flower coasters, and for good reason! The crystal-clear finish showcases your botanical selections perfectly while creating a durable, waterproof surface that’ll protect your furniture for years.
What You’ll Need:
- Epoxy resin kit (food-safe if possible)
- Silicone coaster molds
- Pressed flowers and leaves
- Mixing cups and stir sticks
- Heat gun or lighter (for removing bubbles)
- Protective gloves and work surface
- Sandpaper (fine grit) for finishing edges
The process is straightforward but requires patience. Mix your resin according to the manufacturer’s instructions, pour a thin base layer into your molds, and let it set until tacky (about 30 minutes). This creates the perfect surface for arranging your pressed flowers. Once your design is in place, carefully pour the remaining resin over top, using your heat source to remove any bubbles that form.

View on AmazonAs an Amazon Associate, I earn from qualifying purchases.

View on AmazonAs an Amazon Associate, I earn from qualifying purchases.
Pro Tip: Work in a well-ventilated area and consider wearing a mask when working with resin. Also, pressing your flowers at least 2-3 weeks before your project ensures they’re completely dry and won’t discolor in the resin.
2. Wooden Base Pressed Flower Coasters
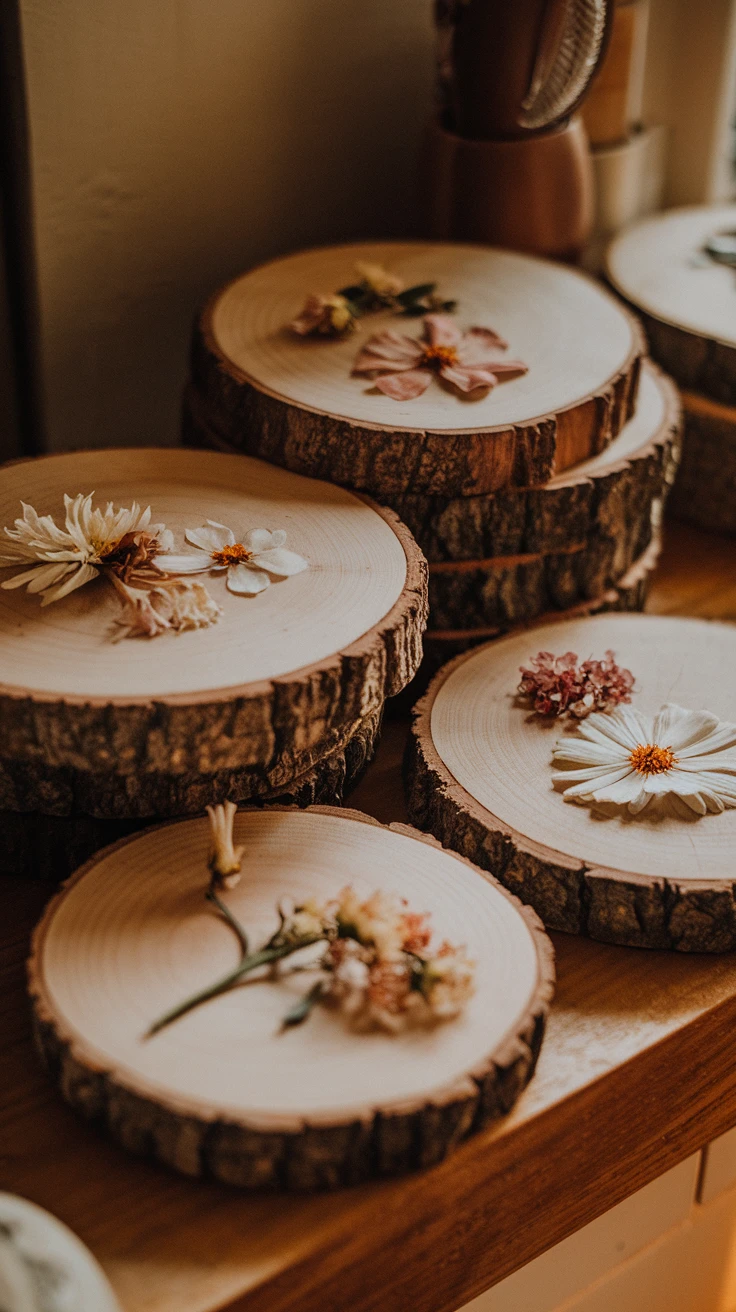
For a rustic, natural look that complements farmhouse or cottage decor, wooden base pressed flower coasters are ideal. The organic texture of wood pairs beautifully with delicate pressed blooms.
What You’ll Need:
- Wooden coaster blanks (available at craft stores or cut from branches)
- Mod Podge or similar decoupage medium
- Pressed flowers
- Clear spray sealant or polyurethane
- Fine sandpaper
- Small paintbrush
- Optional: wood stain
If you’re using raw wood, start by sanding the surfaces smooth and applying stain if desired. Once dry, apply a thin layer of Mod Podge, arrange your pressed flowers, and cover with another layer of Mod Podge. After it dries completely (give it 24 hours), apply 3-4 coats of clear sealant for waterproofing.

View on AmazonAs an Amazon Associate, I earn from qualifying purchases.

View on AmazonAs an Amazon Associate, I earn from qualifying purchases.
The warmth of the wood grain peeking through creates a beautiful contrast with the delicate flowers. I’ve found that these make particularly lovely gifts when packaged with a small jar of homemade jam or a bag of specialty coffee.
3. Clay Pressed Flower Coasters
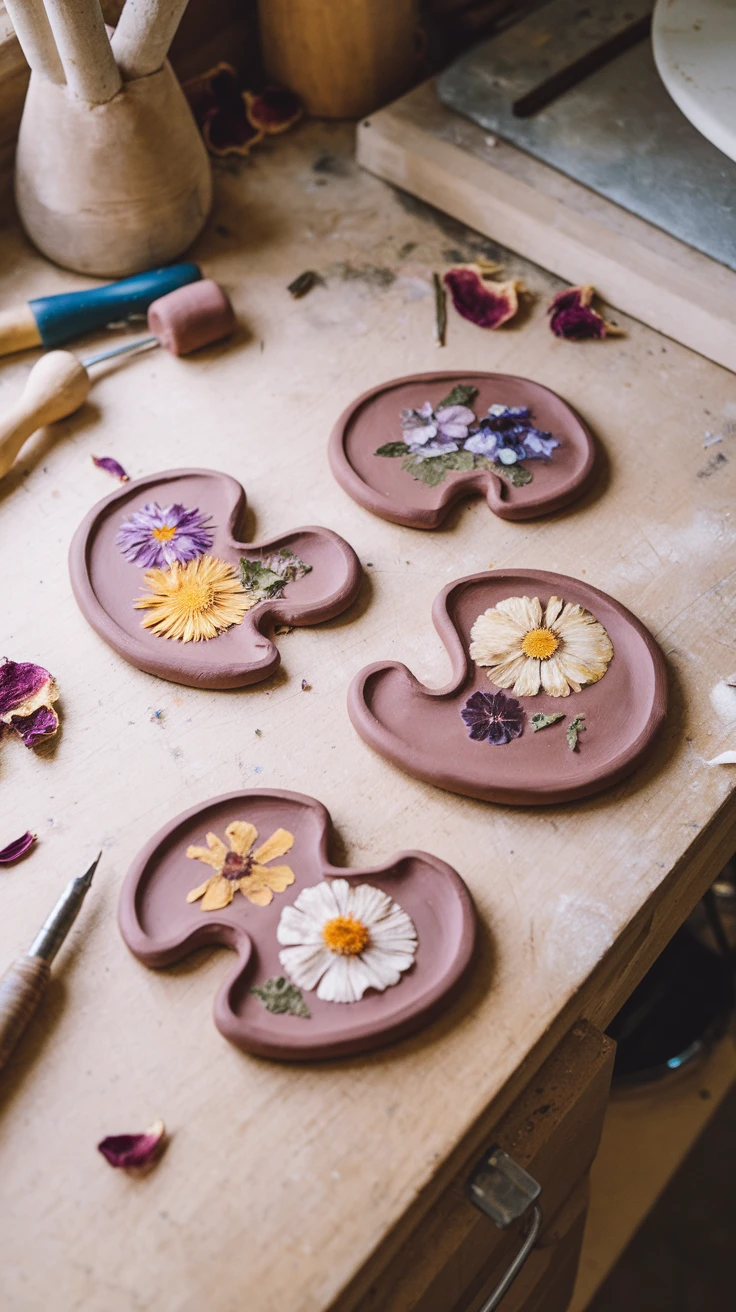
Air-dry or polymer clay offers a wonderful medium for pressed flower coasters with a more substantial feel. You can create custom shapes and even add personalized touches like names or dates.
What You’ll Need:
- Air-dry clay or polymer clay
- Rolling pin and cutting tools
- Pressed flowers
- Clear glaze or varnish
- Sandpaper (for smoothing edges)
- Cookie cutters or circular templates
- Optional: rubber stamps for texturing
Roll your clay to about 1/4 inch thickness, cut into desired shapes, and gently press your flowers into the surface. For air-dry clay, allow to dry completely (usually 24-48 hours) before sealing with multiple coats of clear varnish. For polymer clay, bake according to package instructions, then seal once cooled.

View on AmazonAs an Amazon Associate, I earn from qualifying purchases.

View on AmazonAs an Amazon Associate, I earn from qualifying purchases.
Pro Tip: Create a small lip around the edge of your clay coasters to catch condensation from cold drinks. You’ll thank yourself later when your beautiful wooden tables remain ring-free!
4. Upcycled Tile Pressed Flower Coasters
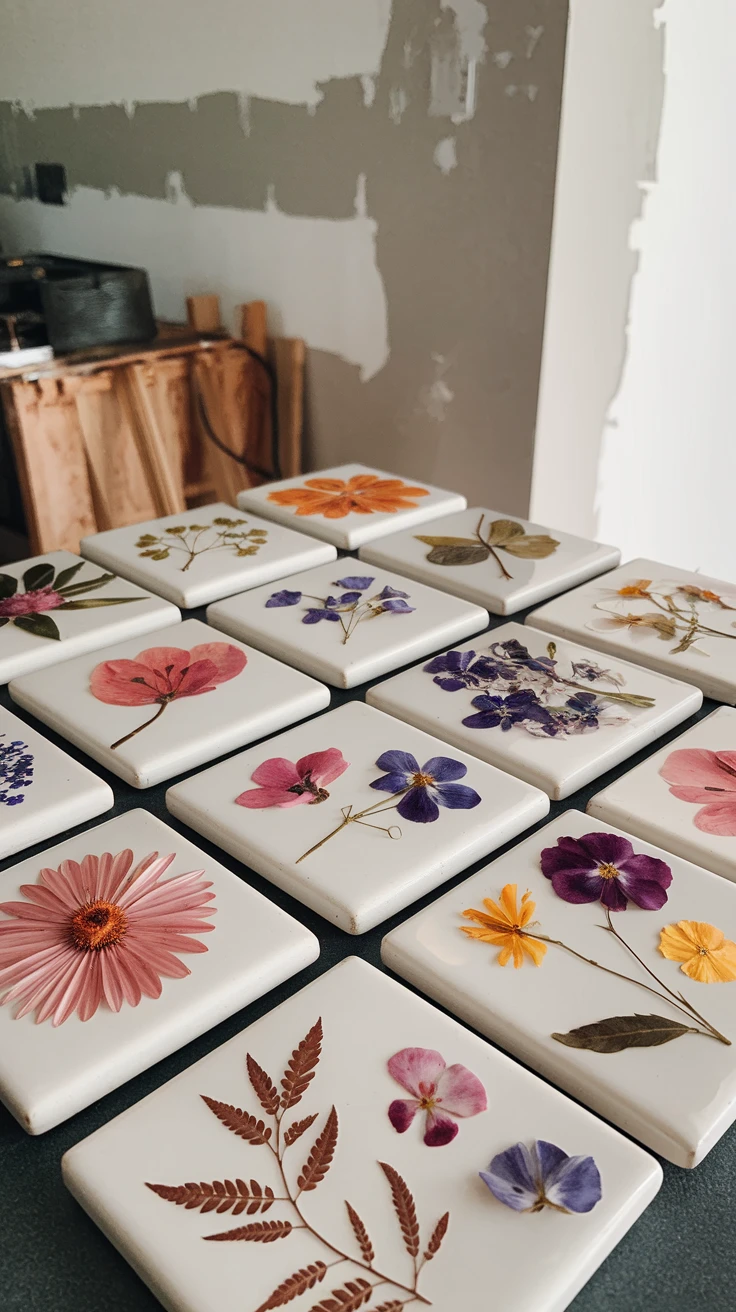
Got some leftover ceramic tiles from a home renovation? Don’t toss them! Transform them into stunning pressed flower coasters at a fraction of the cost of buying new materials.
What You’ll Need:
- Ceramic tiles (4×4 inches works well)
- Pressed flowers
- Mod Podge or similar adhesive
- Clear spray sealant or resin
- Felt or cork for the bottom
- Strong adhesive for attaching backing
- Optional: alcohol inks for background color
Clean your tiles thoroughly and let dry. If using alcohol inks for a colorful background, apply those first and let dry completely. Arrange your pressed flowers on the tile, secure with Mod Podge, and once dry, seal with multiple layers of clear sealant or a layer of resin. Finish by attaching felt or cork backing to prevent scratching surfaces.

View on AmazonAs an Amazon Associate, I earn from qualifying purchases.

View on AmazonAs an Amazon Associate, I earn from qualifying purchases.
I’ve made these with leftover subway tiles from my kitchen backsplash, and they coordinate perfectly with my decor while putting those extra materials to good use. Talk about sustainable crafting!
5. Fabric-Based Pressed Flower Coasters
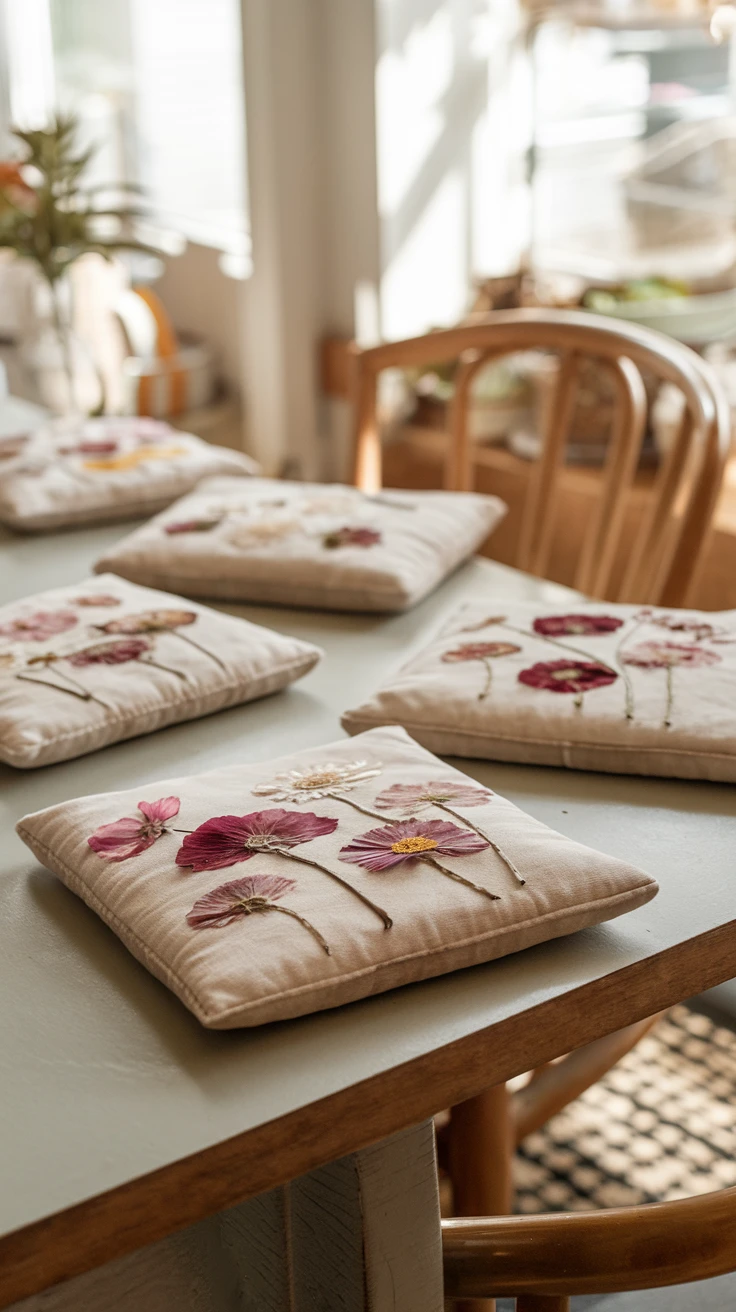
For a softer approach to pressed flower coasters, fabric bases offer flexibility and a different aesthetic that works beautifully in more casual settings.
What You’ll Need:
- Plain cotton or linen fabric
- Pressed flowers
- Fabric stiffener
- Clear fabric sealant
- Scissors
- Template for cutting
- Optional: embroidery hoop for stretching fabric
Cut your fabric into squares slightly larger than your intended coaster size. Apply fabric stiffener and let it partially dry until tacky. Arrange your pressed flowers and apply another layer of stiffener. Once completely dry, cut to size and seal with clear fabric sealant for water resistance.
These fabric-based coasters have a lovely textile quality while still being practical. They’re particularly suited to lighter beverages like tea cups rather than heavy, sweating glasses.
6. Cork Pressed Flower Coasters

Cork is a natural choice for coasters given its inherent water-resistant properties. Adding pressed flowers to cork creates an eco-friendly and highly functional coaster with minimal effort.
What You’ll Need:
- Cork coaster blanks or cork sheets
- Pressed flowers
- Clear adhesive (like Mod Podge)
- Clear sealant
- Scissors or craft knife
- Optional: decorative edge punch
If using cork sheets, cut to your desired coaster size first. Arrange your pressed flowers on the surface, secure with a thin layer of adhesive, and once dry, apply multiple thin coats of clear sealant for protection.

View on AmazonAs an Amazon Associate, I earn from qualifying purchases.
View on AmazonAs an Amazon Associate, I earn from qualifying purchases.
Pro Tip: Cork has a natural texture that can make flower placement tricky. Consider pressing your design under books for a few hours after applying your flowers but before sealing to ensure they adhere properly to the uneven surface.
7. Laminated Pressed Flower Coasters
For a quick and budget-friendly pressed flower coaster project, lamination offers a simple solution that’s perfect for crafting with kids or when you need a last-minute gift.
What You’ll Need:
- Laminating pouches or self-adhesive laminating sheets
- Pressed flowers
- Card stock in your choice of color
- Laminator (or laminating service at an office supply store)
- Scissors or circle cutter
- Cork backing (optional)
Arrange your pressed flowers on card stock cut to your desired coaster size. Place in laminating pouches and run through your laminator. Once cooled, trim to shape, rounding the corners for a finished look. You can add a circle of cork to the bottom for extra protection if desired.
View on AmazonAs an Amazon Associate, I earn from qualifying purchases.

View on AmazonAs an Amazon Associate, I earn from qualifying purchases.
While not as durable as resin or sealed options, these laminated coasters are perfect for light use and make wonderful gifts when bundled with a special tea or coffee blend.
8. Concrete Pressed Flower Coasters

For an industrial chic look, concrete pressed flower coasters offer a stunning contrast between delicate botanicals and rugged material. These substantial coasters make a statement on any table.
What You’ll Need:
- Quick-setting concrete mix
- Silicone molds
- Pressed flowers
- Clear sealant or resin
- Mixing container and stir stick
- Sandpaper
- Felt pads for bottom
Mix your concrete according to package directions. Pour a thin layer into your molds, let it set until firm but not completely hardened (about 30-60 minutes depending on your mix), then gently press your flowers into the surface. Once fully cured (24 hours), sand any rough edges and seal with clear sealant or a thin layer of resin. Add felt pads to prevent scratching surfaces.
The contrast between the industrial concrete and delicate flowers creates a conversation piece that’s both beautiful and functional. I’ve found these particularly popular with friends who have minimalist or modern decor.
9. CD/DVD Upcycled Pressed Flower Coasters

Have a stack of obsolete CDs or DVDs gathering dust? Upcycle them into unique pressed flower coasters that give new life to these outdated media formats.
What You’ll Need:
- Old CDs or DVDs
- Pressed flowers
- Mod Podge or similar adhesive
- Resin or clear sealant
- Sandpaper (to rough up the CD surface)
- Felt for backing
- Optional: spray paint for background color
Lightly sand the printed side of your CD/DVD to help adhesion. If desired, spray paint for a colored background. Once dry, arrange your pressed flowers, secure with Mod Podge, and seal with resin or multiple layers of clear sealant. Add felt backing to finish.
View on AmazonAs an Amazon Associate, I earn from qualifying purchases.

View on AmazonAs an Amazon Associate, I earn from qualifying purchases.
Pro Tip: The reflective quality of CDs can create interesting light effects behind your flowers. Try placing some pressed flowers with gaps to allow the metallic surface to show through for a unique shimmer effect.
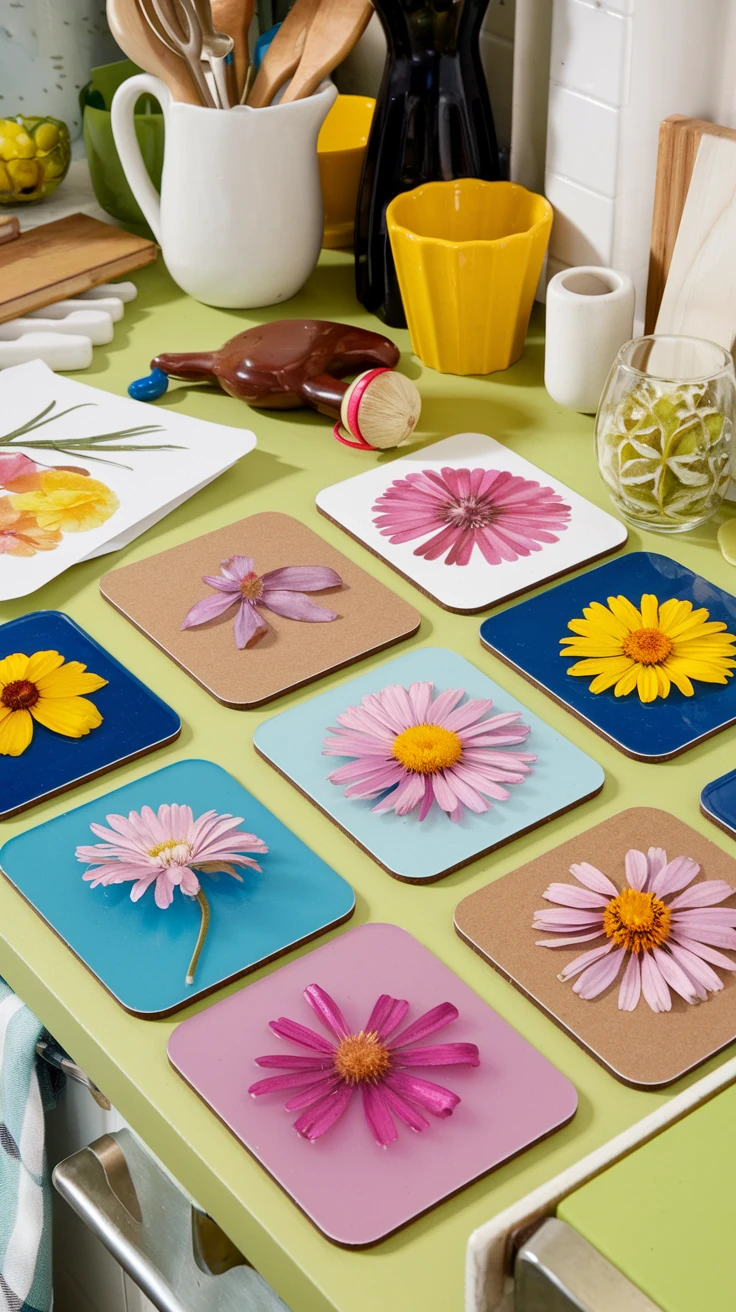
10. Seasonal Themed Pressed Flower Coasters
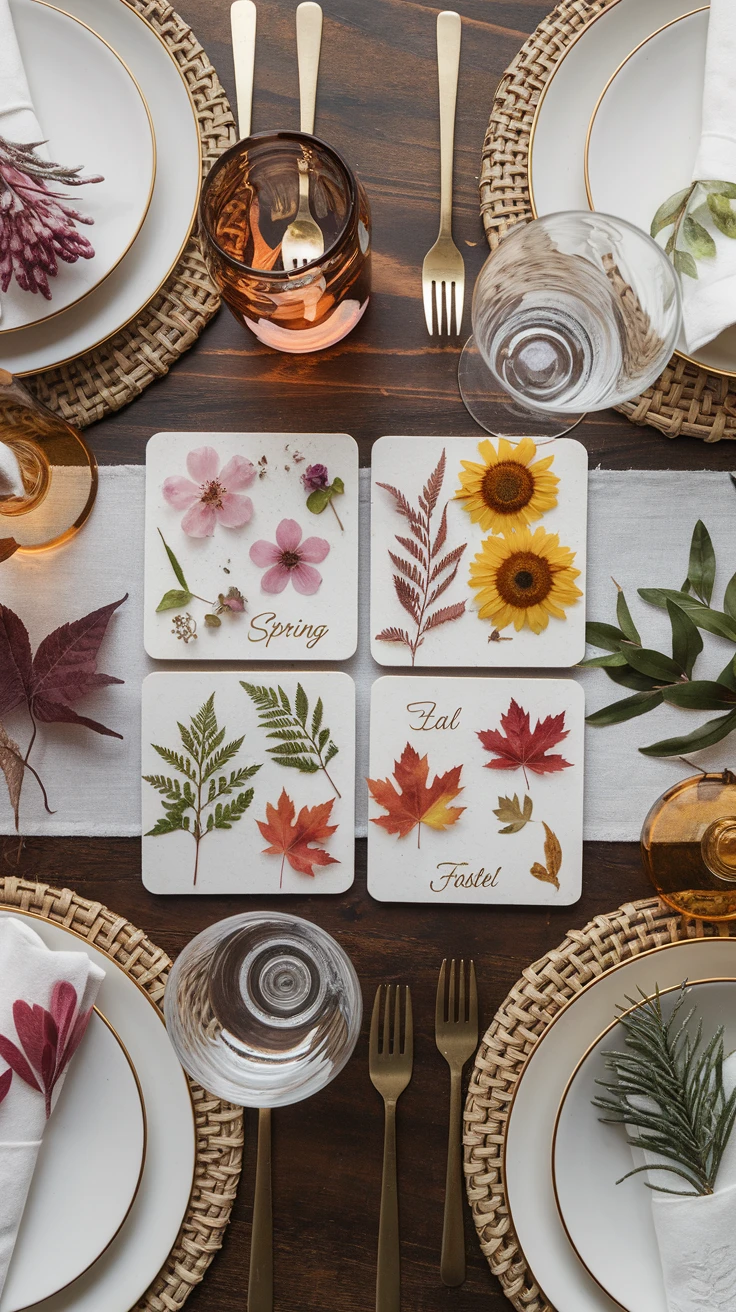
Create sets of pressed flower coasters that celebrate the changing seasons, using flowers, leaves, and colors that evoke spring, summer, fall, and winter.
What You’ll Need:
- Any base material from previous methods (resin, wood, tile, etc.)
- Seasonally appropriate pressed flowers and botanicals
- Colored backgrounds or accents
- Regular coaster-making supplies
For spring, consider pastel backgrounds with delicate blossoms like forget-me-nots or violets. Summer coasters might feature vibrant wildflowers or herbs. Fall calls for turning leaves and deeper hues, while winter can incorporate evergreen sprigs, berries, or snowflake designs with blue tones.
Creating seasonal sets gives you the opportunity to rotate your decor throughout the year or offer thoughtful gifts that acknowledge special times. I love giving these as hostess gifts during holiday gatherings!
Key Takeaways for DIY Pressed Flower Coasters
- Always ensure your flowers are completely dry before incorporating them into any coaster project to prevent discoloration.
- Multiple thin layers of sealant typically yield better results than one thick layer.
- Consider your home’s decor style when choosing base materials and flower combinations.
- Most coaster projects benefit from protective backing to prevent scratching furniture.
- DIY pressed flower coasters make thoughtful, personalized gifts for almost any occasion.
Conclusion
Creating your own DIY pressed flower coasters is more than just a craft project—it’s a way to preserve memories, connect with nature, and add personalized touches to your home. Whether you opt for the crystal clarity of resin, the warmth of wood, or the industrial edge of concrete, pressed flower coasters bring a touch of natural beauty to everyday moments. The best part? Each coaster is completely unique, just like the flowers used to create it. So gather your materials, press those beautiful blooms, and get crafting! Your coffee table (and your guests) will thank you for these functional pieces of botanical art. Which pressed flower coaster project will you try first?
Frequently Asked Questions
How long do pressed flower coasters last?
With proper sealing and care, pressed flower coasters can last for many years. Resin-sealed coasters typically last the longest (5+ years), while laminated versions may need replacement after a year or two of regular use. To extend their life, avoid exposing them to direct sunlight for long periods, as this can cause the flowers to fade.
What flowers work best for pressed flower coasters?
Flat flowers with lower moisture content press best and maintain their color. Good choices include pansies, violets, larkspur, cosmos, queen anne’s lace, and small daisies. Ferns and small leaves also work beautifully. Avoid very thick flowers like roses (unless you separate the petals) or very watery flowers that may turn brown when pressed.
Can I use artificial flowers instead of real pressed flowers?
Yes, you can use artificial flowers, especially if you want specific colors or designs that aren’t available naturally. However, they won’t have the same delicate, translucent quality as real pressed flowers. If using artificial flowers, choose very thin fabric versions and trim any plastic stems completely.
How do I prevent bubbles when using resin for pressed flower coasters?
To minimize bubbles in resin: 1) Work in a warm room (70-75°F is ideal), 2) Mix slowly to avoid introducing air, 3) Pour in thin layers, 4) Use a heat gun or torch held several inches away to pop bubbles that form, and 5) Cover your work while it cures to prevent dust from settling on the surface.
Are pressed flower coasters waterproof?
It depends on the sealing method. Resin-sealed coasters are fully waterproof. Coasters sealed with polyurethane, varnish, or specialized sealants are water-resistant but may not withstand standing water for long periods. Laminated coasters have moderate water resistance but can eventually allow moisture to seep in around the edges. For maximum protection, choose resin or multiple layers of a quality sealant.
How do I care for and clean pressed flower coasters?
Wipe pressed flower coasters with a slightly damp cloth to clean them. Avoid harsh cleaners or abrasive materials that could scratch the surface. Don’t soak them or put them in the dishwasher. For stubborn spots on resin coasters, a small amount of mild soap can be used, followed by thorough drying.
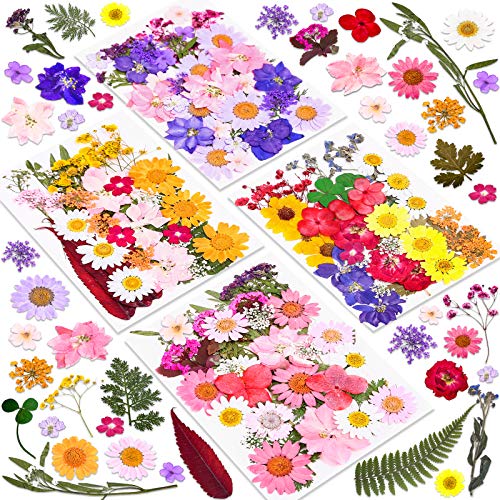
Where can I find materials for making pressed flower coasters?
Most materials can be found at craft stores like Michaels, Hobby Lobby, or Joann Fabrics. Online retailers like Amazon and Etsy offer specialized items like silicone molds and resin kits. For flowers, your own garden is the best source! You can also find pressed flower kits online if you don’t want to press your own. Hardware stores carry materials like concrete mix and tiles for some of the projects.
