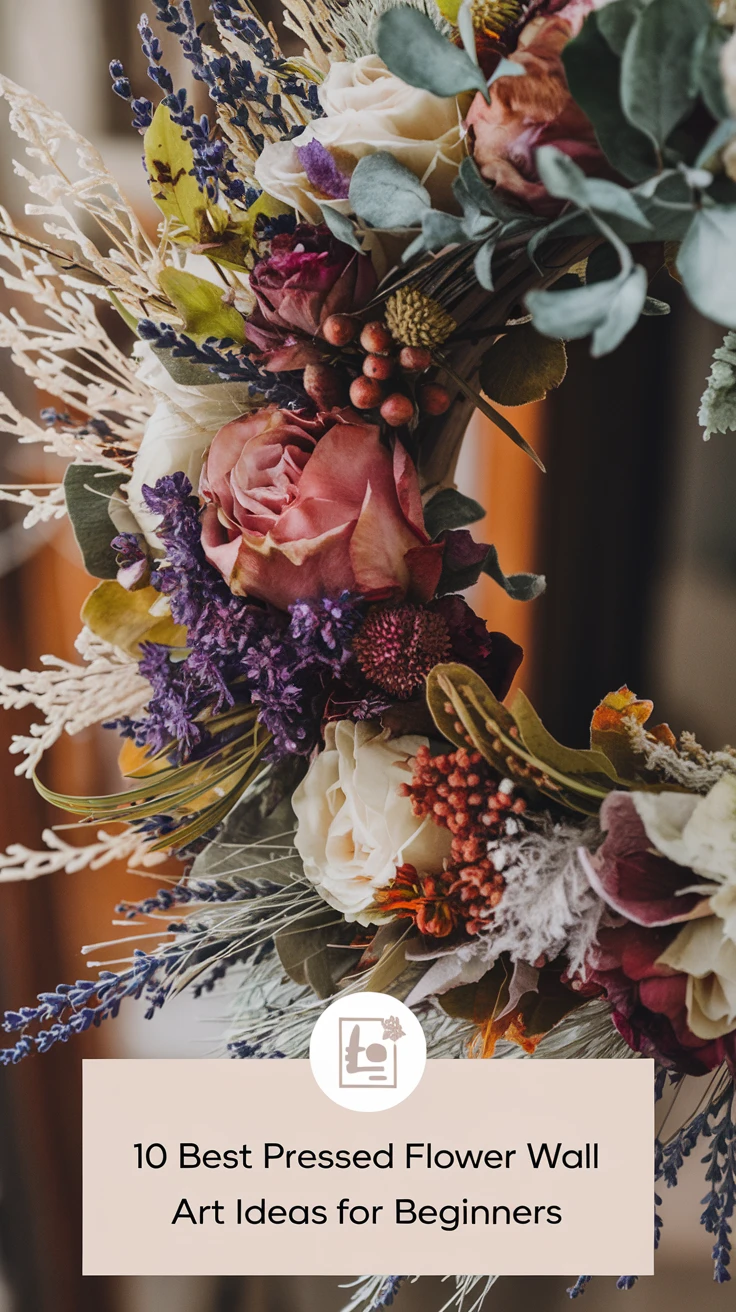
The Magical World of Pressed Flower Art
Remember pressing flowers in heavy books as a kid? There’s something almost magical about preserving nature’s vibrant colors and delicate shapes between pages. I’ll never forget the first time I opened a book to find a perfectly preserved daisy I’d forgotten about months earlier, it was like discovering a little time capsule of summer! If you’ve been admiring those gorgeous pressed flower wall art pieces on Pinterest but thought they looked too complicated, I’m here to tell you that creating your own botanical masterpieces is actually super approachable, even for complete beginners. These easy pressed flower wall art ideas will transform your space with minimal supplies and maximum impact.
The beauty of pressed flower art lies in its simplicity, nature has already done the hard work of creating stunning designs; we just need to preserve and display them. In this guide, I’ll walk you through 10 beginner-friendly projects that’ll have your walls looking like a botanical dream in no time. Ready to bring the garden indoors? Let’s get started!
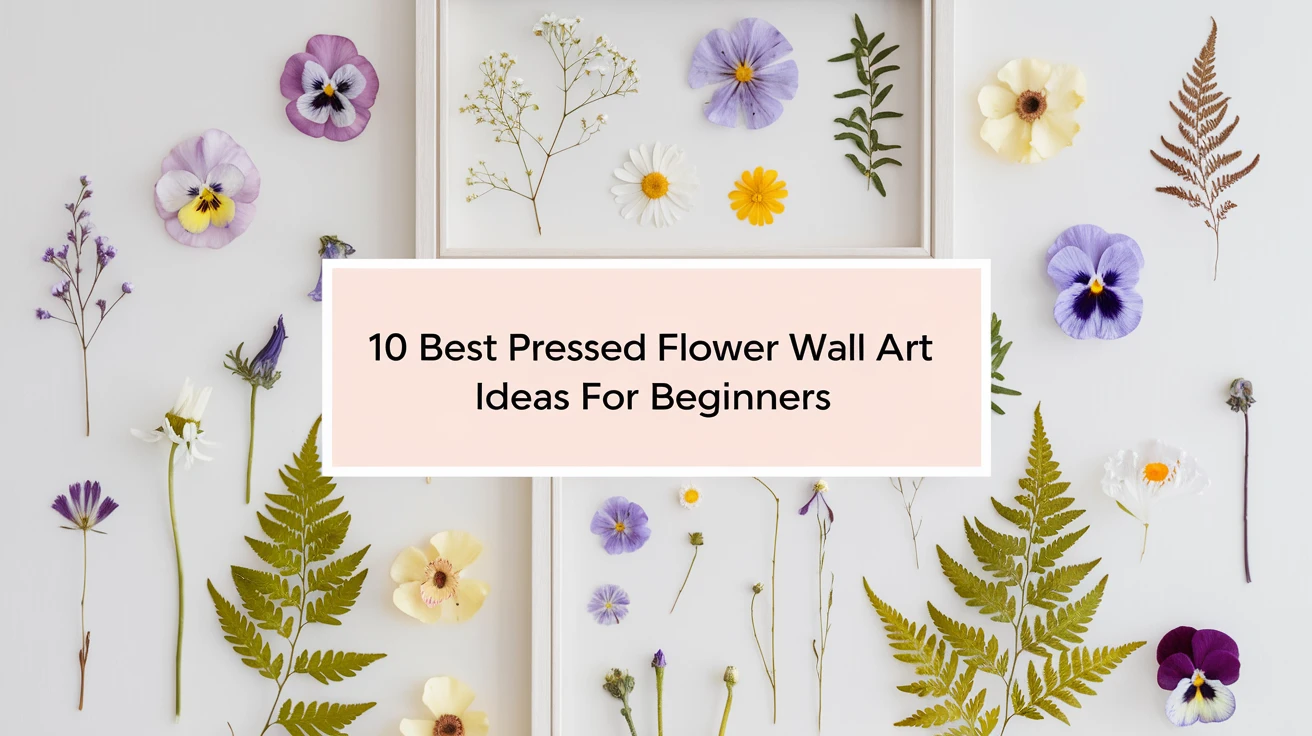
1. Simple Framed Pressed Flowers
The most straightforward way to showcase pressed flowers is in a simple frame. This classic approach lets the natural beauty of each bloom shine without overwhelming your space or your crafting abilities. I started with this method years ago, and it remains my go-to when I find a particularly perfect specimen.
What you’ll need:
- Pressed flowers of your choice
- Photo frames (floating frames work best to prevent crushing)
- Acid-free paper or cardstock for background
- Fine tweezers for positioning
- Clear-drying craft glue (optional)
Simply arrange your pressed flowers on the background paper, secure with tiny dots of glue if desired, and frame. The contrast between the delicate flowers and a crisp white background creates stunning wall art that looks professionally done.

View on AmazonAs an Amazon Associate, I earn from qualifying purchases.

View on AmazonAs an Amazon Associate, I earn from qualifying purchases.
Pro Tip: Try using colored backgrounds like pale blue or soft pink to make certain flower types pop even more. A monochromatic collection of frames creates a cohesive gallery wall effect.
2. Pressed Flower Floating Frames
Floating frames create a magical, suspended effect that showcases pressed flowers in all their delicate glory. The transparency gives these pieces a modern, airy feel that works in virtually any decor style.
What you’ll need:
- Glass floating frames (available at most craft stores)
- Pressed flowers
- Tweezers
- Optional: tiny drops of clear adhesive
The beauty of floating frames is their simplicity, you’re literally sandwiching pressed flowers between two pieces of glass. The transparency creates depth and allows light to filter through, highlighting the natural details of each petal.

View on AmazonAs an Amazon Associate, I earn from qualifying purchases.

View on AmazonAs an Amazon Associate, I earn from qualifying purchases.
Pro Tip: Arrange several smaller floating frames in a cluster for a more dramatic wall display. Mix in pressed leaves with flowers for added texture and visual interest.
3. Botanical Bookmarks as Wall Hangings
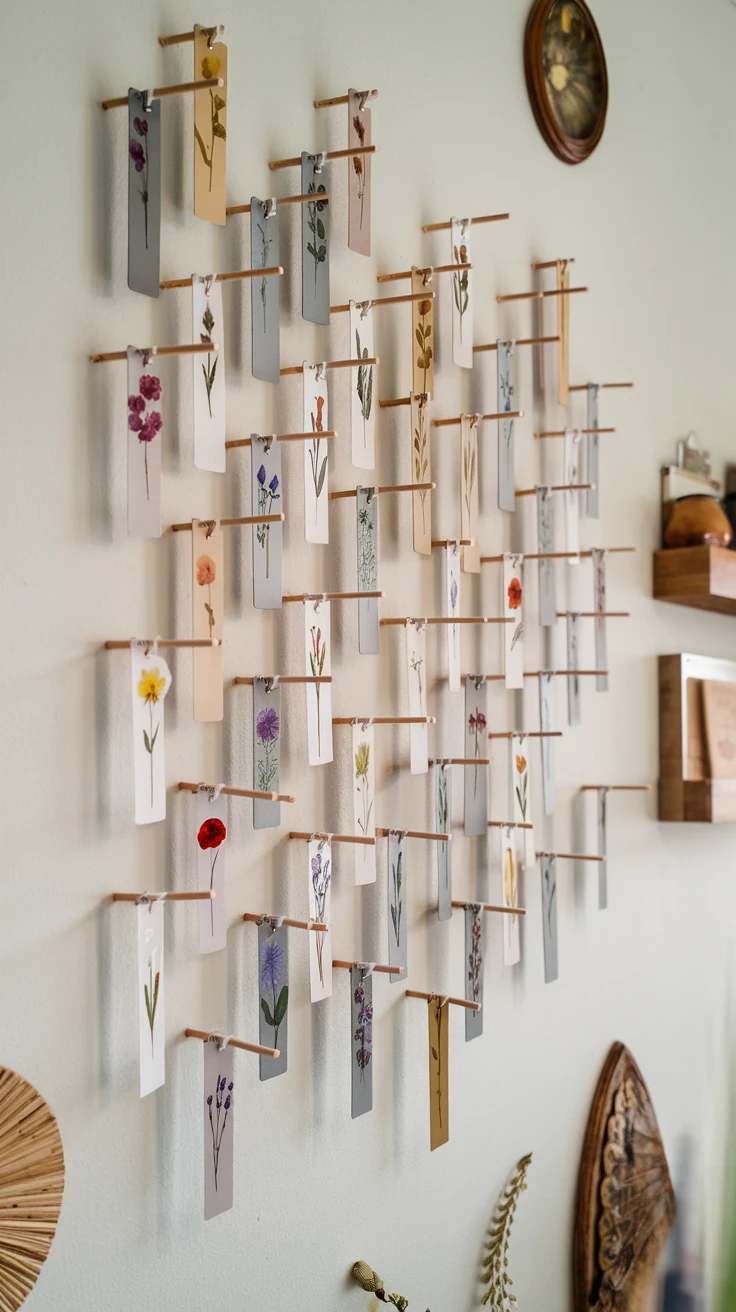
Who says bookmarks belong only between pages? These slender pressed flower creations make stunning wall art when displayed together. Plus, they’re incredibly easy to make and require minimal materials.
What you’ll need:
- Heavyweight cardstock in your choice of colors
- Pressed flowers and leaves
- Clear contact paper or laminating pouches
- Hole punch
- Decorative string, ribbon, or twine
- Small decorative wall hooks
Create your bookmarks by arranging pressed flowers on cardstock, sealing with contact paper or lamination, punching a hole at the top, and adding ribbon. Hang several in a row or cluster for a unique botanical display that costs almost nothing to create.
Pro Tip: Try creating a seasonal collection, spring wildflowers, summer blooms, autumn leaves, and rotate them throughout the year for an ever-changing display.
4. Pressed Flower Collage Canvas
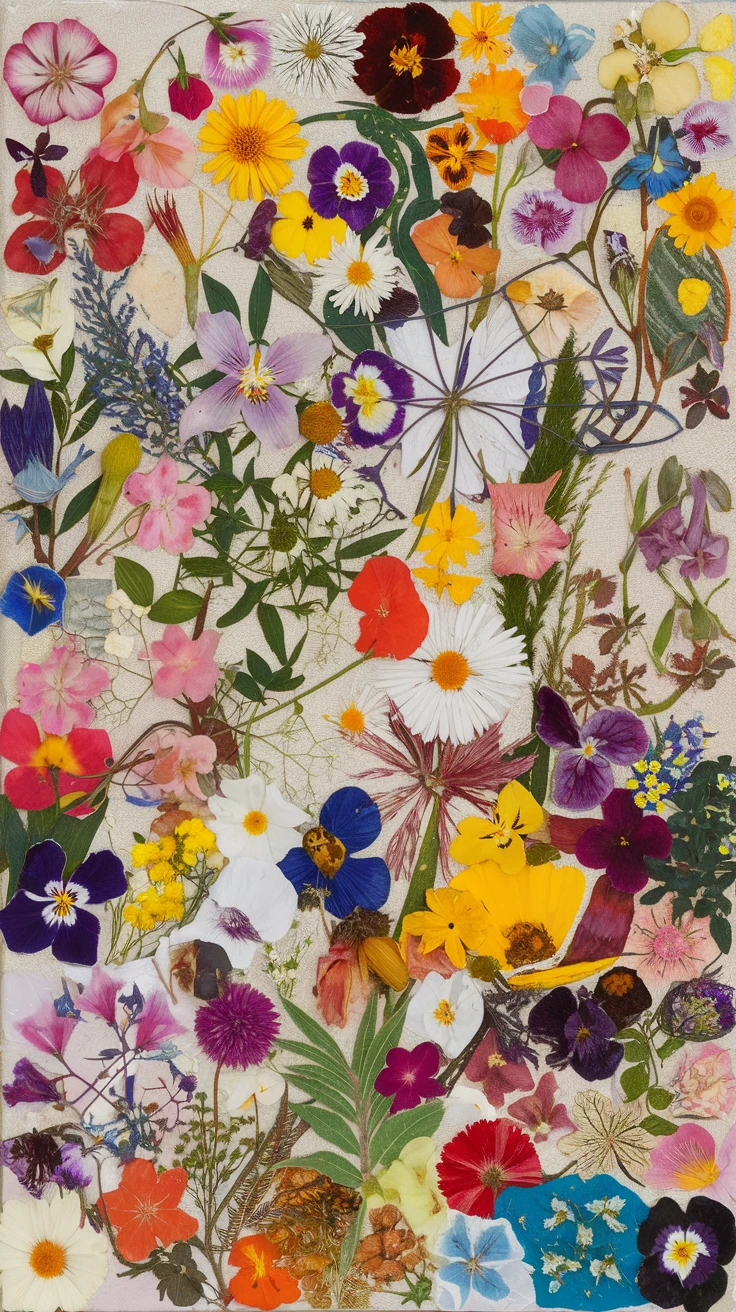
For those who love a more artistic approach, creating a collage on canvas with pressed flowers allows for more creative expression. Don’t worry, this isn’t about artistic skill but rather about arranging beautiful elements in pleasing ways.
What you’ll need:
- Blank canvas (any size works, but 8×10″ is good for beginners)
- Variety of pressed flowers and leaves
- Mod Podge or similar decoupage medium
- Soft brush for applying adhesive
- Optional: watercolors for background tinting
You can leave the canvas white or wash it with pale watercolor before arranging your pressed botanicals. Secure each element with a thin layer of Mod Podge underneath, then seal the entire creation with another layer on top.

View on AmazonAs an Amazon Associate, I earn from qualifying purchases.

View on AmazonAs an Amazon Associate, I earn from qualifying purchases.
Pro Tip: Try creating a simple shape like a heart or circle with your flowers, or spell out a letter or short word for personalized wall art.
5. DIY Pressed Flower Resin Wall Hangings
Resin might sound advanced, but beginner-friendly kits have made this technique accessible to everyone. The crystal-clear results preserve flowers permanently and create modern, eye-catching wall art.
What you’ll need:
- Clear epoxy resin kit (look for “easy” or “beginner” options)
- Small silicone molds in simple shapes
- Pressed flowers and leaves
- Mixing cups and sticks
- Small drill for creating hanging holes
- Decorative string or chain
Place your pressed flowers in silicone molds, carefully pour mixed resin over them, and allow to cure according to package directions. Once hardened, drill a small hole, add string, and hang. The translucent quality creates stunning light effects when hung near windows.
Pro Tip: If you’re nervous about working with resin, start with very small molds. The smaller the project, the easier it is to manage the resin before it starts setting.
6. Pressed Flower Cards as Mini Gallery Wall
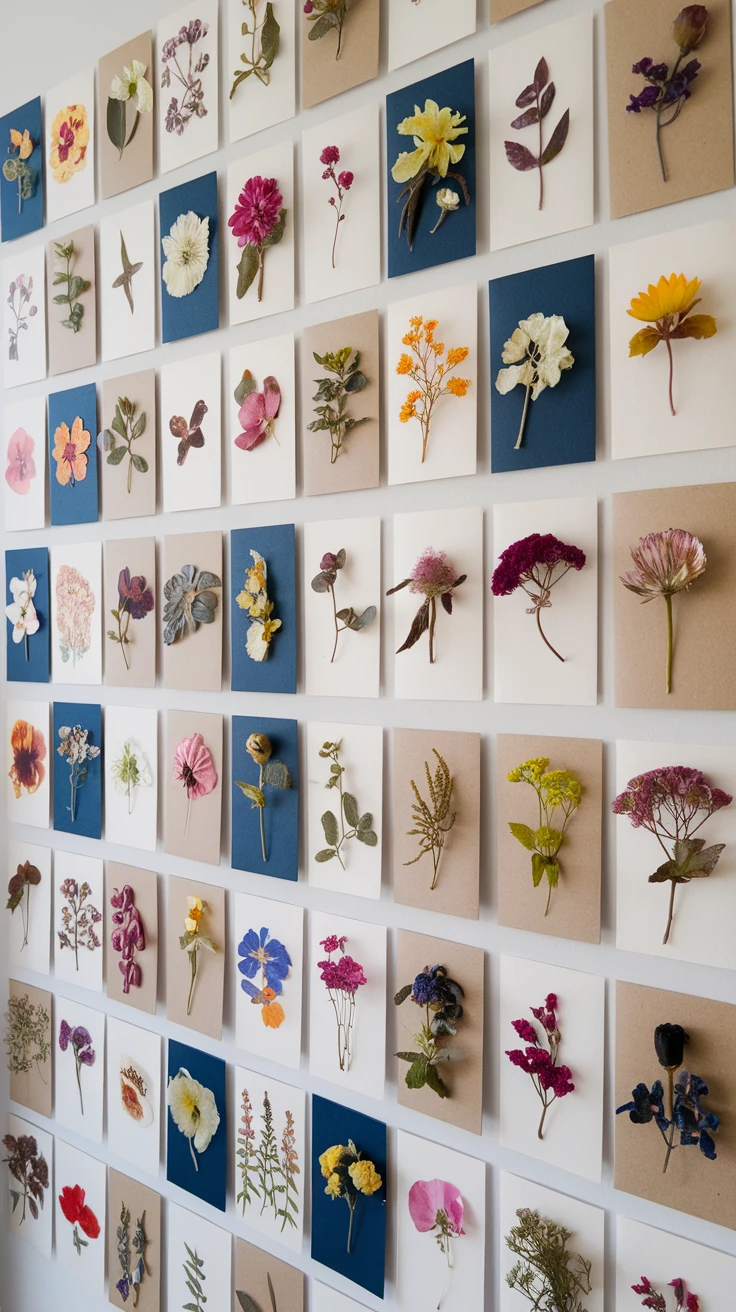
This might be my favorite budget-friendly pressed flower wall art idea! Creating a collection of handmade cards with pressed flowers and displaying them together creates an impressive gallery wall at a fraction of the cost.
What you’ll need:
- Blank greeting cards or cardstock folded in half
- Pressed flowers
- Craft glue
- Mini clothespins or washi tape
- String or thin ribbon
- Small nails or adhesive hooks
Create simple pressed flower designs on blank cards, then hang them using string and mini clothespins for a charming, changeable display. This approach lets you easily swap out cards seasonally or whenever inspiration strikes.

View on AmazonAs an Amazon Associate, I earn from qualifying purchases.

View on AmazonAs an Amazon Associate, I earn from qualifying purchases.
Pro Tip: Include some cards with pressed flower “confetti” (tiny petals scattered across the surface) for variety among more structured designs.
7. Botanical Wreaths with Pressed Flowers
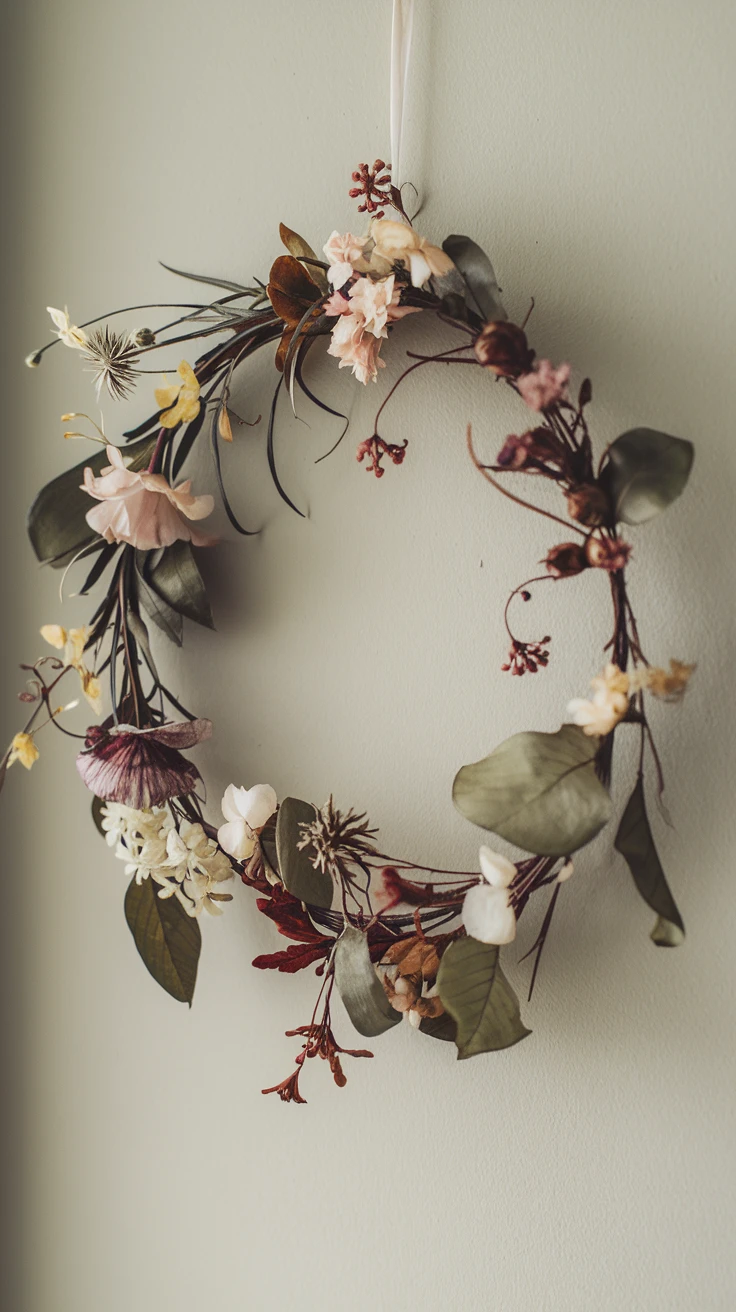
Wreaths aren’t just for doors! A delicate pressed flower wreath makes for stunning wall art that brings a touch of garden-inspired beauty to any room.
What you’ll need:
- Embroidery hoop or wire wreath form
- Pressed flowers and leaves
- Fine gauge wire or strong thread
- Clear-drying craft glue
- Ribbon for hanging
Attach pressed botanicals to your hoop or form using tiny drops of glue or by securing with thread. The circular shape creates a focal point that draws the eye while showcasing your pressed treasures.
Pro Tip: Try making a set of three wreaths in different sizes using coordinating flowers for a designer-worthy wall grouping.
8. Pressed Flower Lampshade Art
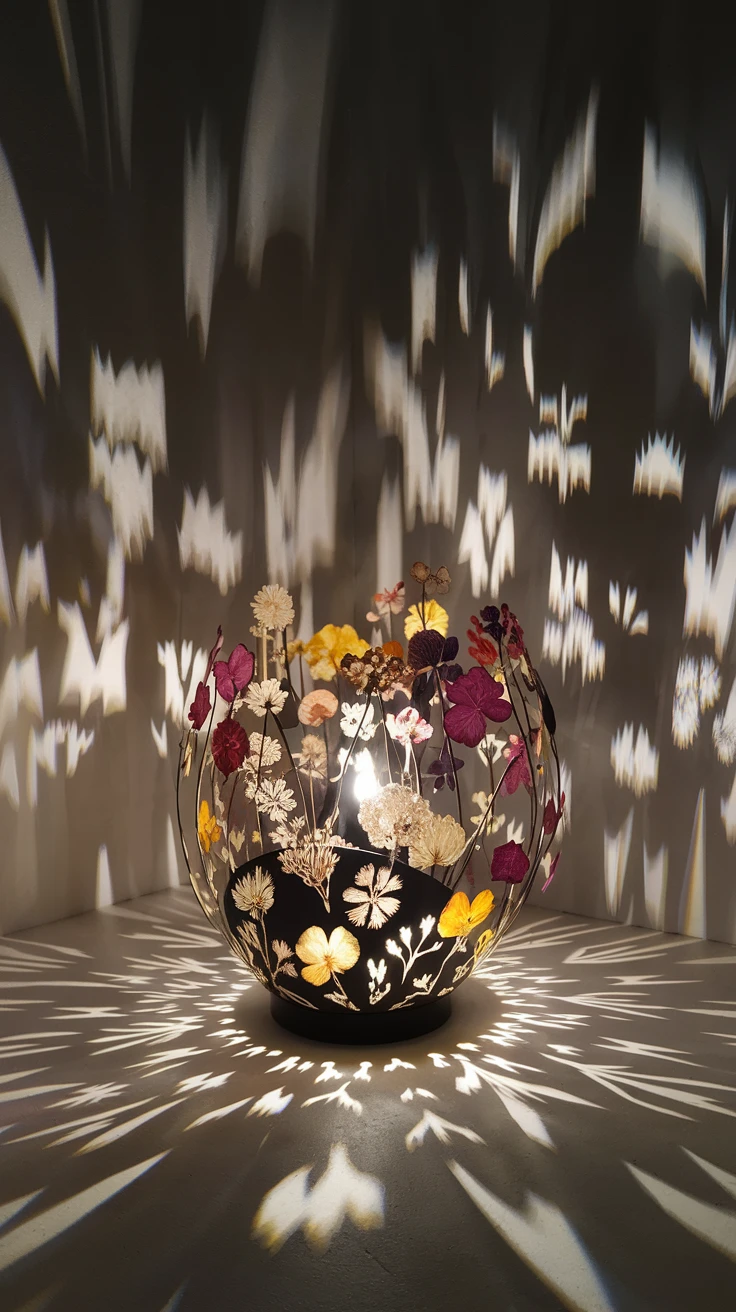
This idea technically creates wall art through projected light and shadow! By adding pressed flowers to a simple paper lampshade, you create both a functional light source and a stunning botanical display when illuminated.
What you’ll need:
- Plain paper lampshade (cylinder or drum shapes work best)
- Very thin pressed flowers (the more translucent, the better)
- Mod Podge or similar adhesive
- Soft brush
- Pendant light kit or table lamp base
Adhere delicate pressed flowers to the outside of a paper lampshade using thin layers of Mod Podge. When lit, the flowers create magical shadows on your walls, turning your entire room into a botanical dreamscape.

View on AmazonAs an Amazon Associate, I earn from qualifying purchases.

View on AmazonAs an Amazon Associate, I earn from qualifying purchases.
Pro Tip: Choose very thin, translucent flowers like forget-me-nots, Queen Anne’s lace, or single petals from larger flowers for the best light-filtering effect.
9. Pressed Flower Wall Hanging with Embroidery Hoops
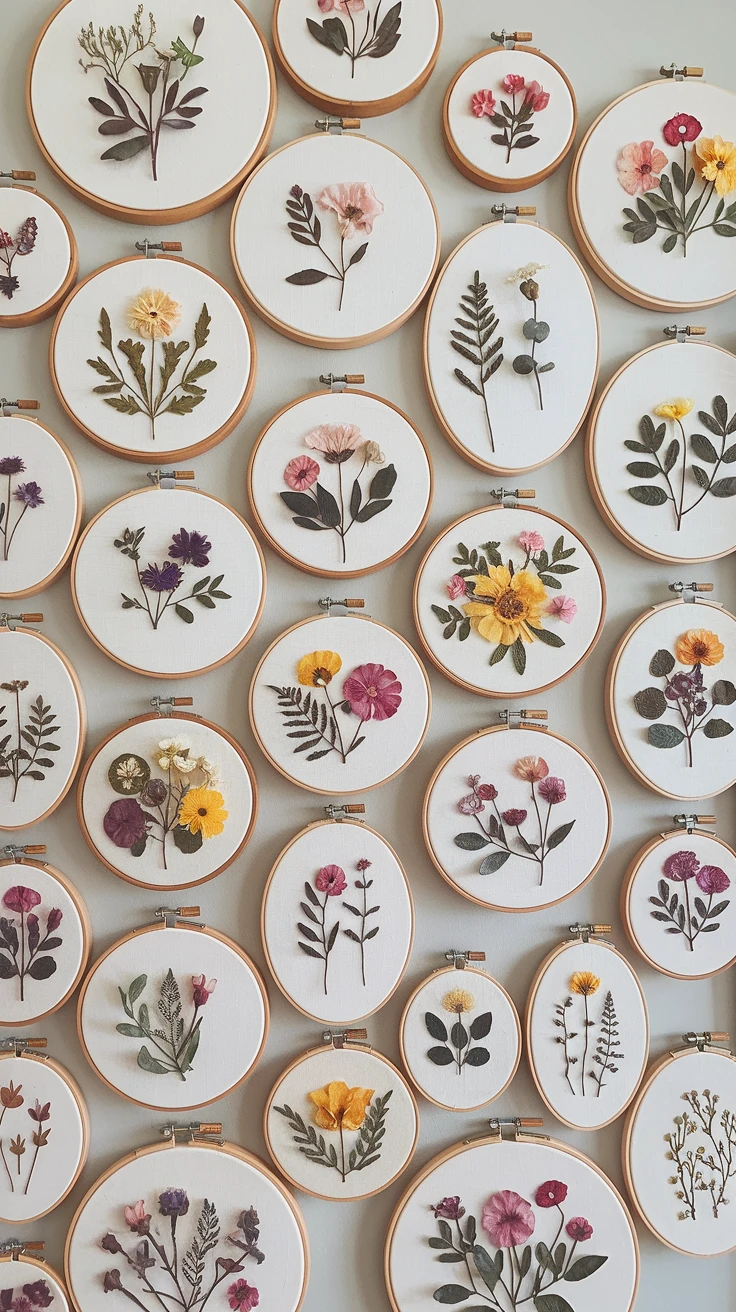
Embroidery hoops aren’t just for stitching! They make perfect frames for pressed flower art and can be hung individually or grouped for dramatic effect.
What you’ll need:
- Wooden embroidery hoops in various sizes
- Sheer fabric (organza or fine cotton)
- Pressed flowers
- Needle and thread or fabric glue
- Ribbon or string for hanging
Sandwich pressed flowers between two layers of sheer fabric, then secure in the embroidery hoop. The transparency of the fabric creates a floating effect while the wooden hoop adds rustic charm.
Pro Tip: Try dyeing the sheer fabric with tea or coffee for an antique, vintage look that complements dried botanicals beautifully.
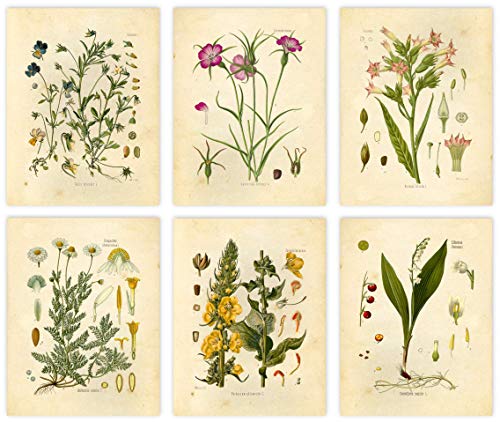
10. Pressed Flower Botanical Print Set
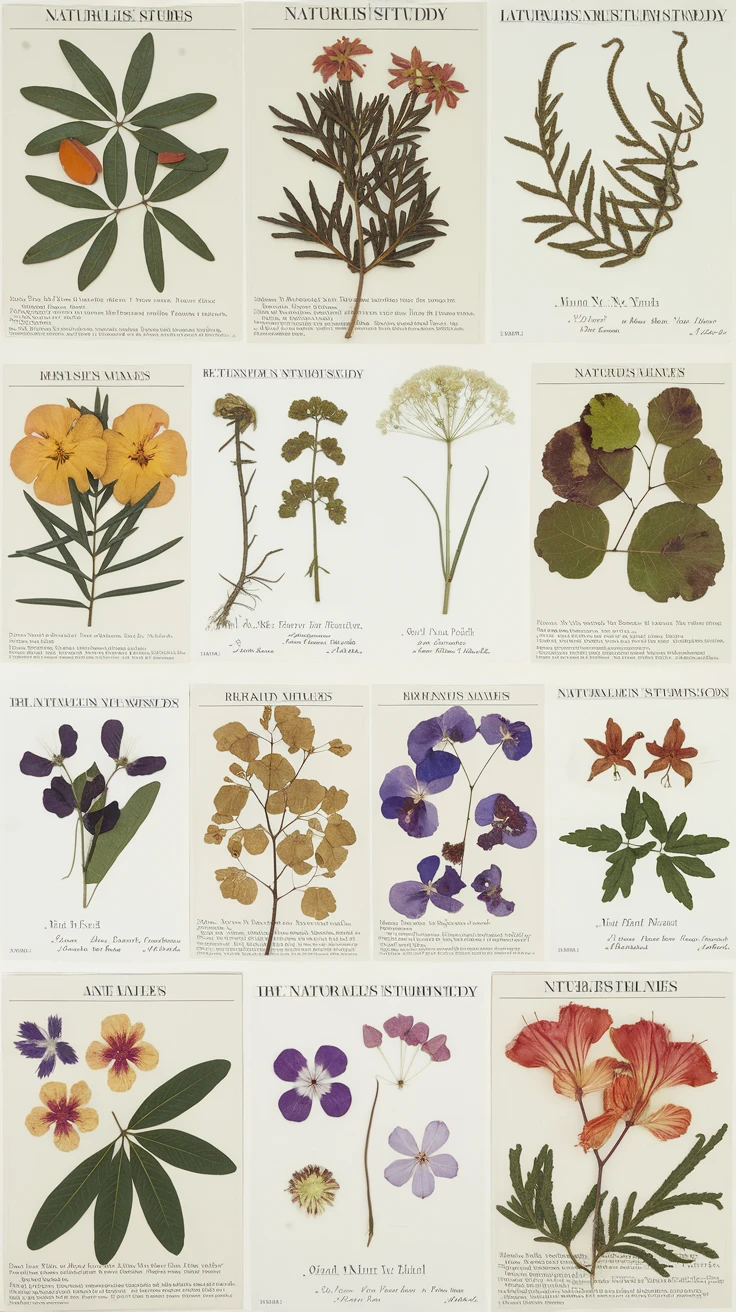
For a more scientific, specimen-like display, create a set of botanical prints that identify and showcase your pressed flowers. This approach combines art with education for a sophisticated wall display.
What you’ll need:
- Heavyweight paper or cardstock
- Pressed flowers with identifying information
- Fine-tip pen for labeling
- Matching frames
- Acid-free glue
Mount each pressed flower specimen on paper, adding the botanical name, common name, and perhaps where and when it was collected. Frame each one identically for a cohesive collection that resembles vintage botanical illustrations.

View on AmazonAs an Amazon Associate, I earn from qualifying purchases.
View on AmazonAs an Amazon Associate, I earn from qualifying purchases.
Pro Tip: Include information like flower meaning or historical uses to add depth to your botanical display. Arranging them in grid format creates maximum visual impact.
Key Takeaways for Creating Beautiful Pressed Flower Wall Art
- Proper pressing is essential, flowers should be completely dry before using in projects to prevent mold or discoloration.
- Work with tweezers to handle delicate pressed flowers without damaging them.
- Consider color preservation, keep finished pieces away from direct sunlight to prevent fading.
- Mix and match different techniques for a more interesting gallery wall effect.
- Don’t limit yourself to just flowers, pressed ferns, herbs, and leaves add texture and variety.
Conclusion: Your Pressed Flower Journey Begins
Creating easy pressed flower wall art is one of the most satisfying ways to bring nature’s beauty indoors. The projects we’ve explored range from ultra-simple framed specimens to more creative approaches like resin pendants and lampshade art, but all share one thing in common: they’re completely achievable for beginners. The joy of pressed flower art comes not just from the finished pieces adorning your walls, but from the entire process, from collecting and pressing beautiful blooms to arranging and displaying them in ways that highlight their natural perfection.
As you embark on your pressed flower art journey, remember that imperfection is part of the charm. Unlike mass-produced wall art, your botanical creations tell a story, perhaps of flowers from your garden, a special hike, or meaningful location. Each pressed petal carries memories along with beauty. So gather some blooms, press them between the pages of a heavy book, and in a few weeks, you’ll be ready to transform your walls with these captivating pressed flower wall art ideas. Nature’s artwork is waiting to be displayed!
Frequently Asked Questions
How long does it take to press flowers properly?
Most flowers take 2-4 weeks to press completely when using the traditional book method. Thicker, more substantial flowers may take up to 6 weeks to fully dry. For quicker results, you can use a microwave press (special kits are available) which can press flowers in 30-60 seconds, though the results may not be quite as flat as the traditional method.
What flowers work best for pressing?
Flowers with naturally flat faces work best for pressing, such as pansies, violets, daisies, and small wildflowers. Avoid very thick or watery flowers like succulents or lilies. Delicate flowers with thin petals like cosmos, larkspur, and Queen Anne’s lace press beautifully and retain good color. Ferns, herbs, and small leaves also press well and add variety to your compositions.
How do I prevent pressed flowers from fading?
To minimize fading, keep pressed flower art out of direct sunlight. You can also spray finished pieces (before framing) with UV-resistant clear acrylic spray. For maximum preservation, some artists seal their pressed flower art with acid-free fixative or laminate their creations. Resin encasing provides the most permanent protection against fading.
What’s the best way to attach pressed flowers to different surfaces?
For paper backgrounds, use acid-free glue applied with a toothpick for precise placement. For fabric, a tiny stitch through the stem or center can secure flowers without visible adhesive. On glass surfaces, a small drop of clear-drying craft glue works well. For porous surfaces like wood or canvas, decoupage medium like Mod Podge provides both adhesion and sealing properties.
Can I use store-bought pressed flowers if I don’t have my own?
Absolutely! Many craft stores and online retailers sell pressed flower collections if you don’t want to wait for your own flowers to press or if you want to work with exotic varieties. Dried flower shops often carry pressed options as well. This is a great way to get started immediately while you’re waiting for your own flowers to press.
