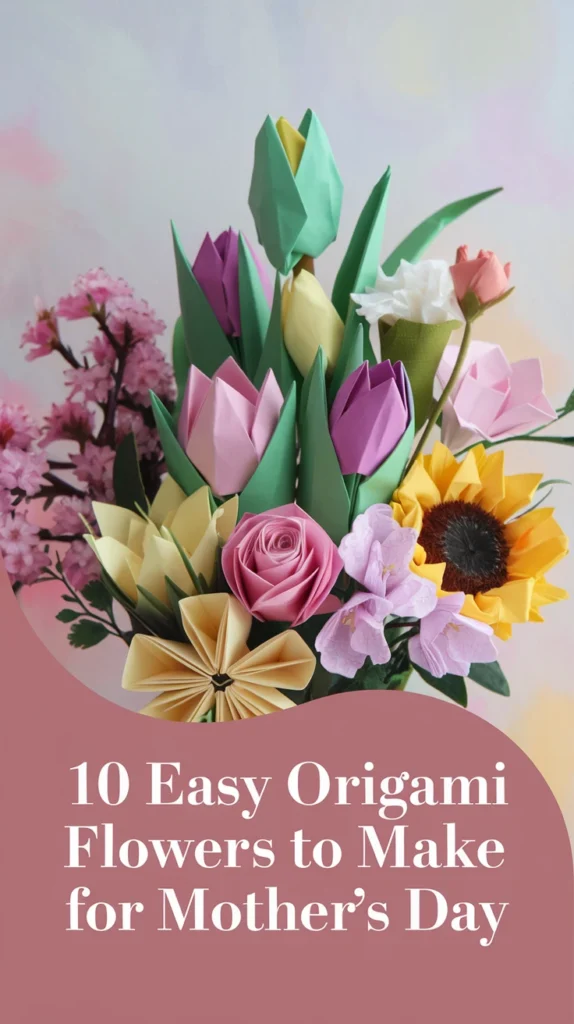
Mother’s Day Origami Flowers
Mother’s Day is just around the corner, and what better way to show your appreciation than with a handmade gift? Origami flowers offer a beautiful, lasting alternative to store-bought bouquets. These paper blooms won’t wilt and serve as a constant reminder of your love and creativity. I’ve been folding origami flowers for years, and they never fail to bring smiles to recipients’ faces – especially moms who treasure handmade gifts.
Creating origami mothers day flowers might seem daunting if you’re new to paper folding, but many beautiful designs are surprisingly simple. In this guide, I’ll walk you through 10 easy-to-make origami flowers perfect for beginners and intermediate folders alike.
Essential Materials for Origami Flower Making
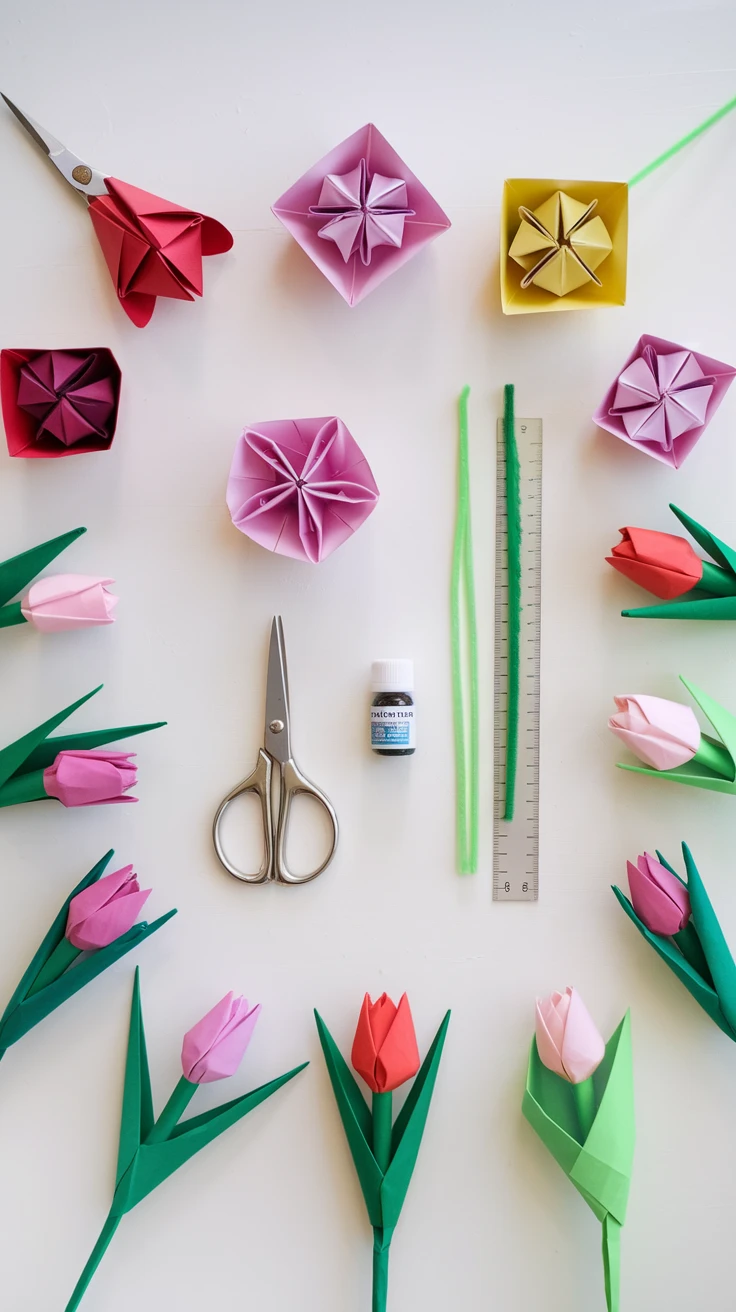
Before diving into our flower designs, let’s gather the necessary supplies. One of the wonderful aspects of origami is that it requires minimal materials to create something beautiful.
- Origami paper (6″ squares work well for most designs)
- Regular colored paper (if you don’t have origami paper)
- Scissors (for cutting regular paper into squares)
- Bone folder or ruler (optional, for making crisp folds)
- Green paper strips or pipe cleaners (for stems)
- Glue (for attaching stems or creating bouquets)
I recommend starting with origami paper if possible, as it’s specifically designed to hold folds well and comes in beautiful colors and patterns. However, regular printer paper cut into squares works perfectly fine for practice!
Pro tip: If using regular paper, try cutting it slightly smaller than standard origami paper (5.5″ instead of 6″) as it can be thicker and more challenging to fold precisely.
1. Simple Tulip
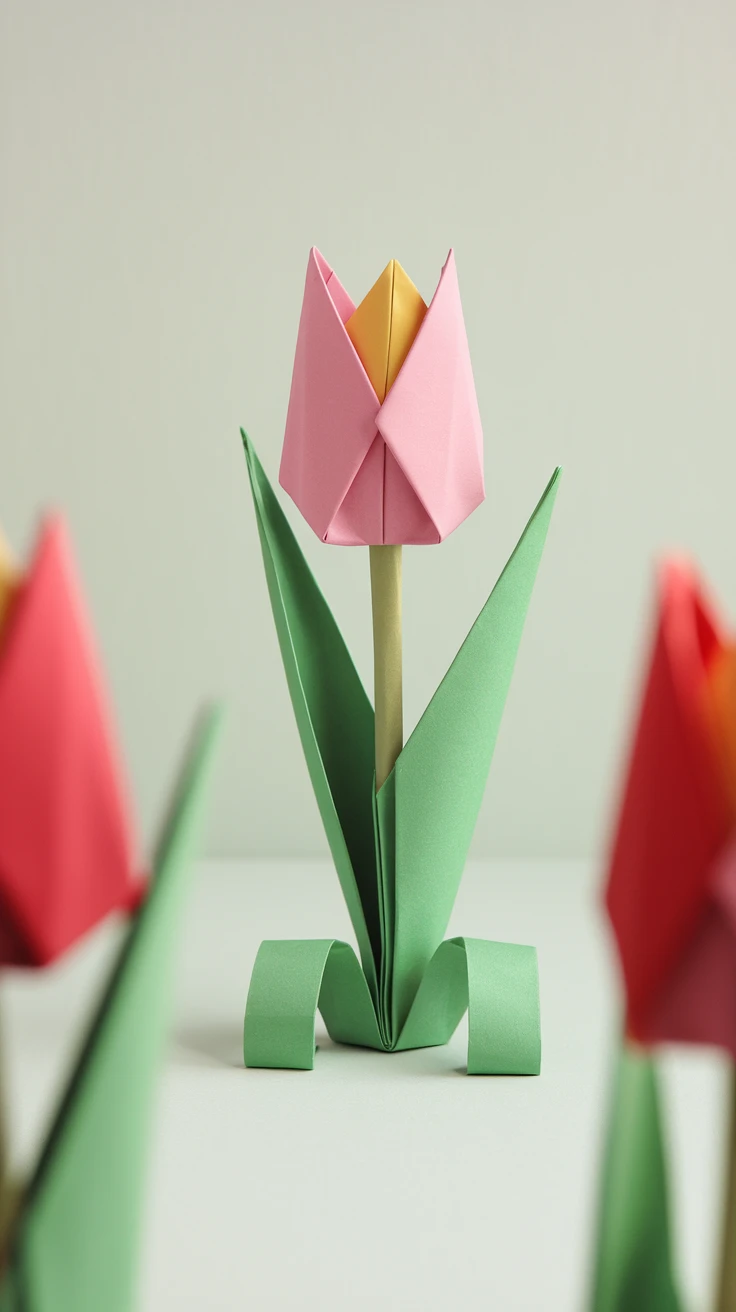
The tulip is one of the most recognizable spring flowers and makes a perfect Mother’s Day gift. This design uses just a few basic folds to create a remarkably realistic flower shape. I remember making these with my niece last year – she was amazed at how quickly she could create something so pretty.
Part 1: Origami Tulip Flower
- Start with a square paper (colored side down).
- Fold diagonally both ways to form an X. Unfold.
- Fold in half horizontally and vertically. Unfold.
- Collapse into a triangle base (bring corners together).
- With the closed point at the bottom, fold right and left corners to top point.
- Flip over and repeat on the other side.
- Tuck the right flap into the left flap. Flip and repeat.
- Blow into the hole at the base to inflate.
- Gently fold down petals to open the tulip.
Part 2: Stem and Leaves
- Use green paper. Fold in half diagonally.
- Unfold. Fold the left and right corners to the center line (kite shape).
- Fold vertically in half (flaps inside).
- Roll bottom edges up to create curled leaves.
- Insert a stick or roll a green strip for the stem.
- Attach flower by poking the stem into the base of tulip.
The beauty of the tulip design lies in its simplicity. Even first-time folders can create a recognizable flower, making it perfect for crafting with younger siblings or children who want to make something special for mom.

View on AmazonAs an Amazon Associate, I earn from qualifying purchases.

View on AmazonAs an Amazon Associate, I earn from qualifying purchases.
Pro tip: Create several tulips in different colors and arrange them in a small vase with green paper stems for a miniature bouquet that will brighten any room.
2. Traditional Origami Rose

The rose symbolizes love and appreciation, making it perfect for Mother’s Day. While slightly more complex than the tulip, this traditional design creates a stunning spiral bloom that looks impressively realistic.
Materials You’ll Need
- Colored paper (cardstock or craft paper)
- Pencil
- Scissors
- Glue (hot glue recommended)
- Optional: Quilling tool or toothpick
Step-by-Step Instructions
- 1. Draw a Circle: Use a cup or circle stencil to trace a circle on your paper (around 4–6 inches wide).
- 2. Create a Spiral: Inside the circle, draw a spiral that winds toward the center. Keep the width of the line about ½ inch thick.
- 3. Cut the Spiral: Carefully cut along the spiral line with scissors.
- 4. Start Rolling: Begin from the outside of the spiral and roll the paper inward tightly.
- 5. Loosen Slightly: Once fully rolled, let it loosen just a bit so it resembles a rose.
- 6. Secure the Base: Use glue to attach the rose to the center (the spiral’s end). Hold for a few seconds.
- 7. Shape the Petals: Gently curl the outer edges backward with your fingers or a pencil for a natural bloom look.
I’ve made dozens of these roses over the years, and they never fail to impress. The spiral pattern creates depth and dimension that makes the flower look much more complex than it actually is to fold. The first time I gave my mom an origami rose bouquet, she kept it displayed for months!
Pro tip: For a more realistic rose, use paper that’s red on one side and white on the other – this creates the effect of lighter inner petals when the rose is complete.
3. Elegant Lily
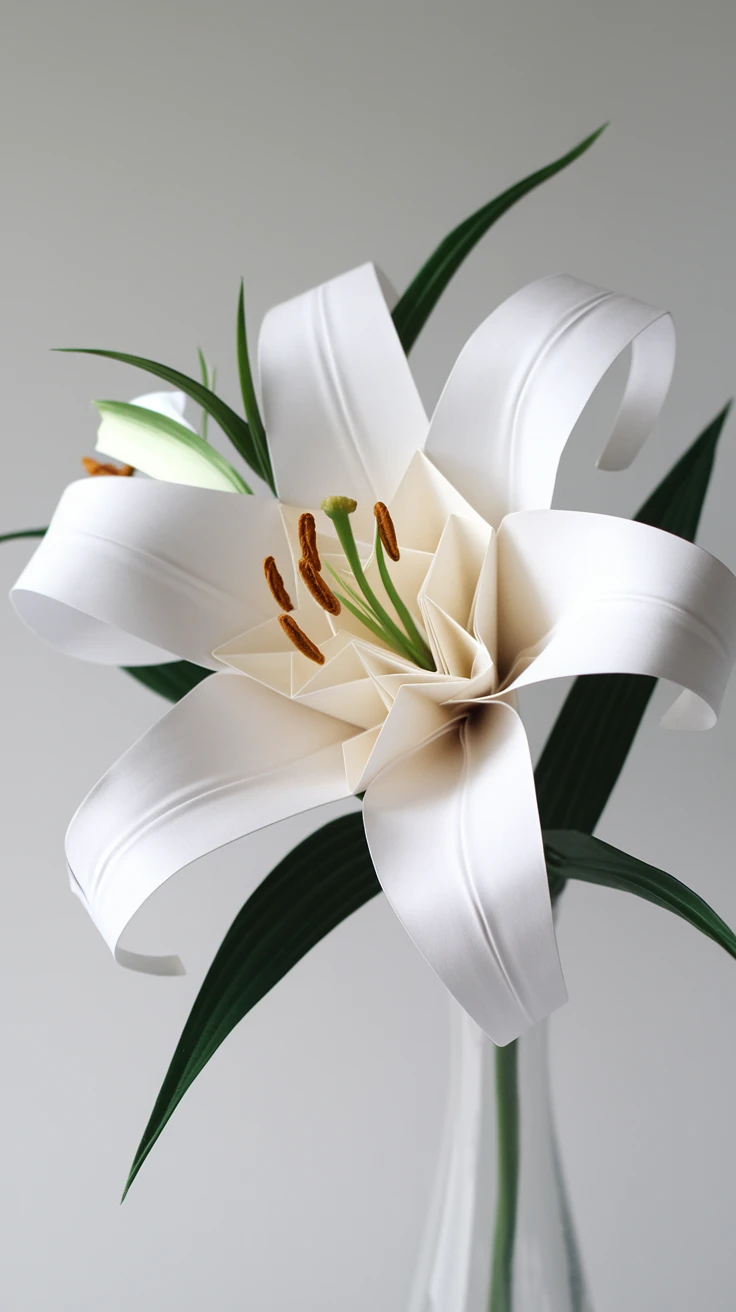
The lily represents purity and is a classic Mother’s Day flower. This origami version captures the elegant trumpet shape of real lilies and stands beautifully on its own or in a bouquet.
Materials You’ll Need
- White cardstock or craft paper
- Green paper for stem and leaves
- Pencil and ruler
- Scissors or craft knife
- Glue or glue stick
- Wooden skewer or floral wire (for stem)
- Orange or brown paper for stamens (optional)
Step-by-Step Instructions
- 1. Cut 6 Petals: Draw and cut 6 large lily-shaped petals from white cardstock. Each petal should be about 1 inch wide at the base, widening toward the tip.
- 2. Curl the Petals: Use a pencil to gently curl the edges of each petal outward, mimicking natural lily curves.
- 3. Make the Center Base: Roll a small cone shape from paper and glue to secure. This will be the base you attach the petals to.
- 4. Attach Petals: Glue 3 petals evenly spaced around the base. Then glue the remaining 3 in between those for a full bloom look.
- 5. Create Stamens: Cut thin strips of orange or brown paper and curl the tips. Glue them inside the center of the flower.
- 6. Make the Stem: Wrap green paper around a wooden stick or floral wire and secure with glue.
- 7. Add Leaves: Cut and curl two long green leaves and glue them near the base of the flower on the stem.
The lily was one of the first “advanced” origami flowers I learned to make. I was intimidated at first, but once I understood the petal-folding technique, it became one of my favorites. The finished flower has a wonderful 3D quality that catches light beautifully.

View on AmazonAs an Amazon Associate, I earn from qualifying purchases.

View on AmazonAs an Amazon Associate, I earn from qualifying purchases.
Pro tip: Add a touch of yellow marker to the center of white lilies to mimic the pollen-bearing stamens of real flowers – just be careful not to use too much!
4. Cheerful Sunflower
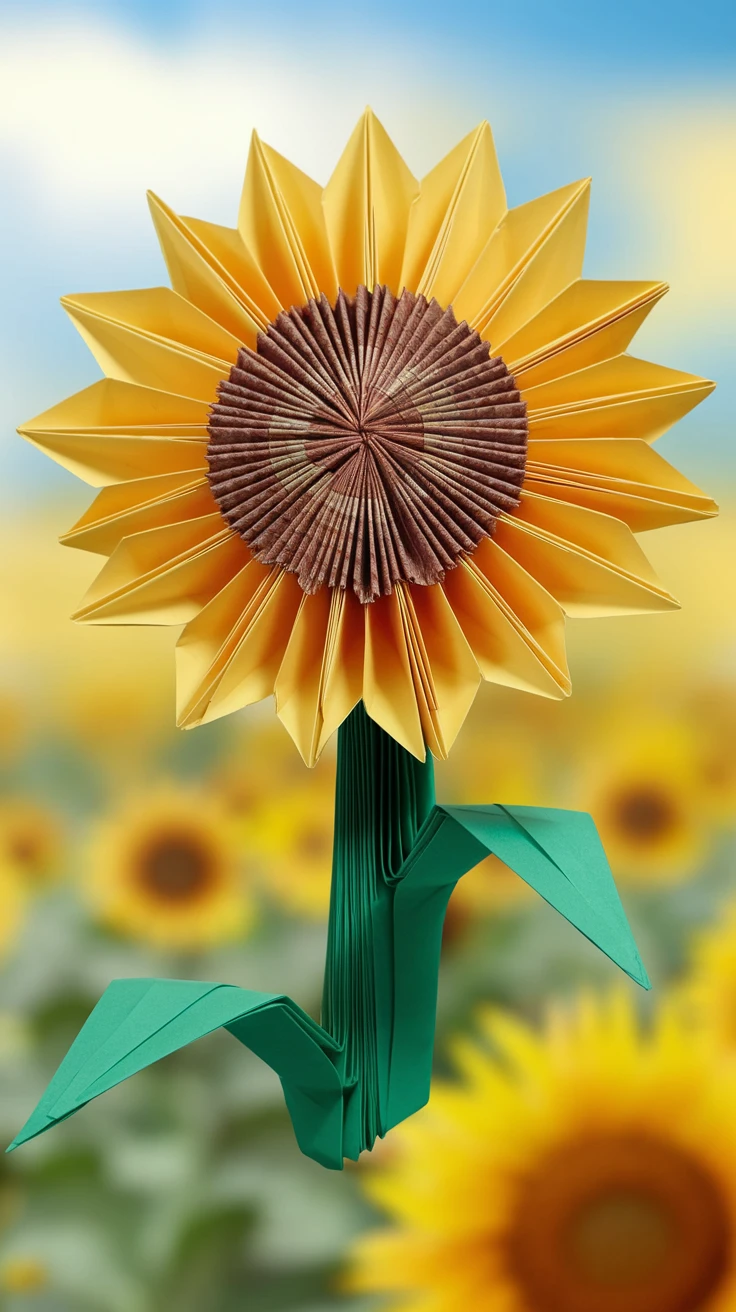
Bring a bit of sunshine to Mother’s Day with an origami sunflower. This bright, cheerful design uses simple folding techniques to create a recognizable sunflower shape complete with a textured center.
Materials You’ll Need
- Yellow origami paper (for petals)
- Brown paper or cupcake liner (for the flower center)
- Green origami paper (for stem and leaves)
- Glue or double-sided tape
- Scissors
- Pencil (for curling if needed)
Step-by-Step Instructions
- 1. Make the Petals: Fold several yellow paper strips into accordion-style pleats. Pinch the center and fan them out into pointed petals. Create 2–3 layers for fullness.
- 2. Create the Center: Take a brown cupcake liner or pleated paper strip and form it into a circle. Glue it to the middle of the petal structure.
- 3. Make the Stem: Roll or fold green paper tightly into a long, thick stem shape. You can accordion-fold for added dimension.
- 4. Add Leaves: Cut and fold two green leaves with angular points. Attach them near the base of the flower stem.
- 5. Assemble the Flower: Glue the flower head to the top of the stem and let it dry standing upright or with support.
Sunflowers always make me think of warmth and happiness – perfect sentiments for Mother’s Day. I’ve found that this design particularly impresses because of its size and recognizable shape, even though the folding process is quite straightforward.
Pro tip: Use two different shades of yellow paper to create a more dynamic, realistic sunflower with lighter outer petals and deeper yellow inner petals.
5. Delicate Cherry Blossom
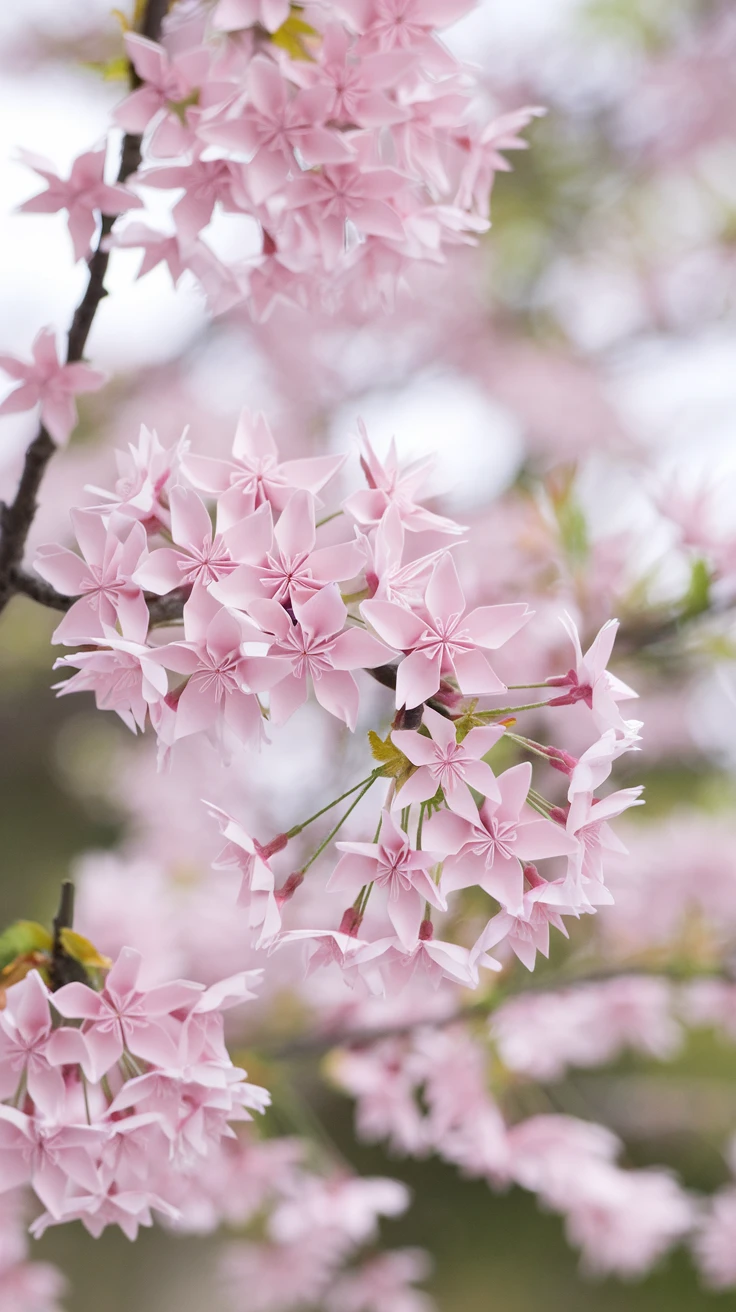
Cherry blossoms symbolize the beauty and fragility of life – a meaningful message for Mother’s Day. These small, delicate flowers can be created quickly and arranged in clusters for maximum impact.
Materials You’ll Need
- Light pink origami paper (square sheets)
- Brown or black pipe cleaner or paper (for branches)
- Glue (craft glue or hot glue)
- Scissors (optional, for shaping)
- Green paper (optional for leaves)
Step-by-Step Instructions
- 1. Start with a Square: Use a small pink square sheet (around 3×3 inches).
- 2. Fold into Triangle: Fold diagonally to form a triangle, then fold again to form a smaller triangle.
- 3. Shape the Petals: Fold the left and right corners upward. Cut the top into a rounded or pointed petal shape if desired.
- 4. Unfold: Carefully unfold to reveal a 5-petal blossom. Adjust creases to add volume.
- 5. Create More Flowers: Repeat the process to make multiple blossoms.
- 6. Build a Branch: Use pipe cleaners or paper strips as branches. Glue the blossoms along them to mimic natural cherry clusters.
- 7. Optional Leaves: Add tiny green origami leaves between blossoms for extra detail.
I love making origami cherry blossoms because they’re quick to fold and look stunning when grouped together. Last Mother’s Day, I created a small “branch” with several blossoms attached that my mom displayed on her desk at work.

View on AmazonAs an Amazon Associate, I earn from qualifying purchases.

View on AmazonAs an Amazon Associate, I earn from qualifying purchases.
Pro tip: Make a dozen small cherry blossoms and attach them to a real branch with small dots of glue for a stunning display that mimics a blooming cherry tree.
6. Kusudama Flower
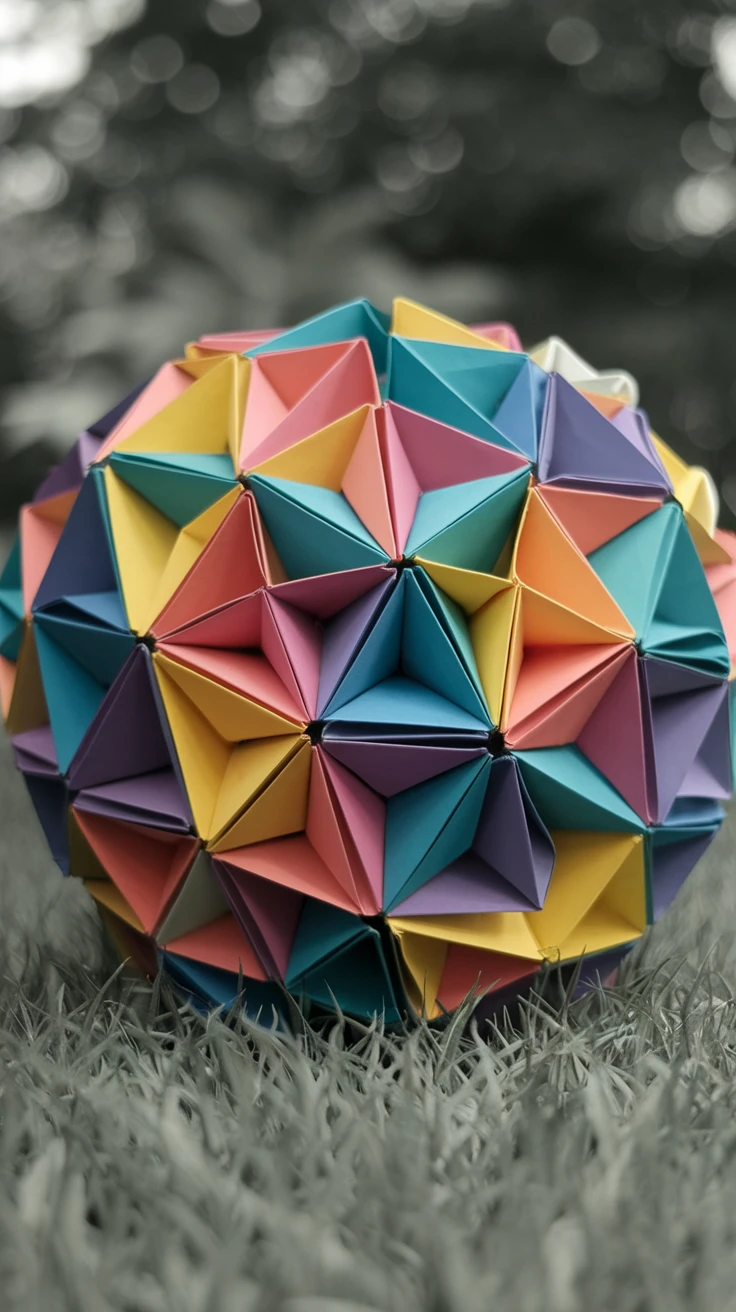
The Kusudama flower isn’t a traditional origami design but creates a stunning, geometric bloom perfect for Mother’s Day. It’s assembled from multiple identical units, making it a great project to work on over several short sessions.
Materials You’ll Need
- 30 to 60 square sheets of colorful origami paper (each unit uses 1 sheet)
- Glue (optional for extra hold)
- Patience and a flat surface for assembly
- Optional: string if hanging the ball
Step-by-Step Instructions
- 1. Fold One Unit: Start with a square piece of paper. Fold it into a triangle, then fold the corners inward to make a kite shape.
- 2. Tuck and Fold: Fold the side flaps inward to form a triangle with a center pocket. Flatten the folds well.
- 3. Make More Units: Repeat the same fold to create 30–60 identical triangular units.
- 4. Start Assembling: Connect 5 units to form a flower-like star. The tips tuck into the pockets of the adjacent unit.
- 5. Build the Sphere: Continue connecting the units by tucking corners into pockets. The ball should gradually curve into a 3D sphere.
- 6. Secure If Needed: Use a small dab of glue at connecting points to ensure stability, especially if hanging the piece.
- 7. Add Hanging Loop (Optional): Insert a string at the top before closing the last section if you’d like to hang your kusudama.
When I first tried making Kusudama flowers, I was intimidated by having to create and assemble multiple pieces. However, I quickly discovered that once you master folding one petal, you can easily create the remaining ones while watching TV or chatting. The assembly process is actually quite relaxing.
Pro tip: Create multiple Kusudama flowers and join them together to form a decorative ball that can be hung as a room decoration – a gift that keeps on giving!
7. Simple Iris
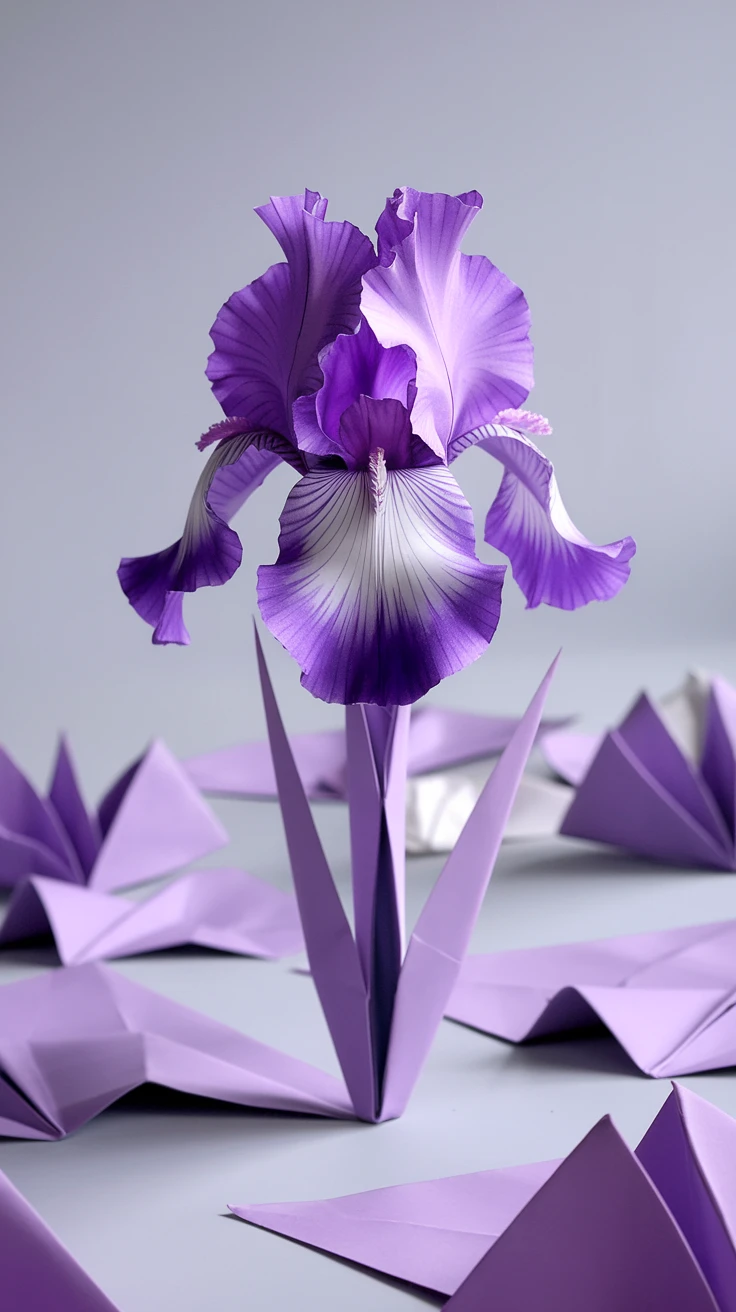
The iris represents wisdom and courage – wonderful qualities to celebrate in mothers. This origami version captures the distinctive shape of iris petals with relatively simple folds.
Materials You’ll Need
- Purple origami paper (square sheets)
- Green paper for stem and leaves
- Scissors (for petal shaping)
- Glue (recommended for assembly)
- Toothpick or pencil (for curling)
Step-by-Step Instructions
- 1. Create Petals: Start with 3 square sheets of purple paper. Fold each one diagonally, then fold sides to the center to form a kite. Open and curl the top edges slightly for a ruffled look.
- 2. Layer the Petals: Overlap 3 to 6 petals together, gluing at the base to form the iris’s bloom. Shape the upper petals to stand upright and the outer ones to curve down.
- 3. Make the Center: Roll a thin strip of purple paper and insert it into the center of the bloom to mimic the inner folds.
- 4. Form the Stem: Roll a green paper strip into a tube and secure with glue. Flatten one end slightly to attach the flower.
- 5. Add Leaves: Fold 2 or 3 long triangle shapes from green paper. Attach them near the base of the stem to finish the iris look.
I’ve always loved the unique shape of iris flowers, and the origami version manages to capture this distinctive form surprisingly well. The first time I made one, I was delighted by how recognizable it was, even with just paper and a few strategic folds.

View on AmazonAs an Amazon Associate, I earn from qualifying purchases.

View on AmazonAs an Amazon Associate, I earn from qualifying purchases.
Pro tip: Use two-toned origami paper with purple on one side and white on the other to create more dynamic, realistic-looking iris petals that mimic the color variations in natural irises.
8. Carnation
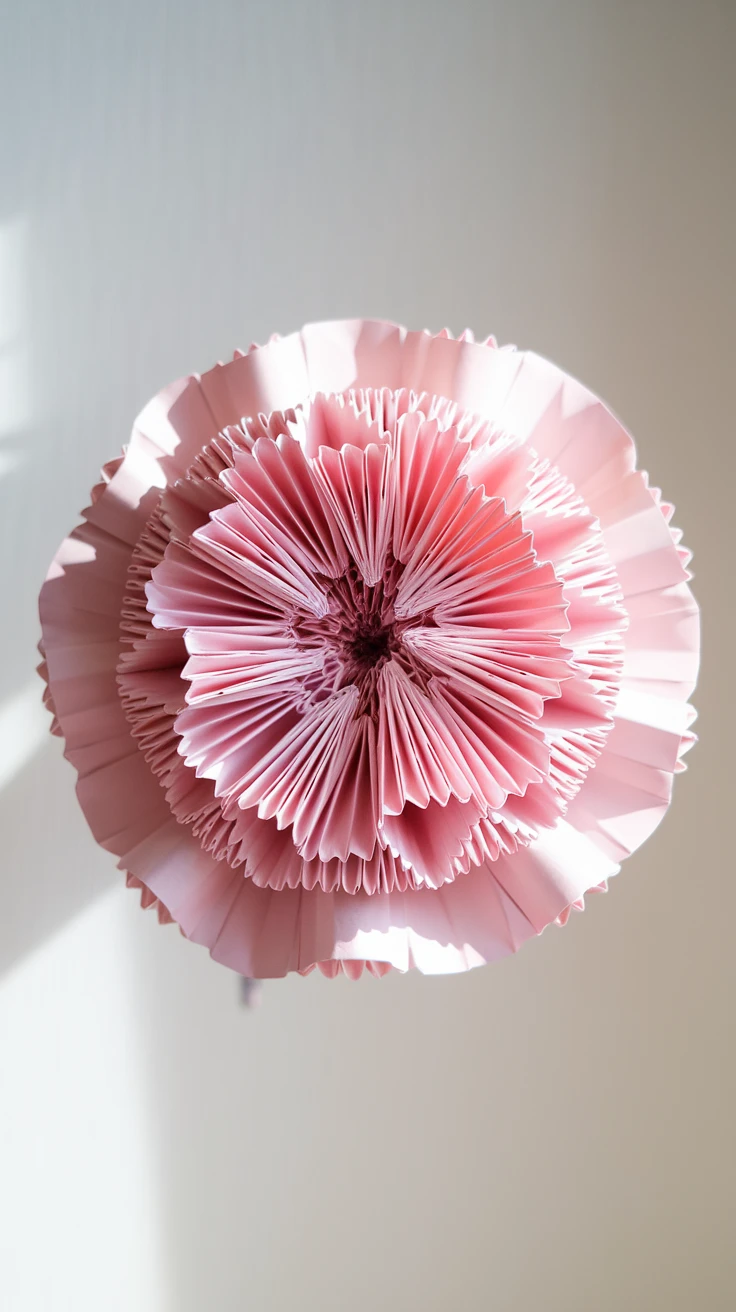
Carnations are traditional Mother’s Day flowers in many cultures, representing love and fascination. The origami version creates a full, ruffled bloom that looks impressively like the real thing.
Materials You’ll Need
- Pink paper (lightweight like printer paper or tissue paper)
- Scissors
- Glue or double-sided tape
- Stapler (optional for securing folds)
- Green paper or floral wire (for stem)
Step-by-Step Instructions
- 1. Cut Strips: Cut multiple strips of pink paper (e.g., 1.5″ x 8″) for each layer of the flower. Use wider strips for outer layers and thinner ones for the center.
- 2. Accordion Fold: Fold each strip back and forth into even accordion pleats.
- 3. Secure the Center: Staple or glue the center of the folded strip. You can also pinch and tie with thread or wire.
- 4. Fan Out the Petals: Carefully spread and fluff each folded section into a circle. Repeat for 3–5 layers.
- 5. Stack the Layers: Glue smaller circles on top of larger ones, aligning the centers. Fluff and curl the edges for a fuller look.
- 6. Add the Stem: Insert a wrapped green floral wire or rolled green paper into the base and glue it in place.
The first time I attempted an origami carnation, I was surprised by how the simple technique of creating multiple folds could result in such a textured, realistic-looking flower. The finished product has a wonderful fullness that makes it stand out in any arrangement.
Pro tip: After completing the basic fold, gently separate and fluff the layers of paper to create a fuller, more natural-looking carnation with more defined ruffles.
9. Lotus Flower
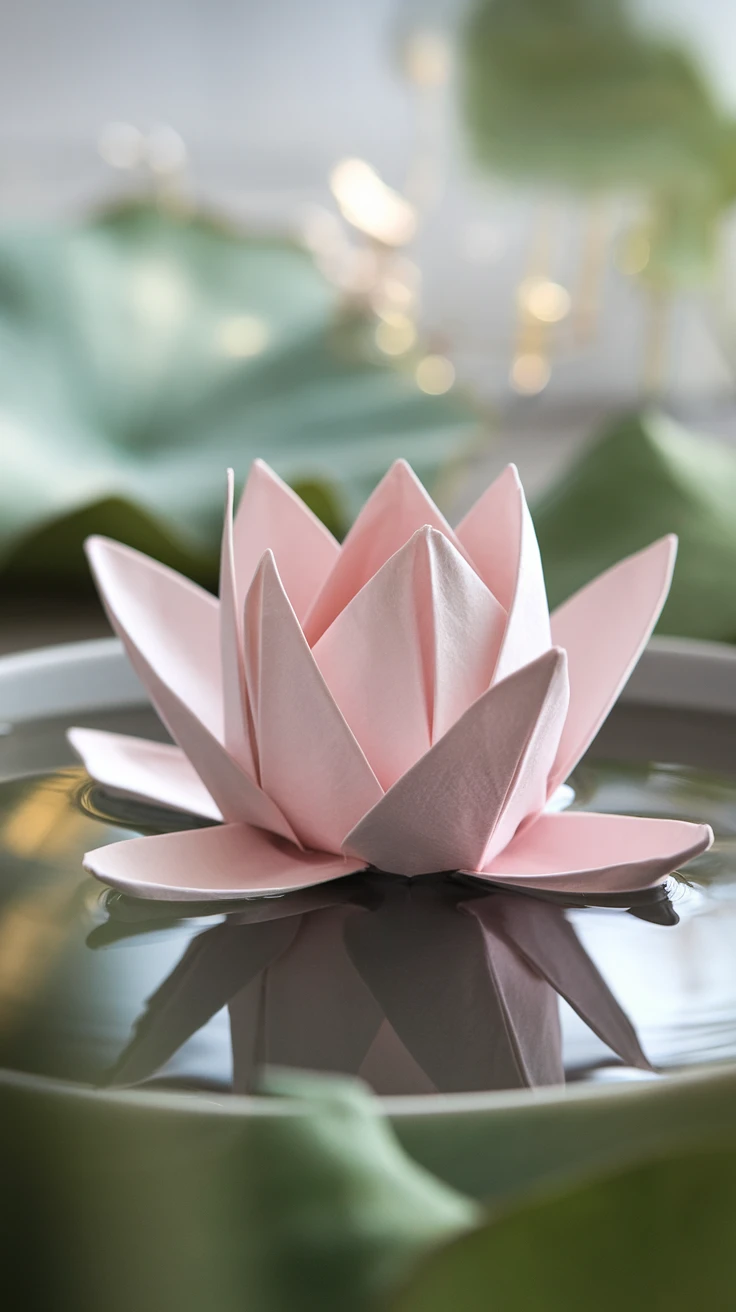
The lotus symbolizes purity and enlightenment across many cultures. This origami version creates a beautiful bloom that opens and closes – adding an interactive element to your Mother’s Day gift.
Materials You’ll Need
- One square sheet of soft or tissue-like origami paper (preferably pink)
- Optional: green paper for a base or leaf layer
- Flat surface to fold on
- Patience for precise folds
Step-by-Step Instructions
- 1. Start with the Colored Side Down: Fold the square in half vertically and horizontally, then unfold.
- 2. Fold Corners to Center: Bring all four corners into the center point. This creates a smaller square.
- 3. Repeat the Fold: Fold the new corners into the center again.
- 4. One More Time: Fold the corners into the center for a third time to build layered folds.
- 5. Flip and Fold Back Corners: Flip the model over and fold all four corners to the center one final time.
- 6. Unfold Petals: Gently pull out the layers one by one from underneath to create the lotus petals, starting with the innermost ones.
- 7. Adjust the Shape: Fluff and space out the petals as needed to create a symmetrical lotus blossom.
I remember the delight on my mother’s face when I showed her how the origami lotus I’d made could actually open and close like a real flower. It’s this interactive quality that makes the lotus such a special origami creation – it’s not just beautiful to look at but also fun to play with.

View on AmazonAs an Amazon Associate, I earn from qualifying purchases.

View on AmazonAs an Amazon Associate, I earn from qualifying purchases.
Pro tip: Place your completed lotus in a shallow dish of water and watch as it slowly opens – a magical demonstration that will impress any mom on Mother’s Day!
10. Daisy
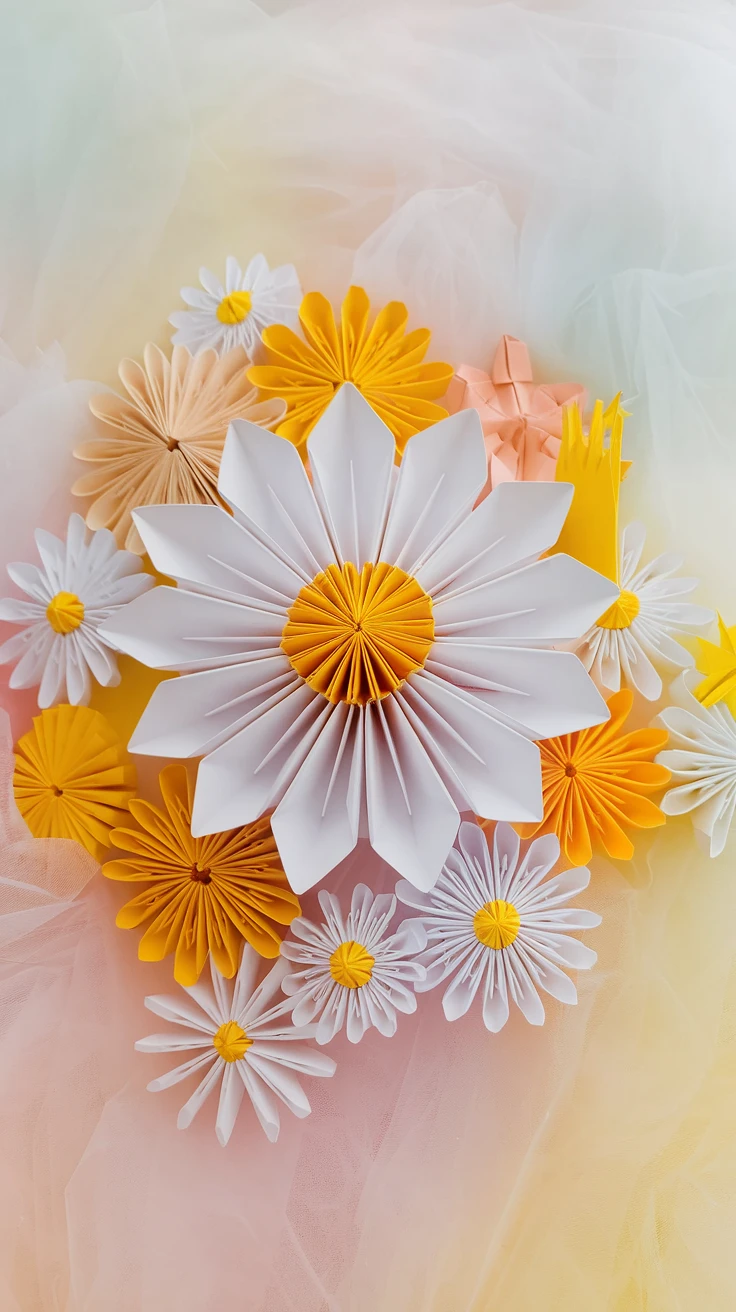
Daisies represent innocence and purity, making them a sweet choice for Mother’s Day. This simple origami version creates a cheerful flower with minimal folding techniques.
Materials You’ll Need
- White paper (for petals)
- Yellow or orange paper (for flower centers)
- Scissors
- Glue or double-sided tape
- Ruler (optional for measuring fold segments)
Step-by-Step Instructions
- 1. Create Petal Folds: Cut a strip of white paper (about 1.5–2 inches tall). Accordion fold it into small even segments.
- 2. Form a Fan: Once folded, connect the two ends with glue to make a circular fan shape.
- 3. Add Center: Cut a small yellow circle or accordion-folded strip to form a rounded center. Glue it to the middle of the daisy fan.
- 4. Shape the Petals: You can trim the edges of the fan to make the petals pointed, rounded, or notched for variation.
- 5. Make More Variations: Repeat the steps using different paper widths and colors to create a bouquet of layered daisies.
- 6. Optional Assembly: Arrange them into a wall display, bouquet, or gift topper using tape or hot glue.
Daisies were the first origami flowers I ever learned to make, and they remain a favorite due to their simplicity and charm. They’re perfect for beginners or for making with children who want to create something special for Mother’s Day but might get frustrated with more complex designs.
Pro tip: Create a bouquet of daisies in different sizes by starting with different-sized squares of paper – the varying scales create visual interest in the final arrangement.
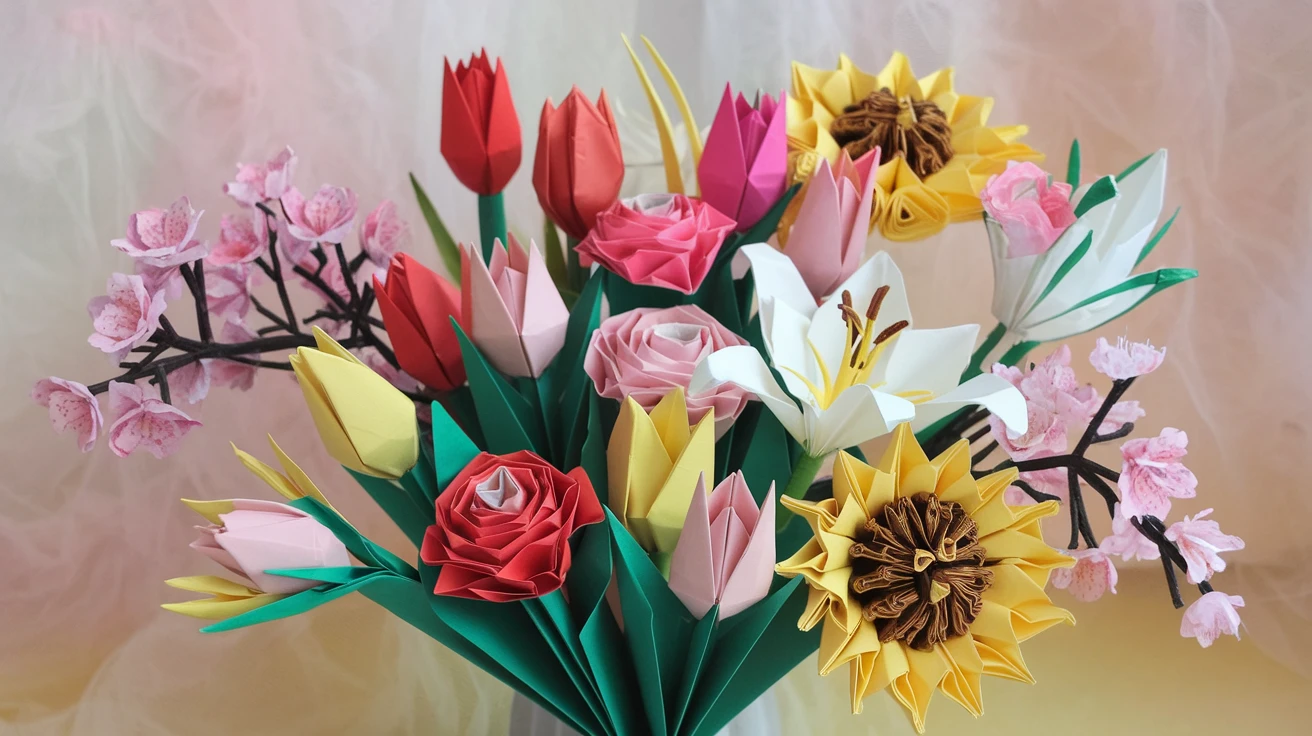
Creative Ways to Present Your Origami Mothers Day Flowers
Once you’ve created your beautiful origami flowers, presentation is key to making them a memorable gift. Here are some creative ways to display your paper blooms:
- Arrange in a small vase with paper or wire stems
- Create a flower crown or wreath
- Attach to a greeting card for a 3D effect
- Make a bouquet wrapped in decorative paper
- Create a shadow box display with multiple flower types
- Incorporate into a larger gift basket
I’ve found that taking the extra time to present origami flowers beautifully makes them even more special. One year, I created a “bouquet” of mixed origami flowers, wrapped the stems in floral tape, and tied them with a ribbon – my mom thought they were store-bought at first glance!
Pro tip: Include a small card explaining the symbolic meaning behind each flower type you’ve created – this adds an extra layer of thoughtfulness to your handmade gift.
Conclusion
Origami mothers day flowers offer a unique, personal way to show appreciation that lasts far longer than traditional bouquets. From the simple tulip to the elegant lotus, these paper creations carry the added value of your time and effort – something every mother treasures. Whether you’re an experienced folder or trying origami for the first time, there’s a flower on this list that’s perfect for your skill level.
Remember, the most meaningful gifts come from the heart. As someone who has both given and received origami flowers, I can attest that these paper blooms carry special significance precisely because they aren’t store-bought. They represent patience, creativity, and thoughtfulness – qualities that mothers everywhere appreciate and nurture.
So gather your paper, find a quiet moment, and start folding. The origami mothers day flowers you create will bring joy long after Mother’s Day has passed, serving as a lasting reminder of your love and appreciation.
