Top 10 Seasonal Pressed Flower Décor Projects

Top 10 Seasonal Pressed Flower D�cor Projects

Seasonal flower décor projects offer a charming way to bring the beauty of nature into our homes. With the changing seasons, each brings its own unique palette of colors and textures. As someone who’s spent countless weekends knee-deep in flower petals, I can tell you that creating pressed flower projects is not only therapeutic but also incredibly rewarding. 

It’s like capturing a moment in time and preserving it in a frame. In this article, we will explore the top 10 seasonal pressed flower décor projects that you can try out. Each project is designed to highlight the beauty of the season’s blooms, allowing you to enjoy them year-round.

1. Spring: Wildflower Wall Art

Spring is the perfect time to embrace renewal and creativity, and nothing captures the season’s beauty better than wildflower wall art. By transforming vibrant blooms into a stunning piece of décor, you can bring the fresh energy of spring into your home. 

I still chuckle at my first attempt—let’s just say I was a little too enthusiastic with the glue, and my masterpiece turned into a sticky disaster. The takeaway? Less is more, especially when working with delicate flowers.

Here’s a simple guide to help you create your own wildflower wall art:

Steps to Create Wildflower Wall Art

  1. Gather Wildflowers
    Choose a variety of wildflowers in different colors and shapes. Look for blooms that are naturally flat and vibrant, such as daisies, buttercups, or Queen Anne’s lace.

  2. Press the Flowers
    Place the flowers between sheets of parchment or wax paper. Then, tuck them inside a heavy book and weigh it down with additional books or weights. Let them dry for 2–4 weeks for the best results.

  3. Plan Your Arrangement
    Before gluing, experiment with different arrangements on a canvas, inside a frame, or on sturdy cardstock. Play around with layering, spacing, and patterns to find a layout you love.

  4. Glue the Flowers
    Use a minimal amount of clear-drying glue or adhesive dots to secure the flowers. Apply the glue sparingly on the back of each flower and press gently onto your surface. Too much glue can seep out and damage the delicate petals.

  5. Seal and Protect (Optional)
    If you want extra durability, consider sealing your piece with a clear protective spray or placing it behind glass in a frame to keep it safe from dust and moisture.

Materials Needed

ItemDescription
WildflowersChoose flowers with thin petals for best results.
Parchment PaperUsed to press the flowers.
Heavy BookFor pressing the flowers.
Canvas or FrameTo display your art.
Clear-drying GlueSecures the flowers in place.

This project not only adds a touch of nature to your decor but also lets you channel the energy of spring into something uniquely yours. Trust me—once you’ve created your first piece, you’ll want to make one for every room!

2. Summer: Sunflower Suncatchers

Summer is synonymous with sunshine, and nothing embodies that golden glow quite like sunflowers. Incorporating their vibrant petals into a craft project is a great way to capture the season’s warmth. I still remember making a sunflower suncatcher for my kitchen window—it was such a simple project, but every morning it felt like waking up to my own little slice of summer. Whether you’re looking to brighten up a room or add a cheerful touch to your home, this project is the perfect fit.

Steps to Create Sunflower Suncatchers

  1. Press the Sunflower Petals
    Start by gently removing petals from fresh sunflowers. Place them between sheets of wax paper and press them inside a heavy book for 1–2 weeks. For best results, add extra weight on top to ensure the petals dry flat.

  2. Cut the Shapes
    Once the petals are dry, cut them into shapes that speak to you—classic circles, playful hearts, or even abstract designs. Use a stencil or freehand your creations for a personalized touch.

  3. Laminate or Use Contact Paper
    Arrange the pressed petals on one side of a laminating sheet or a piece of contact paper. Carefully seal them with a second layer, ensuring no air bubbles trap the petals. This step preserves their vibrant colors and prevents damage.

  4. Hang Them in a Window
    Punch a small hole at the top of each suncatcher and thread a string or fishing line through it. Hang them in a sunny window where the light can shine through, illuminating the golden petals and creating a warm, cheerful glow.

Materials Needed

ItemDescription
Sunflower PetalsBright and vibrant petals work best.
Wax PaperFor pressing the petals.
ScissorsTo cut shapes.
Laminator or Contact PaperTo preserve the shapes.
StringTo hang the suncatchers.

3. Autumn: Leaf and Petal Coasters

Autumn brings a rich tapestry of colors, and making coasters from leaves and petals is a great way to capture that. My first attempt was a bit of a disaster because I forgot to seal the coasters, resulting in coffee-stained leaves. Always remember to seal!

Steps to Create Leaf and Petal Coasters

  • Collect colorful autumn leaves and petals.
  • Press them using the same method as wildflowers.
  • Arrange them on cork or wood coasters.
  • Seal with clear resin or a sealant spray.

Materials Needed

ItemDescription
Autumn Leaves and PetalsChoose vibrant, colorful ones.
Cork or Wood CoastersAs a base for your project.
Clear Resin or Sealant SprayTo protect and preserve the coasters.

4. Winter: Poinsettia Ornaments

Winter is synonymous with festive cheer, and poinsettias are a staple in holiday décor. A few years ago, I made poinsettia ornaments that quickly became a family favorite. They add a touch of elegance to the Christmas tree and are surprisingly easy to make.

Steps to Create Poinsettia Ornaments

  • Press poinsettia petals and leaves.
  • Use clear glass or plastic ornament balls.
  • Carefully insert petals into the ornament.
  • Seal the top and hang on the tree.

Materials Needed

ItemDescription
Poinsettia Petals and LeavesChoose healthy, vibrant leaves.
Clear Ornament BallsGlass or plastic works well.
RibbonFor hanging the ornaments.

5. Year-Round: Personalized Greeting Cards

Pressed flowers can add a personal touch to greeting cards for any occasion. My friends and family always appreciate the extra effort, and it’s a project that allows endless creativity. You can tailor each card to the recipient’s favorite colors and flowers.

Steps to Create Personalized Greeting Cards

  • Select your favorite flowers and press them.
  • Choose card stock in complementary colors.
  • Arrange the flowers on the card and glue them down.
  • Write a personal message inside.

Materials Needed

ItemDescription
Pressed FlowersChoose a variety for different cards.
Card StockAvailable in various colors and textures.
Clear-drying GlueTo attach flowers to the card.

6. Spring: Floral Bookmarks

If you’re a book lover like me, having a beautiful bookmark can make the reading experience even better. Spring flowers make perfect bookmarks that are both functional and decorative. I once gave these as gifts to my book club, and they were a huge hit!

Steps to Create Floral Bookmarks

  • Press small, flat flowers like violets or daisies.
  • Cut cardstock or thick paper into bookmark-sized strips.
  • Arrange flowers on the strip and laminate or cover with contact paper.
  • Add a tassel to the top for a finished look.

Materials Needed

ItemDescription
Small Flat FlowersSuch as violets or daisies.
Cardstock or Thick PaperFor the base of the bookmark.
Laminator or Contact PaperTo protect the bookmark.
TasselOptional, for decoration.

7. Summer: Floral Resin Jewelry

Turn your summer blooms into unique pieces of jewelry with resin. I made a pair of earrings with pressed lavender once, and they were a showstopper. It’s a fun way to wear your favorite flowers and make a fashion statement.

Steps to Create Floral Resin Jewelry

  • Press small flowers like lavender or forget-me-nots.
  • Place flowers in resin molds of your choice (earrings, pendants, etc.).
  • Pour resin over the flowers and let it cure.
  • Attach jewelry findings to complete the pieces.

Materials Needed

ItemDescription
Pressed FlowersChoose small, delicate blooms.
Resin MoldsAvailable in various shapes and sizes.
ResinClear resin works best for this project.
Jewelry FindingsLike earring hooks or pendant chains.

8. Autumn: Framed Botanical Prints

Capture the essence of autumn with framed botanical prints. This project adds a touch of elegance to any space and makes use of the season’s natural beauty. I’ve got a few hanging in my hallway, and they never fail to get compliments from guests.

Steps to Create Framed Botanical Prints

  • Collect a variety of autumn leaves and flowers.
  • Press them between sheets of parchment paper.
  • Arrange them on a piece of cardstock or watercolor paper.
  • Frame the piece in a shadow box or glass frame.

Materials Needed

ItemDescription
Autumn Leaves and FlowersChoose different shapes and colors.
Cardstock or Watercolor PaperFor the background.
Shadow Box or Glass FrameTo display your print.

9. Winter: Pressed Flower Candles

Pressed flower candles can add a cozy, romantic feel to winter evenings. I made a set last holiday season, and they were the perfect addition to my mantle. Plus, they make wonderful gifts!

Steps to Create Pressed Flower Candles

  • Press small flowers like baby’s breath or ferns.
  • Apply a thin layer of melted wax on the candle surface.
  • Press flowers into the wax and add another layer to seal them.
  • Let the candles cool and set.

Materials Needed

ItemDescription
Pressed FlowersChoose small, flat flowers.
Plain CandlesPillar candles work well.
WaxFor sealing the flowers.

10. Year-Round: Floral Phone Case

Turn your phone into a work of art with a pressed flower phone case. I made one for myself, and it quickly became a conversation starter. The best part? Each case is completely unique.

Steps to Create a Floral Phone Case

  • Press flowers that fit the size of your phone case.
  • Arrange them on a clear phone case.
  • Seal with a clear layer of resin or a protective sealant.
  • Let it cure completely before use.

Materials Needed

ItemDescription
Pressed FlowersChoose flowers that complement your style.
Clear Phone CaseAvailable for various phone models.
Resin or Protective SealantTo secure and protect the flowers.

Conclusion

Pressed flower décor projects are a beautiful way to celebrate the changing seasons. They allow us to preserve the fleeting beauty of nature and enjoy it in our everyday lives. Whether you’re a seasoned crafter or a beginner, there’s something incredibly rewarding about transforming simple blooms into lasting works of art. So gather your flowers, pick a project, and dive into the world of floral creativity. Happy crafting!

Key Takeaways

  • Pressed flowers add a unique, personal touch to home décor.
  • Each season offers different flowers that can be used in a variety of projects.
  • Experimentation is key; don’t be afraid to try new things.
  • Proper sealing and preservation ensure that your creations last.

FAQ

What are pressed flowers?

Pressed flowers are natural blooms that you flatten and dry to preserve their intricate details, vibrant colors, and delicate textures. This process captures the beauty of flowers long after they bloom, making them perfect for decorative projects, keepsakes, and personalized gifts. Many people use pressed flowers in crafts like scrapbooking, framing, or card-making to add a timeless and sentimental touch.

How do I press flowers?

To press flowers, place them between absorbent sheets like parchment or blotting paper. Sandwich the sheets in a heavy book or a specialized flower press. For the best results, flatten and dry the flowers before pressing, since excess moisture can cause discoloration or mold. Stack additional books or weights on top to create even pressure. Leave the flowers untouched for at least 2–4 weeks to let them dry completely. If you want faster results, try using a microwave flower press, though traditional methods often give more vivid and natural colors.

Can I use any flower for pressing?

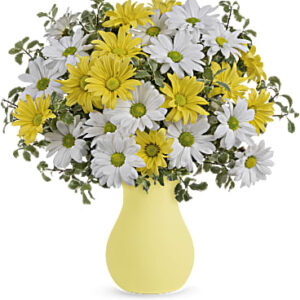
You can press many flowers, but not all work equally well. Thin-petaled flowers, like pansies, violets, or daisies, dry evenly and hold their shape beautifully. Bulky flowers like roses or peonies pose more challenges because their thick petals retain moisture and dry unevenly. If you want to press larger flowers, separate their petals and press them individually for better results.

How long do pressed flowers last?

Properly preserved and stored pressed flowers can last for many years. Keep them out of direct sunlight, high humidity, and temperature fluctuations to prevent fading or damage. Store them in airtight frames, between acid-free paper, or in sealed craft projects to maintain their vibrancy and structure. By taking care of your pressed flowers, you can preserve them as cherished mementos that stay beautiful over time.

Can I use pressed flowers outdoors?

Pressed flowers don’t withstand outdoor conditions well. Rain, wind, sunlight, or extreme temperatures can quickly damage their color and structure. Instead, use them for indoor crafts or decorations, where you can protect them from harsh conditions. Display them in glass frames, shadow boxes, or resin to shield them while showing off their beauty.

Top 10 Seasonal Pressed Flower D�cor Projects