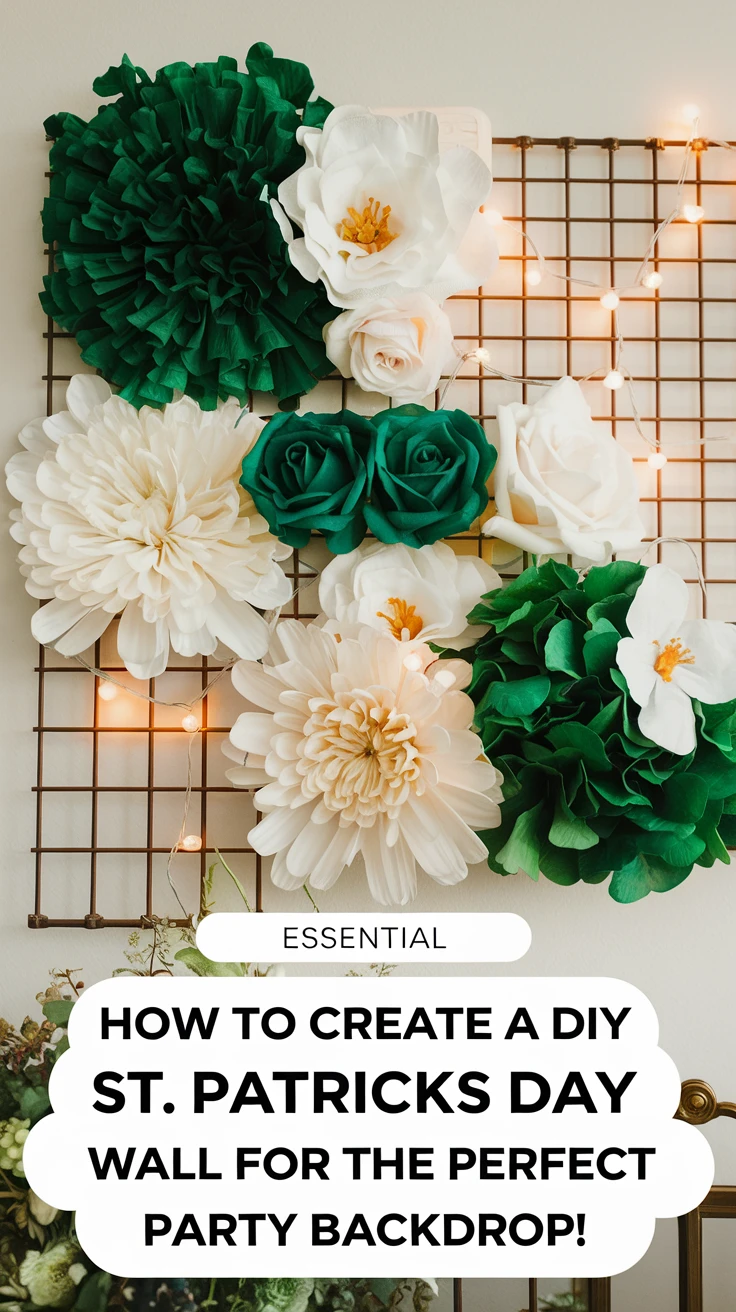
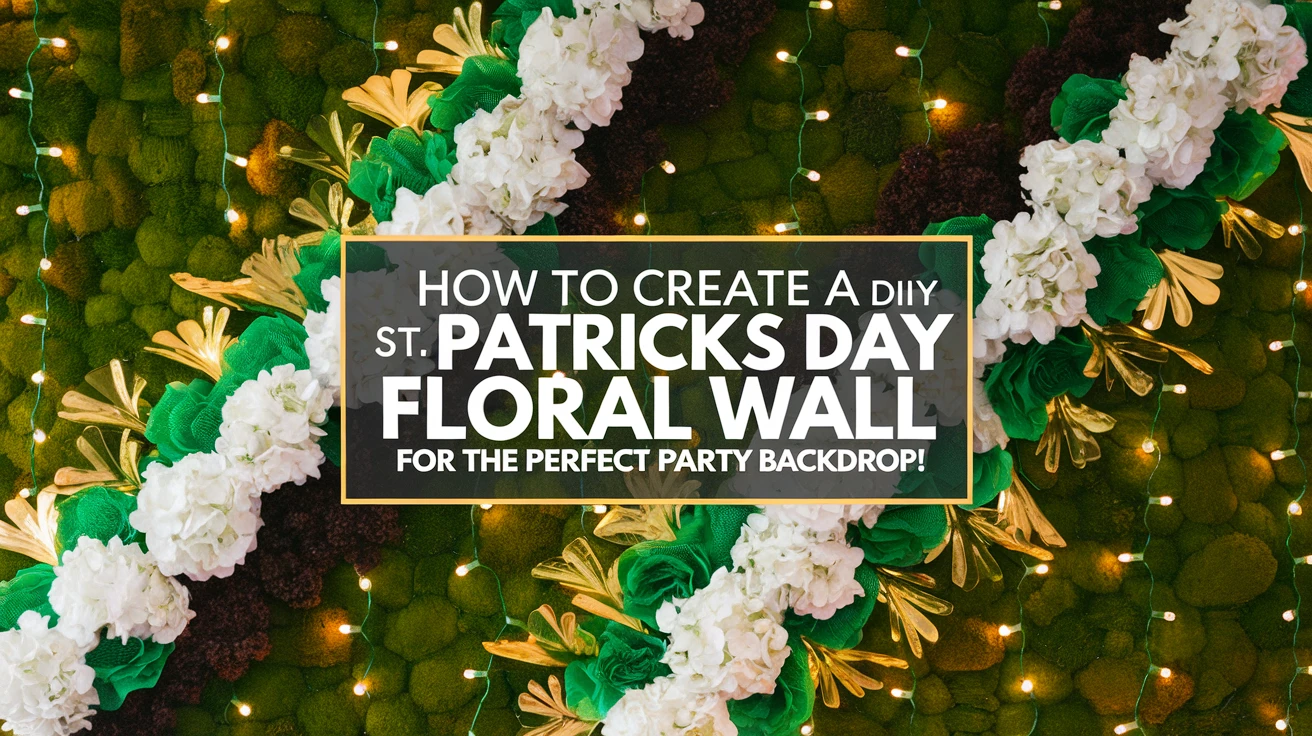
Creating a stunning St. Patrick’s Day flower wall isn’t just about throwing together some green blooms and calling it a day. As someone who’s designed dozens of themed flower walls for various events, I can tell you that the magic lies in the details. A well-crafted flower wall can transform any space into an Instagram-worthy backdrop that’ll have your guests reaching for their phones before they even grab their first green beer. Whether you’re planning a St. Patrick’s Day party at home or organizing a larger event, this guide will walk you through everything you need to know to create a show-stopping floral display that captures the spirit of the holiday while maintaining an elegant aesthetic.
Essential Materials for Your St. Patrick’s Day Flower Wall
Before diving into construction, let’s gather all the necessary materials. From my experience, having everything ready beforehand saves countless trips to the craft store and prevents last-minute panic.
Base Materials
| Item | Quantity | Purpose |
|---|---|---|
| Grid wall panels | 2-4 panels | Main structure support |
| Cable ties | 100-200 pieces | Securing flowers and panels |
| Command hooks | 8-12 pieces | Wall mounting |
Floral Elements
– Artificial green roses (3-4 dozen)
– White hydrangeas (2-3 dozen)
– Artificial shamrock garlands (5-6 pieces)
– Green moss sheets (4-5 pieces)
– Gold metallic flowers (1-2 dozen for accent)
Additional Decorative Items
– LED string lights (2-3 sets)
– Gold ribbon (2-3 rolls)
– Metallic shamrock cutouts (20-30 pieces)
– Green tulle fabric (3-4 yards)
Pro tip: I’ve found that mixing different shades of green creates depth and prevents the wall from looking flat. Don’t be afraid to incorporate various textures and materials!
Step-by-Step Construction Guide
Phase 1: Foundation Setup
1. Measure your space carefully (I once made the mistake of building a wall too large for the room!)
2. Connect grid panels using cable ties
3. Secure the structure to the wall using command hooks
4. Test stability before adding decorations
Phase 2: Base Layer Application
| Layer | Material | Coverage Tips |
|---|---|---|
| First | Green moss sheets | Cover 100% of grid |
| Second | Tulle fabric | Create depth with gentle waves |
| Third | LED lights | Weave between layers |
Phase 3: Floral Arrangement
– Start from the corners and work your way in
– Alternate between different types of flowers
– Create clusters of 3-5 flowers for visual impact
– Integrate shamrock garlands in flowing patterns
Remember: I learned the hard way that spacing is crucial – leave enough room between elements to prevent overcrowding!
Design Elements and Theme Integration
Creating a cohesive St. Patrick’s Day theme requires careful attention to color balance and symbolic elements. Here’s what I’ve learned works best:
Color Palette Guidelines
– Primary green shades (40% of design)
– White accents (30% of design)
– Gold highlights (20% of design)
– Deep emerald touches (10% of design)
Traditional Elements to Include
– Shamrocks strategically placed throughout
– Celtic knot patterns using ribbon
– Lucky horseshoes as accent pieces
– Small leprechaun hats or pots of gold in corners
Modern Twists
– Metallic spray-painted elements
– Incorporated LED color-changing lights
– Mixed traditional and contemporary flowers
– Added subtle glitter elements
One mistake I made early on was going too traditional – don’t be afraid to mix modern elements with classic St. Patrick’s Day symbols for a fresh take!
Common Mistakes to Avoid
After creating numerous flower walls, I’ve identified several pitfalls that can impact your final result:
Construction Mistakes
– Using weak attachment methods
– Overcrowding the wall with too many elements
– Neglecting proper support structure
– Forgetting to leave space for photography
Design Mistakes
– Using only one shade of green
– Improper lighting placement
– Uneven distribution of elements
– Focusing too much on one area
Planning Mistakes
– Underestimating setup time
– Not having backup materials
– Failing to consider the venue’s restrictions
– Overlooking proper storage solutions
Conclusion
Creating a St. Patrick’s Day flower wall is an exciting project that combines creativity with technical skill. Through my experiences, I’ve learned that success lies in careful planning, attention to detail, and a willingness to adapt when things don’t go as planned. Remember, your flower wall doesn’t need to be perfect – it needs to be memorable and capture the spirit of the holiday. With these guidelines and tips, you’re well-equipped to create a stunning backdrop that will make your St. Patrick’s Day celebration truly special.
Key Takeaways
- Proper planning and material gathering is crucial for successful execution
- Mixing different shades of green and various textures creates visual depth
- Balance traditional elements with modern touches for contemporary appeal
- Consider lighting and photography angles in your design
- Allow enough time for setup and have backup materials ready
Frequently Asked Questions
How long does it take to create a St. Patrick’s Day flower wall?
Typically, it takes 4-6 hours for initial setup, depending on the size and complexity of your design. I recommend starting the day before your event.
What’s the average cost for materials?
A basic 8×8 foot flower wall usually costs between $200-$400, but costs can vary based on material quality and design complexity.
Can I reuse the materials for other events?
Yes! Most materials can be carefully stored and repurposed for other holidays or events with different color schemes and themes.
How do I prevent the flowers from falling off?
Use a combination of cable ties and hot glue for secure attachment, and always double-check connections before the event.
What’s the best lighting for photos?
LED string lights incorporated into the wall, plus external lighting at 45-degree angles, provide the best illumination for photos.
How do I transport the wall if I need to move it?
Build the wall in sections that can be easily transported and assembled on-site. Label all pieces and take photos of the original setup for reference.
What’s the best way to store the wall after use?
Disassemble carefully, store flowers in boxes with tissue paper, and keep panels flat to prevent warping.
Can I create a smaller version for home use?
Absolutely! The same principles apply to smaller walls, just scale down the materials accordingly.
How do I prevent color fading if the wall is in direct sunlight?
Use UV-resistant artificial flowers and consider positioning the wall away from direct sunlight when possible.
What’s the best way to clean the flower wall?
Use compressed air to remove dust, and gently spot clean with a slightly damp cloth when necessary. Avoid harsh cleaning products.
