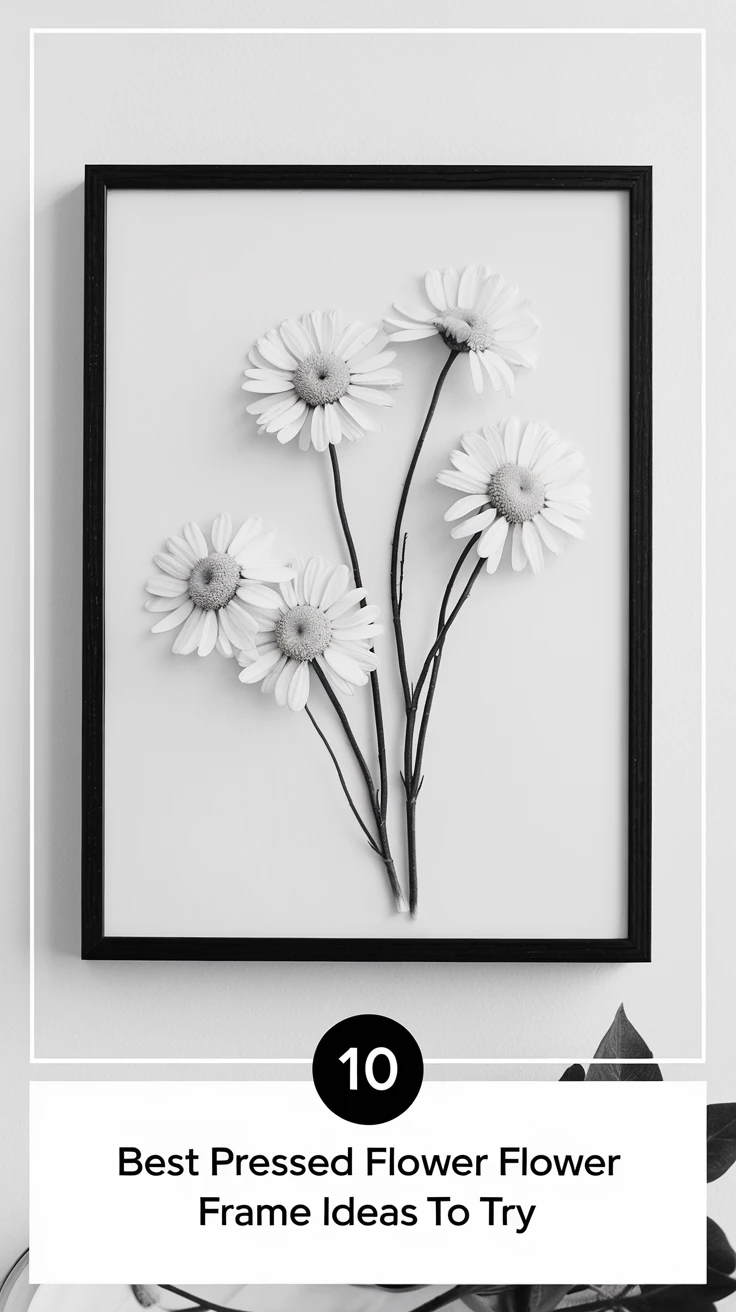

Introduction to the Magical World of Pressed Flower Frames
Have you ever wanted to preserve the beauty of your garden or a special bouquet forever? I’ll never forget the first time I discovered a pressed flower frame at my grandmother’s house, delicate violets and forget-me-nots suspended in time behind glass. It was like a window into the past, and I was instantly hooked! Pressed flower frames aren’t just crafts; they’re tiny time capsules that capture nature’s ephemeral beauty. Whether you’re a seasoned crafter or just looking for a weekend project, these 10 pressed flower frame ideas will inspire you to create something truly special with those blooms you can’t bear to throw away.
Before we dive into the creative ideas, let’s cover some pressed flower basics. You’ll need properly dried and pressed flowers (either using a flower press, heavy books, or even an iron), frames of your choice, acid-free paper or backing, and some basic crafting tools. The magic of pressed flower art is that it can be as simple or as elaborate as you want, there’s no wrong way to showcase nature’s artwork!
1. Floating Glass Frame with Pressed Wildflowers
There’s something magical about flowers that appear to float between two panes of glass. This technique creates depth and allows light to pass through the delicate petals, highlighting their natural translucency. I’ve found this style works beautifully with wildflowers that have intricate details like Queen Anne’s lace, cosmos, and delicate ferns.
What You’ll Need:
- Double glass frame (or two picture frames with glass)
- Assortment of pressed wildflowers and leaves
- Clear mounting corners or tiny dots of acid-free glue
- Tweezers for precise placement
- Clean microfiber cloth
How to Create It:
Clean both glass pieces thoroughly, trust me, you’ll notice every fingerprint or speck of dust once it’s assembled! Lay one glass piece on a clean surface, then use tweezers to arrange your pressed flowers. Secure delicate specimens with tiny mounting corners or the smallest possible amount of acid-free glue. Once you’re happy with your arrangement, carefully place the second glass piece on top and secure in your frame. The result is a stunning, three-dimensional display that catches light beautifully.

View on AmazonAs an Amazon Associate, I earn from qualifying purchases.

View on AmazonAs an Amazon Associate, I earn from qualifying purchases.
Pro Tip: For a more dramatic effect, try using a deep frame with spacers between the glass pieces to create more distance between the layers. This works particularly well with flowers of varying thicknesses.
2. Vintage Window Frame with Seasonal Pressed Flowers
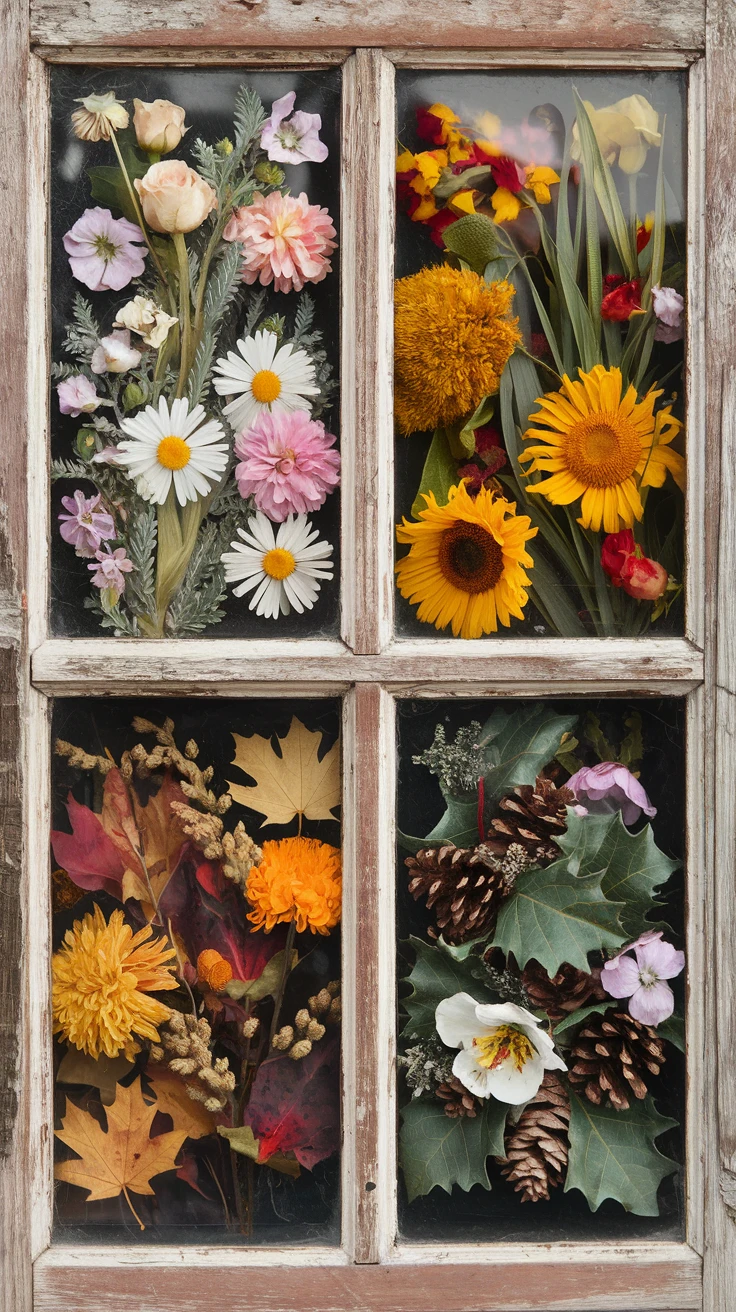
Who says you need a traditional picture frame? One of my favorite pressed flower displays uses an old window frame I rescued from my neighbor’s renovation project. Each pane showcases a different season of blooms, creating a year-round garden that never needs watering!
What You’ll Need:
- Old window frame with multiple panes
- Pressed flowers representing different seasons
- Acid-free cardstock for backing
- UV-resistant glass or acrylic (optional but recommended)
- Mounting adhesive or acid-free glue
- Hanging hardware
How to Create It:
Clean your window frame thoroughly and repair any loose parts. Cut acid-free cardstock to fit each pane. Create seasonal arrangements, daffodils and cherry blossoms for spring, sunflowers and daisies for summer, maple leaves and chrysanthemums for fall, and holly or evergreen sprigs for winter. Secure your pressed botanicals to each backing, then install in the window frame. If the original glass isn’t UV-resistant, consider replacing it to prevent your flowers from fading.

View on AmazonAs an Amazon Associate, I earn from qualifying purchases.

View on AmazonAs an Amazon Associate, I earn from qualifying purchases.
Pro Tip: Add small seasonal embellishments like tiny pine cones for winter or butterfly specimens for summer to enhance the thematic display.
3. Minimalist Single Specimen Display
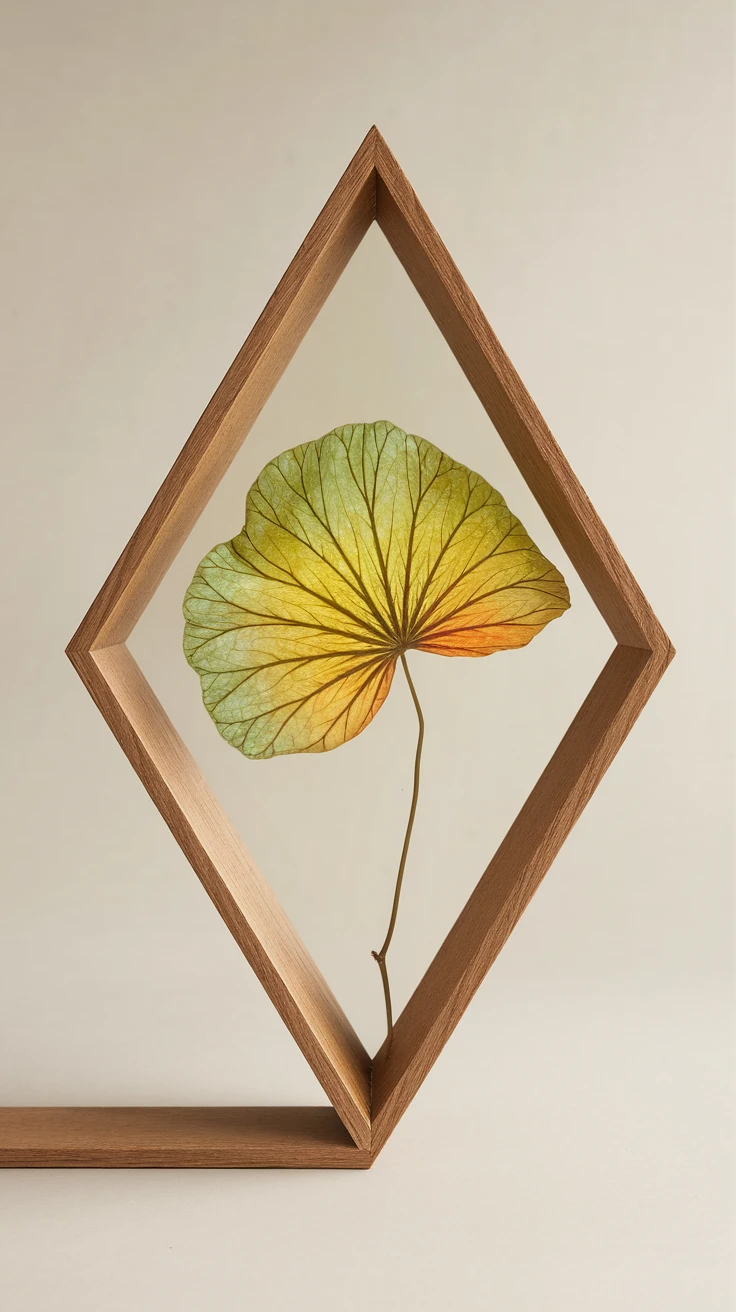
Sometimes less is more, especially when showcasing a particularly stunning specimen. I’m absolutely in love with the Japanese-inspired minimalism of a single perfect flower or leaf centered in a simple frame. This approach lets the botanical beauty speak for itself without competition.
What You’ll Need:
- Simple frame with wide mat (white or natural color works best)
- One perfect pressed specimen (a Japanese maple leaf, ginkgo leaf, or perfect rose works beautifully)
- Acid-free mounting paper
- Fine archival adhesive
- Clean tweezers
How to Create It:
Select a specimen that has perfect form and color. The star of my living room is a ginkgo leaf that turned the most incredible shade of gold before I pressed it! Center your specimen on acid-free backing paper, securing with the tiniest dots of archival adhesive. The wide mat creates breathing room around your botanical treasure, drawing the eye to its perfect form. This style is particularly effective when grouped in a collection of similar frames with different specimens.

View on AmazonAs an Amazon Associate, I earn from qualifying purchases.

View on AmazonAs an Amazon Associate, I earn from qualifying purchases.
Pro Tip: For an even more dramatic effect, choose a frame with museum glass that reduces glare and seems to make the barrier between viewer and specimen disappear.
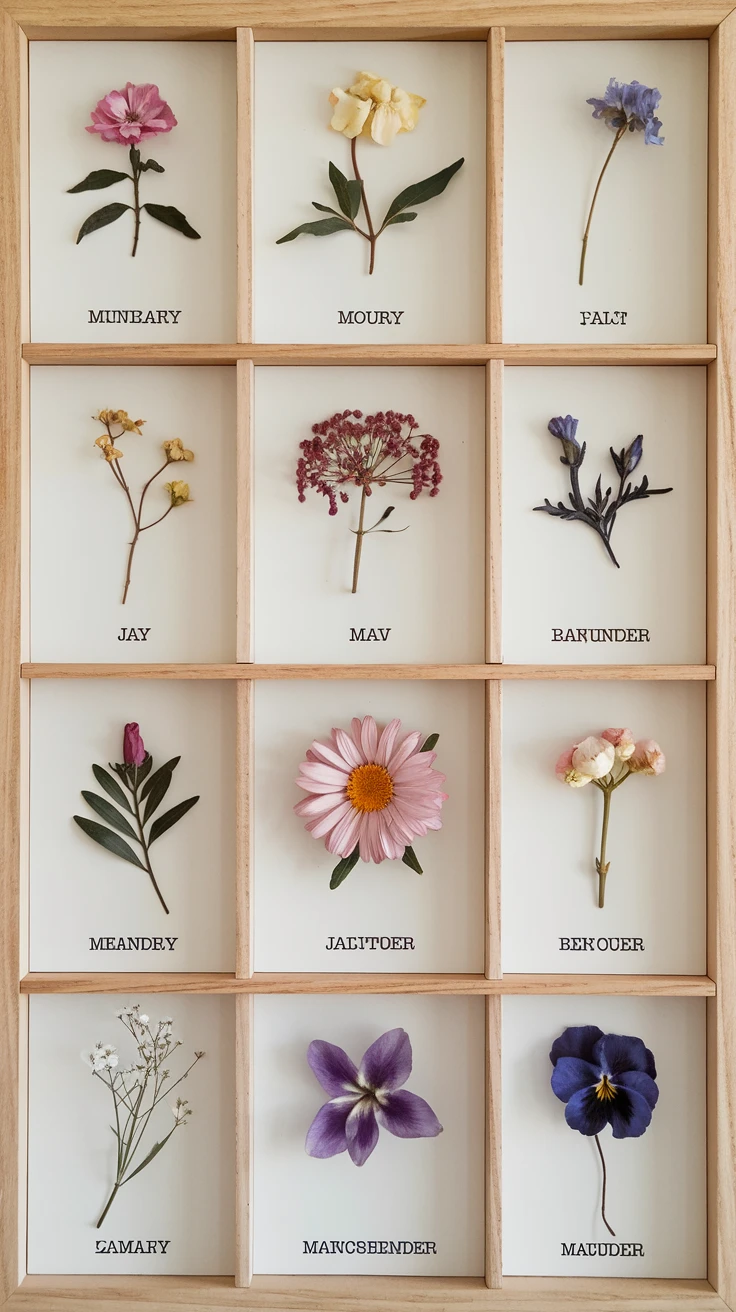
4. Botanical Collection with Labels
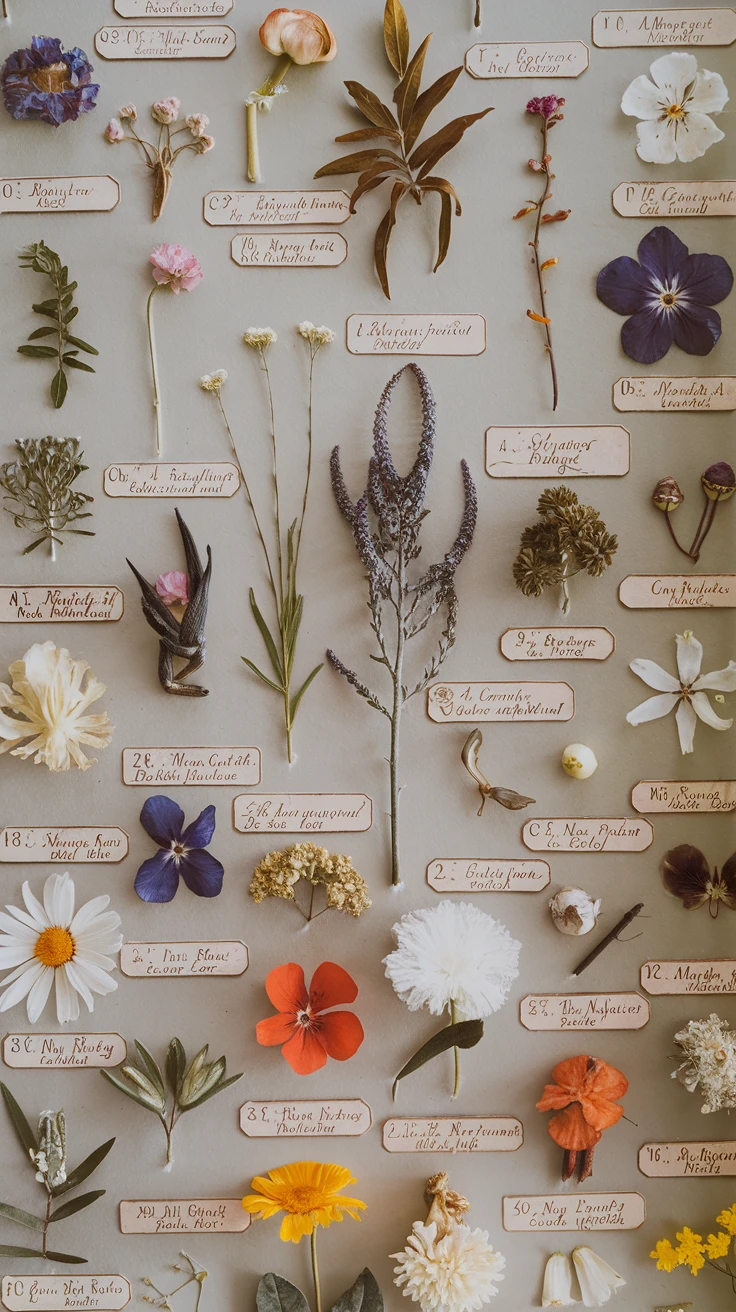
Channel your inner Victorian naturalist with a scientific collection display! This pressed flower frame idea combines education with aesthetics by including identification labels with your specimens. I created one of these after a hiking trip in the mountains, and it’s become both a beautiful memento and a conversation starter.
What You’ll Need:
- Large frame with plenty of display space
- Various pressed botanical specimens
- Small labels (handwritten or printed)
- Acid-free paper for backing
- Fine-tipped archival pen
- Mounting corners or acid-free glue
How to Create It:
Arrange your pressed flowers in an organized collection. Create small labels with the common name, scientific name, and where/when you collected each specimen. For an authentic touch, use calligraphy or a typewriter font. Mount everything on acid-free paper, being careful to align your specimens neatly. This approach works particularly well with botanical families (different varieties of ferns, for example) or flowers collected from a special location.
Pro Tip: Include a small map marking where you collected your specimens for an extra personal touch, or add pressed butterflies if you have ethically sourced specimens.
5. Shadow Box Depth Display
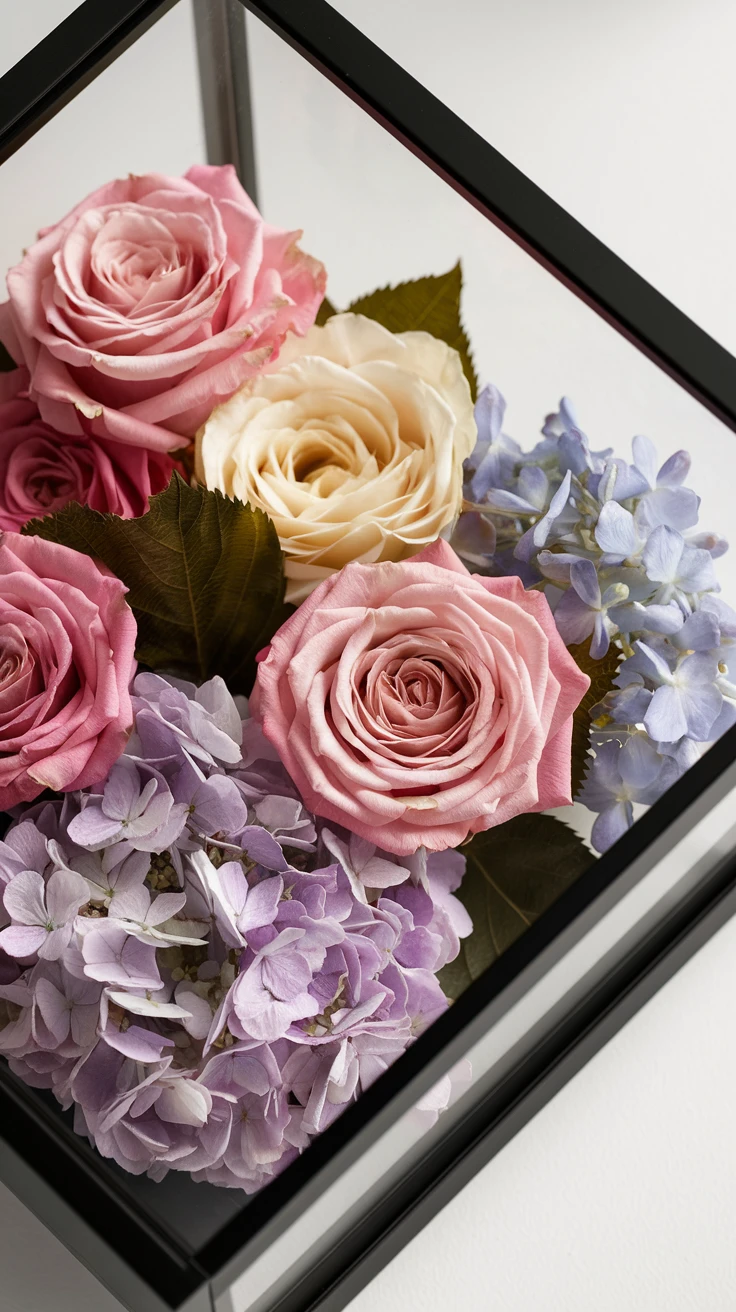
For flowers with significant dimension even when pressed (like roses or hydrangeas), a shadow box frame creates the perfect display space. The added depth allows you to create layers and dimension that standard frames can’t accommodate. My shadow box of wedding flowers still brings tears to my eyes five years later!
What You’ll Need:
- Shadow box frame (at least 1″ deep)
- Pressed flowers of varying thicknesses
- Acid-free backing board
- Small foam dots or mounting tape for dimension
- Background paper (optional)
- Decorative elements like ribbon or lace (optional)
How to Create It:
Start by planning your arrangement, considering how to create depth with your composition. Use foam dots to elevate certain elements above others. Thicker flowers like roses can be positioned toward the front, while delicate ferns or baby’s breath can create a background layer. The shadow box allows you to incorporate small three-dimensional elements alongside your pressed flowers, perhaps a small charm, ribbon, or even a handwritten note.

View on AmazonAs an Amazon Associate, I earn from qualifying purchases.

View on AmazonAs an Amazon Associate, I earn from qualifying purchases.
Pro Tip: Create a monochromatic arrangement within your shadow box for a sophisticated, cohesive look. All white wedding flowers or all autumn-toned specimens can create a stunning visual impact.
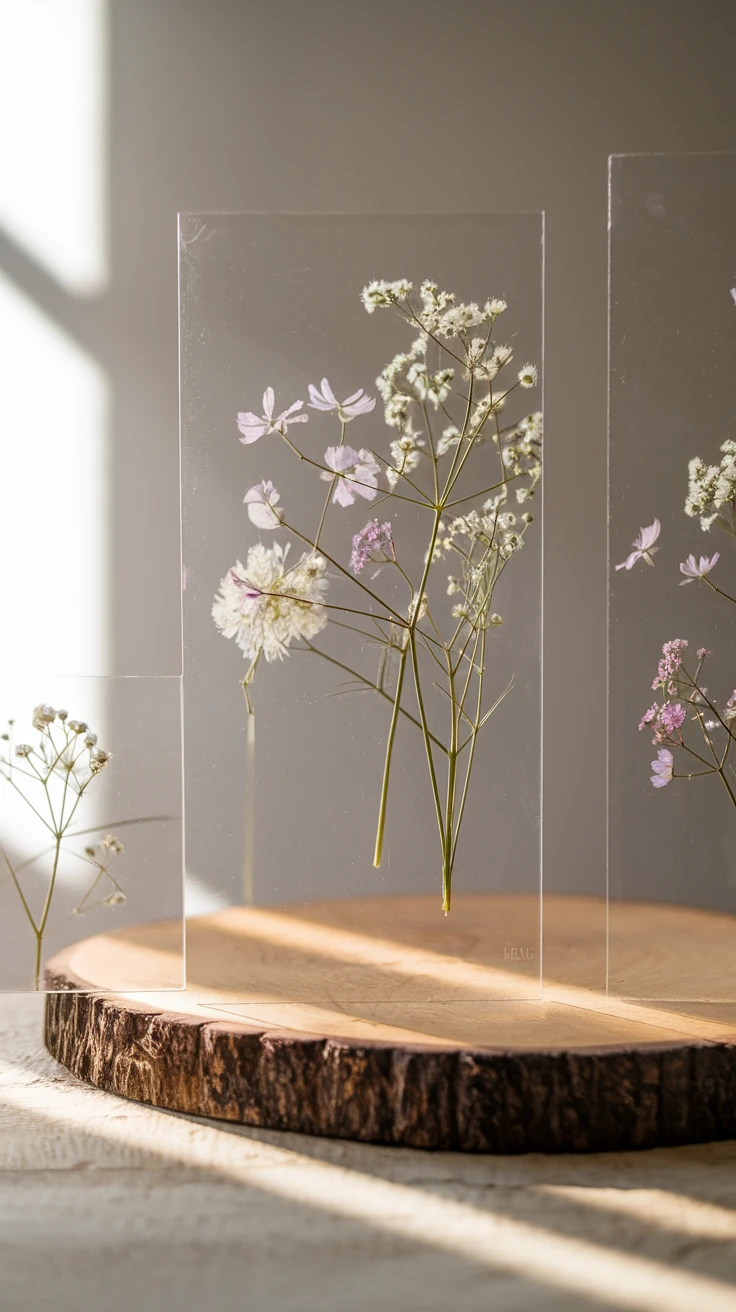
6. Pressed Flower Resin Frame
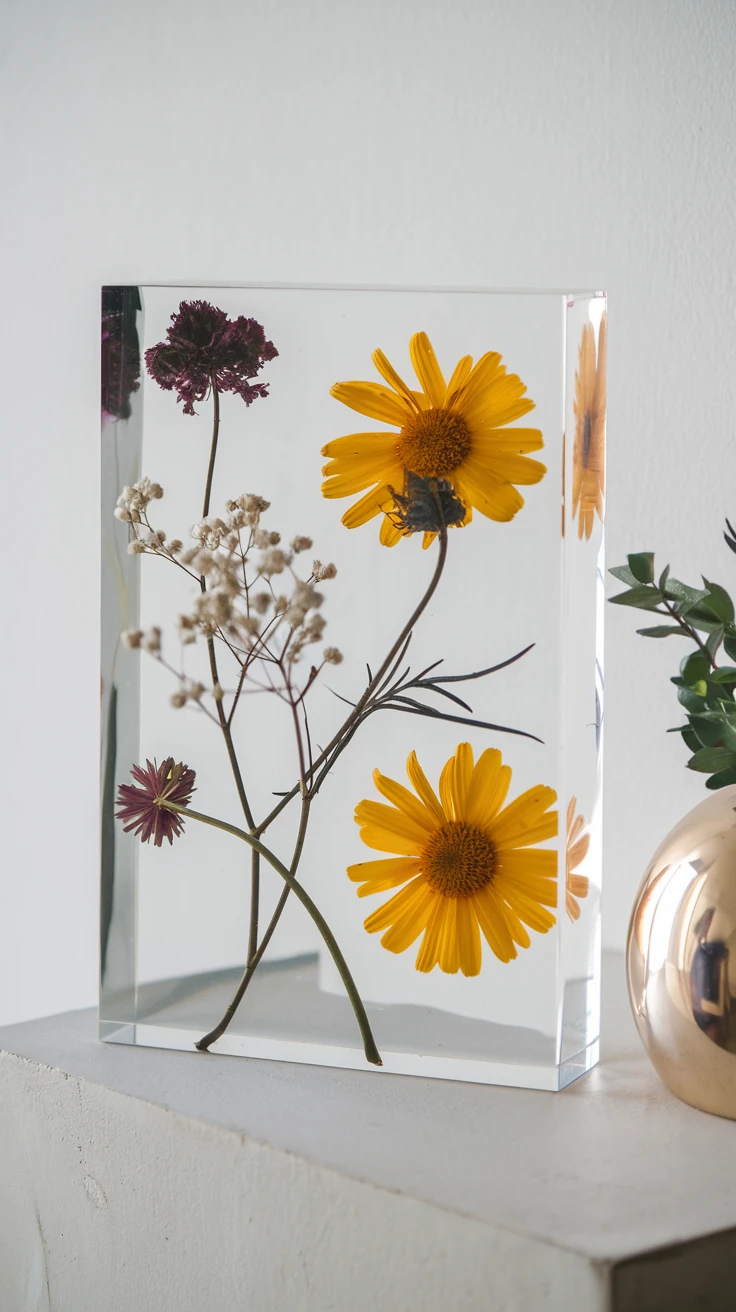
For a contemporary twist on pressed flower preservation, try embedding your botanicals in clear resin! I was initially intimidated by working with resin, but the results are absolutely worth stepping outside your comfort zone. The crystal-clear preservation means your flowers will stay vibrant for decades.
What You’ll Need:
- Clear casting epoxy resin (art grade)
- Silicone molds or bezels that fit your frame
- Pressed flowers and leaves
- Frame with removable back
- Mixing cups and stir sticks
- Tweezers and toothpicks for positioning
- Heat gun or torch for removing bubbles (optional)
- Protective gloves and well-ventilated workspace
How to Create It:
Pour a thin base layer of resin and allow it to become tacky (about 30 minutes). Arrange your pressed flowers on this layer, then carefully pour another thin layer of resin over them. Use a toothpick to gently press any floating flowers down and remove air bubbles. Continue building layers until you achieve the desired effect. Once fully cured (usually 24-48 hours), pop the resin piece out of the mold and place it in your frame.
Pro Tip: Try adding a touch of mica powder or alcohol ink to tint your resin slightly, pale blue creates a dreamy, underwater effect, while gold adds luxury and warmth to your preserved botanicals.
7. Upcycled Vintage Photo Frame
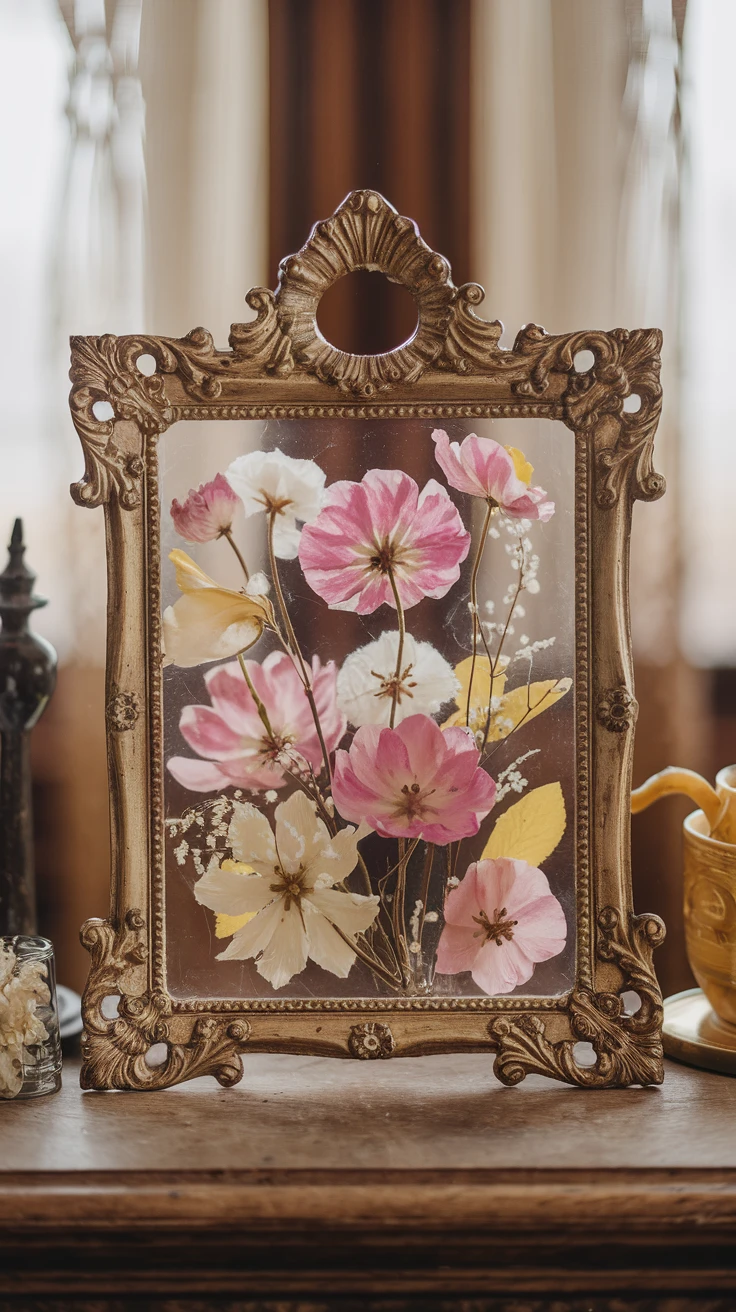
There’s something poetic about repurposing vintage frames for pressed flowers, like giving new life to both the frame and the preserved blooms. I’ve become somewhat of a thrift store addict hunting for ornate frames to house my botanical creations!
What You’ll Need:
- Vintage or antique frame (ornate works beautifully)
- Pressed flowers that complement the frame’s style
- Acid-free backing paper or fabric
- Archival adhesive
- New glass if the original is damaged
- Light sandpaper and paint (optional for frame touch-ups)
How to Create It:
Clean your vintage frame carefully, preserving its patina while removing dirt. If necessary, make minor repairs or touch up the finish. Choose a backing material that complements both the frame and your flowers, vintage linen, handmade paper, or even velvet can create stunning backgrounds. Arrange your pressed flowers in a composition that echoes the frame’s era, Victorian frames pair beautifully with romantic roses and forget-me-nots, while mid-century frames work wonderfully with more geometric arrangements.

View on AmazonAs an Amazon Associate, I earn from qualifying purchases.

View on AmazonAs an Amazon Associate, I earn from qualifying purchases.
Pro Tip: Research the era of your frame and try to incorporate flowers that would have been popular during that time period for an historically accurate display.
8. Pressed Flower Calendar Frame
Document a year of blooms with a pressed flower calendar frame! This is one of my favorite ongoing projects, each month I press something blooming in my garden, creating a visual record of the growing season. At year’s end, it becomes a beautiful keepsake.
What You’ll Need:
- Large frame divided into 12 sections (or 12 small matching frames)
- Pressed flowers collected throughout the year
- Small month labels
- Acid-free backing in a neutral color
- Archival adhesive
- Small notebook to record what’s pressed each month
How to Create It:
Dedicate space for each month’s flowers. As each month passes, press representative blooms from your garden or local area. Label each section with the month name and attach your pressed specimens. By December, you’ll have a complete botanical calendar showing the progression of blooms throughout the year. This makes a meaningful gift for gardeners or a beautiful record of a special year (like a baby’s first year or a milestone anniversary).
Pro Tip: Include tiny handwritten notes about significant events that happened each month alongside your pressed flowers for a botanical journal effect.
9. Pressed Flower Memory Frame
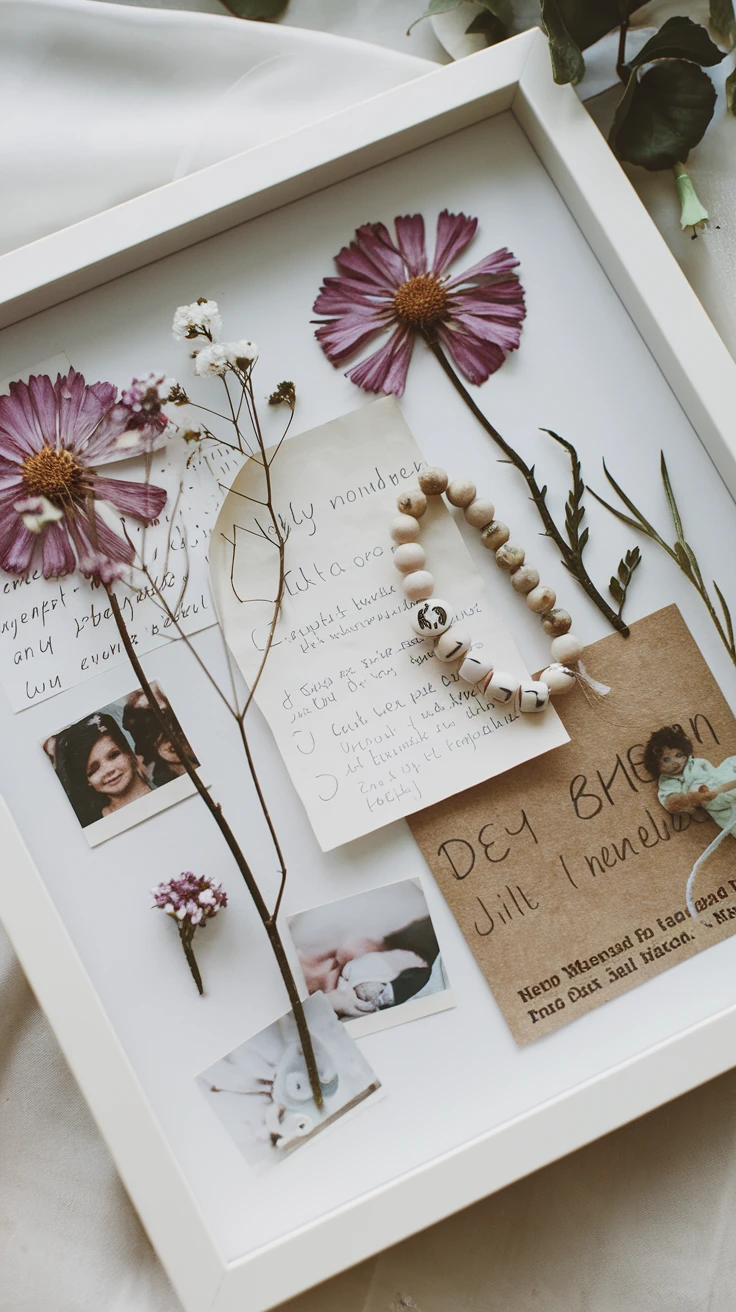
Combine pressed flowers with memorabilia for a deeply personal keepsake. I created one of these after my daughter’s birth, incorporating flowers from congratulatory bouquets alongside her hospital bracelet and birth announcement. Years later, it remains one of my most treasured possessions.
What You’ll Need:
- Shadow box or deep frame
- Pressed flowers from a significant event
- Memorabilia (ticket stubs, programs, cards, etc.)
- Acid-free mounting board
- Archival adhesive or mounting corners
- Decorative background paper if desired
How to Create It:
Select flowers associated with a special occasion, wedding bouquet flowers, blooms from a memorial service, flowers from a graduation ceremony, or blossoms from a memorable vacation. Press these carefully, then arrange them alongside meaningful memorabilia from the same event. The combination tells a complete story and creates a multi-dimensional keepsake that preserves both natural and personal history.

View on AmazonAs an Amazon Associate, I earn from qualifying purchases.

View on AmazonAs an Amazon Associate, I earn from qualifying purchases.
Pro Tip: Include a small envelope on the back of the frame containing seeds from the displayed flowers (if available) or a handwritten note explaining the significance of the contents.
10. Gradient Color Arrangement Frame
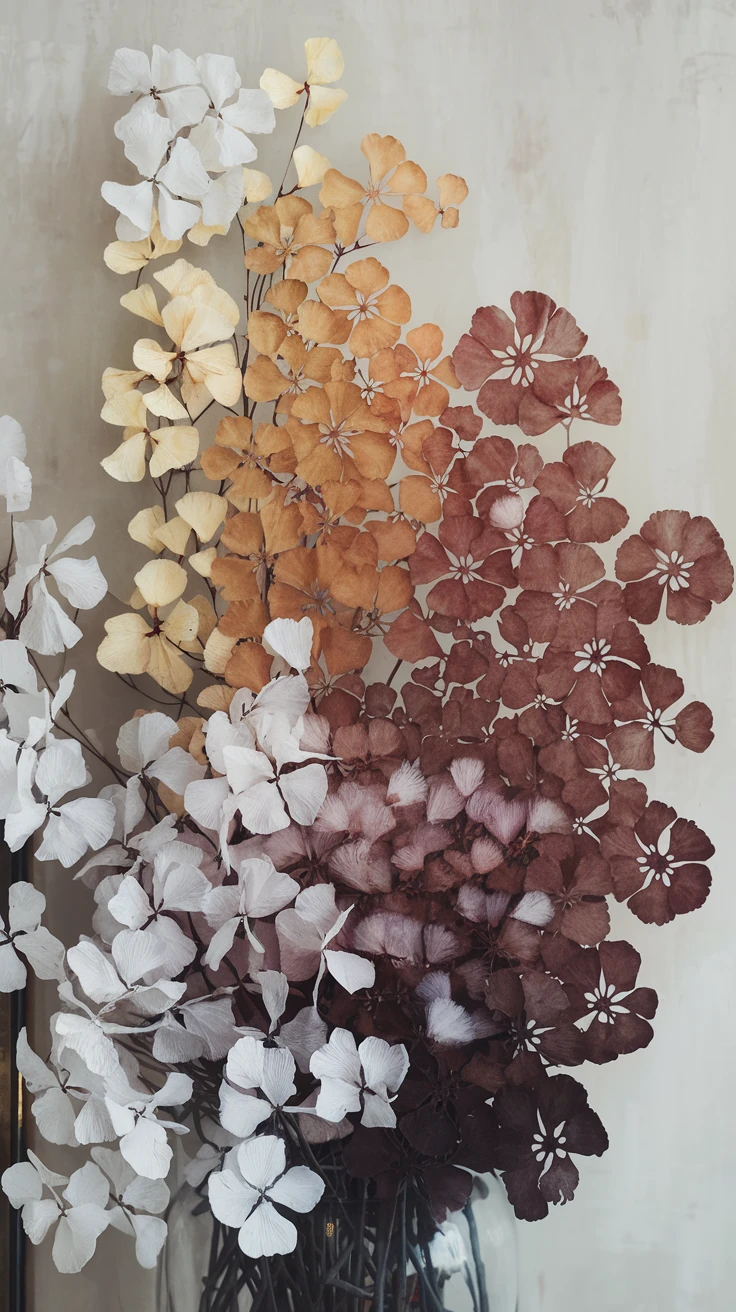
For a modern, artistic approach to pressed flower framing, try arranging your botanicals in a color gradient! This technique transforms individual flowers into a cohesive art piece that’s both natural and deliberately designed. My ombre pressed flower panel in shades of purple to pink never fails to impress visitors.
What You’ll Need:
- Wide frame with plenty of display area
- Pressed flowers in a range of related colors
- White or black backing paper for contrast
- Tweezers for precise placement
- Acid-free glue dots
- Graph paper for planning your arrangement
How to Create It:
Collect and press flowers in a spectrum of colors, for example, from deep purple through lavender to pale pink to white. Sort your pressed specimens by color, then arrange them in a gradient pattern across your backing paper. This could be horizontal, vertical, circular, or diagonal. The key is the smooth transition between colors that creates a stunning visual flow. This technique works beautifully with petals separated from whole flowers to create a more abstract effect.
Pro Tip: Try a rainbow gradient with flowers representing each color of the spectrum, or a monochromatic gradient showing subtle variations of a single color family.
Key Takeaways for Perfect Pressed Flower Frames
- Always use acid-free materials to prevent yellowing and deterioration of your pressed flowers.
- Position frames away from direct sunlight to prevent fading, even UV-resistant glass can’t completely prevent color loss over time.
- Press flowers when they’re dry (not wet from rain or dew) for best results and to prevent mold.
- Experiment with different pressing technique, while books work well, microwave pressing can preserve more vibrant colors.
- Consider the story behind your flowers, specimens with personal significance create more meaningful art.
Conclusion: Framing Nature’s Fleeting Beauty
There’s something profoundly satisfying about preserving a moment of natural beauty in a pressed flower frame. Whether you’re documenting your garden’s seasonal changes, commemorating special occasions, or simply creating beautiful botanical art, these 10 pressed flower frame ideas offer endless creative possibilities. The techniques we’ve explored range from traditional to contemporary, simple to complex, but they all share one thing: they allow us to hold onto nature’s ephemeral gifts a little longer.
Remember that pressed flower framing isn’t just about the end result, it’s about the mindfulness of collecting and preserving special blooms, the patience of the pressing process, and the creativity of arrangement. Each pressed flower frame tells a story that’s uniquely yours. So gather your blooms, dust off your flower press (or stack of heavy books!), and start creating your own botanical time capsules with these pressed flower frame craft ideas. Nature provides the materials; you provide the vision!
